
Intellect™
IMPORTANT PROGRAM MODIFICATIONS
The following Release Notes include the features and modifications made in the current update. PCS suggests you provide each department a copy of the Release Notes so they are aware of the changes which may affect their department.
In order to be aware of ALL changes in the software, please read all release notes from the version you are currently on through to the version to which you are updating.
The update may include items labeled: ATTENTION. These will IMMEDIATELY affect Billing and other daily tasks. Please be sure to notify all departments which will be affected.
Intellect Update Authorization Form:
Print, complete, sign, and return the Update Authorization Form to PCS prior to your update. Even if updating your system yourself, PCS requests you send us this completed form so we can update your Client Record with the version number to which you are updating. Knowing your version number is necessary if we find a critical error in the program and need to update clients with specific versions.
If your version is less than 9.12.01, click here.
If your version is 9.12.01 or greater, click here.
If your office runs Live Update yourself:
If you are updating your server yourself, refer to the instructions for updating your server, restarting Services, and updating workstations.
If your version is less than 9.12.01, click here.
If your version is 9.12.01 or greater, click here.
This update may include new features labeled: BETA TEST. These are new features which require additional testing in a real, live environment. If you are interested in being a Beta Test site, please contact Prime Clinical System for additional information and set up.
The January Update includes version 9.12.26 and version 9.12.27
To read a summary of the Release Note for versions 9.12.26, click here.
To read a summary of the Release Note for versions 9.12.27, click here.
Release Date: January 31, 2012
MODIFICATIONS Charges--►Charge – New edits for Referring Provider, Modifiers and Diagnosis Pointer
Due to an increase in rejections applied by Medicare and other payers in ANSI 5010, PCS has added several new edits in Charge Posting:
1. When posting charges, Intellect can alert you when a Referring Provider or Modifier are required for the procedure posted. The set up is located in two new fields added to the Utility--►Procedure table:
Referring Required
![]()
N - When posting this charge, a Referring Physician is not required.
Y - When posting this charge, a Referring Physician is ALWAYS required.
When posting a charge where <Requires Referring Prv> is set to "Y" (yes), the following message will pop up:
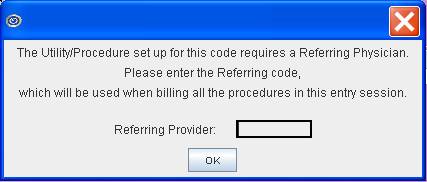
The message box allows you to either type in the Referring Provider code or search for the appropriate referral by placing the cursor in the <Referring Provider> field and using the same searching steps used in other fields: typing in part of the referring physician name and pressing [F2], or pressing [F2] key twice for the entire list.
![]()
N - When posting this charge, a Modifier is not required.
Y - When posting this charge, a Modifier is ALWAYS required.
<Requires Modifier> = Y & <Mod Y/N> = N
When posting a charge where <Requires Modifier> is set to "Y" (yes) AND <Mod Y/N> = N (do not stop at modifier when posting), the following message will pop up as you finish posting the charge:
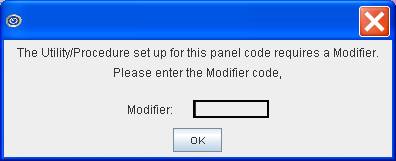
The message box allows you to either type in the Modifier code or search for the appropriate modifier by placing the cursor in the <Modifier> field and using the same searching steps used in other fields: typing in part of the modifier description and pressing [F2], or pressing [F2] key twice for the entire list.
<Requires Modifier> = Y & <Mod Y/N> = Y
When posting a charge where <Requires Modifier> is set to "Y" (yes) AND <Mod Y/N> = Y (stop at modifier when posting), the following message will pop up when focus reaches the Mod field.
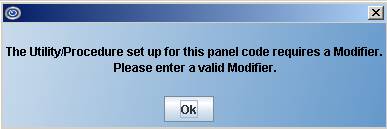
Press [OK] and the focus will be returned to the <Mod> modifier code field.
Note: The “Requires Referring Prv” and “Requires Modifier” are both hard edits; i.e., you MUST enter a valid code to post the charge.
Reminder: If a Modifier Code, or set of Modifier Codes, is entered during Charge Posting and it is not set up in the Utility--►Procedure--►Modifier table, the following message will be displayed:
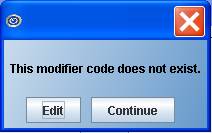
[Edit] will return focus to the Modifier field
[Continue] will allow you to continue posting with the Modifier Code(s) entered even though they are not in the Utility--►Procedure--►Modifier table.
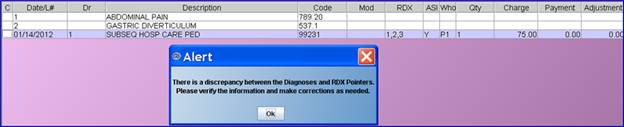
2. If the Rdx contains pointers for which there is not a valid diagnosis, the following warning will pop up. Notice, in the example, we have Diagnosis 1 and 2, but the RDX column has 1,2,3. The edit message pops up after selecting to "Commit" the charges. You must correct the error before you can commit the charges.
3. Renumbering of Diagnosis column L# (used for Rdx - Diagnosis Pointer). If a diagnosis is deleted, the program will now show the renumbering of the diagnoses on the screen in the Date/L# column. Prior to this update, the L# for Diagnosis Pointer would show the original numbering. Refer to the following example:
Originally 3 diagnoses were posted:

The second diagnosis, 836.0 TORN MEDIAL CARTILAGE, was deleted. What was originally L# 3 became L# 2.

MODIFICATIONS Charges--►Modify– new edits for Diagnosis Pointer Invalid
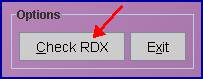
The same Diagnosis Pointer edit in Charge Posting has been added to Charges--► Modify. Because Charges--►Modify does not have an option to "Commit", we have added a new button to use if changes have been made to the diagnoses to verify that the Rdx (Diagnosis Pointer) matches the Diagnoses entered:
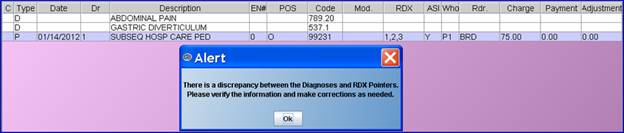
If the Rdx contains pointers for which there is not a valid diagnosis, the following warning will pop up. Notice in the example we have Diagnosis 1 and 2, but the RDX column has 1,2,3.
If the RDX and number of Diagnoses entered are correct the following will display after clicking on Check RDX:

NOTE: This does not mean you have billed using the correct Diagnosis Codes, only that the RDX (diagnosis pointer) are linked to a Diagnosis entered.
NEW FEATURE Charges--►Encounter - Default Encounter screen
For clients who complete most of the Encounter screen fields with the same values for each patient, you may now set up a 'default' record with the value you wish to be carried over to all new Encounters.
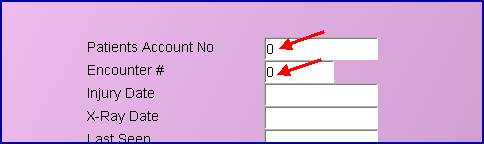
To set up a default screen, go to Charges--►Encounter. Select the type of Encounter screen your office uses, then select Modify. At the <Patient Account No> field, enter 0 (zero). At the <Encounter #> field, enter 0 (zero).
Complete any field which you wish to default to all new Encounters entered.
Setting up the default encounter screen will NOT affect any encounters you have already entered.
Payment
MODIFICATION Payment--►Auto Payment – F2 at Field Name to query list of files and select file to post
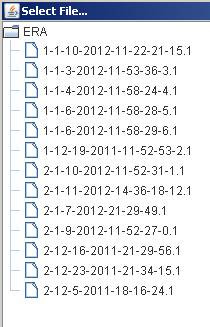
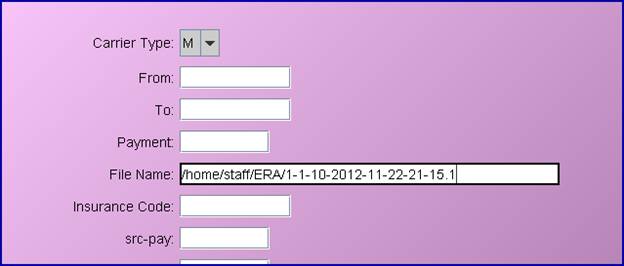
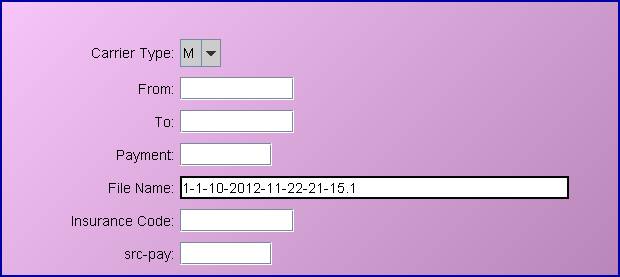
When posting an ERA/ERN file from the Auto Payment screen, rather than typing in the file name, you can now search for it by pressing [F2] at the <File Name> field. Complete the <Carrier Type> as usual, and at <File Name> press the [F2] key to list the ERA/ERN files in your ERA directory. The files will be listed in order by the file name. The first value in the <File Name> is the clinic in which the ERA/ERN file was picked up. If your office bills from multiple clinics, the files will be listed in the clinic order of the clinic from which the ERA/ERN is picked up .
Billing
NEW FIELD & FEATURE Billing--►TeleCom--►Acknowledgement – View 997, 999, Acknowledgement and 277CA files
A new <File Path> field has been added to allow you to view the ANSI 4010 997 and Acknowledgement report, or the ANSI 5010 999 and 277CA files from the Acknowledgement screen. The feature was added for clients who prefer to view the reports, and not print them.
This screen may still be used to pick up files by completing the <Status> and <Insurance Code> fields as usual leaving the File Path blank.
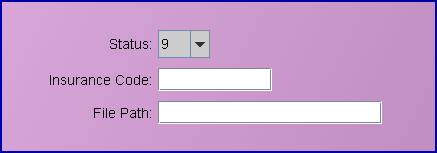
To view the files, you will need to complete the <Status> and <Insurance Code> fields, though the list of files will NOT be limited based on your entry. With the focus in the <File Path> field, press the [F2] key to list the directories where the files are kept.
Clicking on the icon next to the directory name will list the files within that directory. The files will be listed in order by the file name. In our example below, the 997 directory is displayed, and one 999 report/file. Both the ANSI 4010 997 and ANSI 5010 999 reports will be listed in the 997 directory.
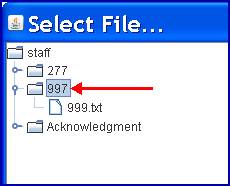
The first value in the file name is the clinic in which the file was picked up. If your office bills from multiple clinics, the files will be listed in the clinic order of the clinic from which the files were picked up.
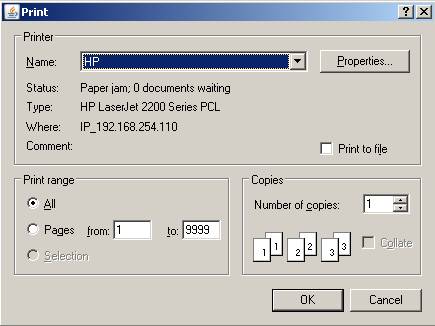
To select a report/file, double click and, when the printer dialog box comes up, select View. The file will display:
Viewing a Rejected 999 Report:
Information at the top of this file correlates to information on the Electronic Billing report as follows:
When viewing the 999 file from the 997 File Path; if the file was rejected, the program will locate the line # the error is on and display the error on the screen in red, as shown in the following example.
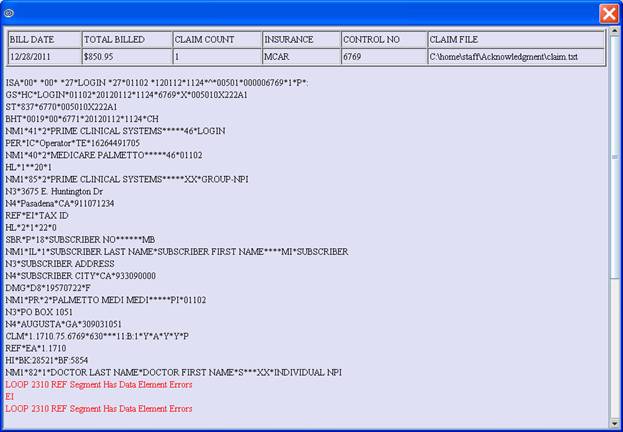
Bill Date: Displays the date the claim file was sent.
Total Billed: Matches the amount in Total Charges at the bottom of the Electronic Billing report.
Claim Count: Matches Claim Count.
Insurance: Displays the Ins where the claims were billed; i.e., Medicare, or the clearinghouse name.
Control No.: Displays the Reference Number at the bottom of the Electronic Billing report.
Claim File: Matches the File information at the bottom of the Electronic Billing report.
When viewing the 999 file from the Acknowledgement File Path, if the file was rejected, the program will locate the line # the error is on and display the error on the screen in red, as shown in the above example.
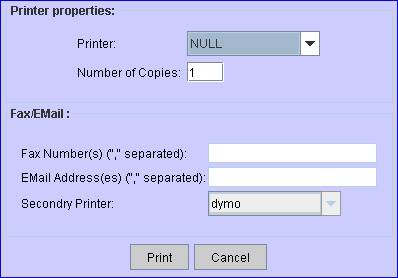
If the ANSI 4010 997 and Acknowledgement reports, or ANSI 5010 999 and 277CA files, are picked up nightly through automation, you can request to have the printer be set to null so the reports will no longer print.
Adding this feature will not automatically stop your reports from printing. If you wish to implement this feature call PCS Support and request us to change your automated tasks. OR, if you pick up the reports yourself when prompted which printer to send the report to; select NULL
Management
FIX Management--►Track Productivity
In past versions, users would get an error when they ran the Tracking Productivity report with the following criteria:
Report Code: Panel Code
Report Option: Clinic
Date Selection: Service
This problem has been fixed in this update.
Miscellaneous
Holding down the Ctrl key and pressing the letter L will capture the image currently on the screen. A printer dialog box will pop up allowing you to select a printer to send the screen image to. Select the printer and enter the number of copies to print.
* * * * * * * * * * * * * * * * * * * * * * * * * *
Release Date: January 13, 2012
To read a summary of this Release Note, click here.
5010 NEW FEATURE Billing--►Tele Com--►Submit Claims – new Pay To address for electronic billing
ANSI 5010 requires providers to bill with physical addresses. A P.O. Box address is no longer accepted in the electronic equivalent of Box 33. To accommodate for providers who wish to continue receiving payments to a P.O. Box or other secure site, the ANSI 5010 has a Loop and Segment which was not part of the ANSI 4010 file. Effective this update, Intellect has added the ability to transmit the ‘Pay To’ address when different than the physical address.
To implement the ‘Pay To’ address feature, complete the new pay-to fields available on the Utility--►Set Up--►Clinic and Utility--►Provider--►Provider screens shown later in this email.
If your pay-to address is different than the physical address:
Complete the original <Address>, <Zip Code>, <City>, and <State> fields with the P.O. Box or other pay-to address.
Complete the new <Physical Address>, <Physical Zip>, <Physical City>, and <Physical State> fields with your physical address.
The pay-to address information will print on the HCFA and UB04 forms
The pay-to address information will be submitted in Loop 2010AB Segment NM1, 87
The physical address information; i.e., the <Physical Address> field, will be submitted in Loop 2010AB Segment NM1, 85

If your pay-to address is the same as your physical address:
Complete the original <Address>, <Zip Code>, <City>, and <State> fields with the physical address. Leave the new <Physical Address>, <Physical Zip>, <Physical City>, and <Physical State> fields blank.
The <Address> field information will print on the HCFA and UB04 forms
The <Address> field information will be submitted in Loop 2010AB Segment NM1, 85

The Intellect program will first check for a Physical address.
If completed:
The <Physical Address> field will be used for Loop 2010AB Segment NM1, 85
The <Address> field will be used for Loop 2010AB Segment NM1, 87.
If blank:
The <Address> field will be used for Loop 2010AB Segment NM1, 85.
This feature is available only in ANSI 5010; it is not available in ANSI 4010.
NOTE: Contact Medicare and your clearinghouse before making any changes in regard to the Pay To address. Failure to do so could result in rejected claims.
Registration
FIX Registration--► Regular and Registration--►Worker
In prior software versions, while in the Appointment option, when you selected [Modify Patient] from the Appointment Schedule window and in the Registration screen you changed the Category, the system then asked if you wanted to add or modify insurance and, if you answered [YES], the program did not take you to the insurance screen; you remained in the demographic screen. As of this update, the error has been fixed and the program will take you to the Modify INSURANCE screen.
Charges
MODIFICATIONS Charges--►Modify
In this version we added a few modifications to this screen:
1. In the Information Panel (pressing 'N' or clicking on the [Information] button), the program will warn you if you are trying to set the <Who> column to an invalid selection. For example, The patient has only P1 insurance and you try to change it to P2. Or, for example, if entering only the numeric value, and not entering the alpha character, you enter 1 be P1.
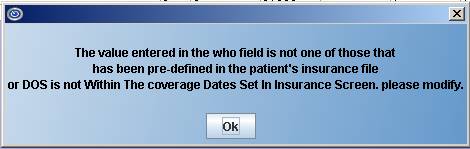
OR, If you are trying to change it to a single character, using only the letter and omitting the number: the program will verify which insurances the patient has on file for the Date of Service and select what it feels is the most appropriate.
2. In the Information panel you can press the [F3] key to view the appropriate utility screen for the <Category>, <Referring>, <Billing Provider>, <Insurance Code (Primary)>, <Secondary> and <Tertiary> fields. For example, if the focus is on the <Prim Insurance> field and you press [F3], the patient’s primary Utility/Insurance record will display in View mode.
The program has always contained this feature in the <Dr>, <POS (Facility)>, and <Rdr (Referring)> columns when pressing ‘M’ to modify a charge line.
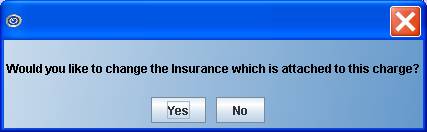
3. When pressing ‘M’ to modify a charge line; at the <Who> column if you change the value from P1 to P2, or S1 to S2, etc., the program will prompt to see if you want to change the treatment history to the appropriate insurance. For example, if the patient has two primary insurances and you change the <Who> from P1 to P2, if you answer YES, the program will modify the insurance code stored in the treatment history file from the P1 insurance code to the P2 insurance code.
Payment
NEW FIELD/FEATURE Payment--►Open Item – CoPay column
A new CoPay column has been added to the Payment--►Open Item screen:
![]()
The 'CoPay' information can be entered two ways:
Payment--►Auto Payment: when posting an ERA/ERN file, the program will insert the CoPay when the electronic file indicates there is a copayment due from the patient.
Payment--►Open Item: When manually posting payments, at the drop down list containing the patient’s insurance, select the 'CPAY' code/record. The program inserts the amount entered in the Payment column into the CoPay. You must first save the payment, then when viewing the record again the CoPay column will reflect the amount applied to the patient's copayment for the charge.
This field is accumulative, meaning each time a Copayment is posted the newest amount paid will be added to the previous amount paid.
Utility
NEW FIELDS Utility --►Set Up --►Clinic and Utility --►Provider --►Provider
When billing in ANSI 5010, a P.O. Box address is no longer accepted in the electronic equivalent of Box 33. To accommodate for providers who wish to continue receiving payments to a P.O. Box or other secure site, we have added four new fields:
![]()
![]()
![]()
![]()
These fields are for the actual pay-to address. Users may enter a P.O. Box in the <Address> field and enter the actual physical address in the <Physical Address> field.
If your office does not have a different pay to address: complete only the <Address>, <City>, <State> and <Zip Code> fields, and leave the new 'Physical' address fields blank.
For additional information, please refer to the ANSI 5010 Billing entry in this release note.
Schedule
NEW FEATURES Schedule --►Appointment --►Self Check In
Please note the following:
Effective this version, several new features have been added to the Self Check In option.
1. Patients may now update their demographic information.
Once the main screen has been filled in (see above) and the [Check In] button selected, a new screen displays:
2. Patients can now pay by credit card.
Once the [OK] button has been selected on the above screen, Intellect displays a screen which includes the patient's co-pay, if they have one, and the patient's account balance, and gives the patient the option to make a payment via credit card:

If the patient selects [No], he/she is directed to have a seat and wait for further assistance.
If the patient selects [Yes], the following screen is displayed:

If using the Credit Card:
Patients must slide their card; they cannot type in their Credit Cared information.
The Balance shown on both the screen above and the screen below is the patient balance, not the family balance.
Patients can type in the amount they want to pay in the Balance Due field; other fields are filled in by the credit card swipe. Patients cannot modify the amount of the co-pay, but they can type in the amount they want to pay in the Balance Due field.
Press [Process] to complete the payment, otherwise, press [Cancel]. If either [Process] or [Cancel] are selected, Intellect displays:

3. A new [Patient Icon] has been added at the top of Intellect's main screen:
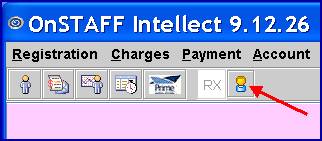
Once a patient has checked-in, the [Patient Icon] begins to blink, changing from the original figure (see above) to a figure with a 'plus' sign: 
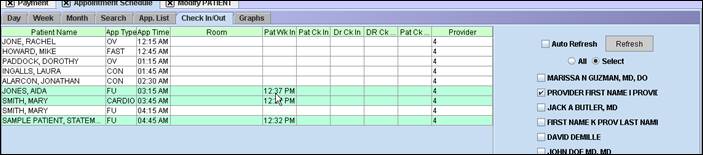
Clicking on the blinking [Patient Icon] displays a report showing only the patients which have checked in since the last time the report was viewed. If the patient made a co-pay or payment to his/her balance, the payment will show on this screen:

As in prior software versions, results within the Appointment Scheduler show:
The newly scheduled appointment.
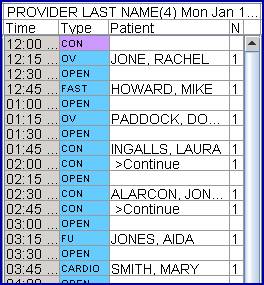
The patient added to the Check In Out View.
And will display a comment in all Appointment History displays.
![]()
Note: To close this feature you must log out of Intellect; X does not work by design to prevent patients from accidentally shutting down the system.