
Intellect™
BILLING MENU OPTIONS

Tele Com
Access Claim Report
On-Screen 277 Report
This option was initially added in version 9.12.18 for ANSI 5010 reports for users of Optum Intelligent EDI (formerly ENS/Ingenix). However, all payers and clearinghouses may use it as long as the report comes in as a 277CA file.
This option may only be viewed on-screen.
Effective Version 9.12.20: On-Screen 277 report
Intellect programmers worked with Optum Intelligent EDI to eliminate the paper 277 Reports for clients who wish to be less paper dependent. Optum Intelligent EDI provides the 277 Report in an XML file, which can be imported into the Intellect system. The first step in this procedure is for the inclusion of a ‘Tracer Number’ in the electronic billing file, which has been added in this update. The addition of the Tracer Number does NOT affect your electronic billing, nor prevent 277 Reports from printing.
In the first phase of this feature, you are able to view the patient claim records, see whether they have been received, accepted, rejected, etc., along with Optum Intelligent EDI and payer explanations. Initially, when selecting the [View Detail] button, the details for the claim (i.e., reason for rejection) are not available. This portion of the program is only available once claims have been submitted with the new ‘Tracer Number’ and the 277CA file received in return.
This feature is available with the 9.12.20 version, but to be able to view the 277 Report on-screen, your system needs to be set up. Please contact Prime Clinical Support for assistance.
NOTE: This feature is part of the ANSI 5010 changes, and is available with Medicare and other clearinghouses once you are billing using 5010.
This feature uses three screens: the Access Claim Report screen which opens when this option is first selected, the Claim Acknowledgment screen which displays the patient claim records, and a Detail Acknowledgement screen which shows information for a selected claim and the reason it was rejected. Buttons are also available on this screen to modify/correct a claim.
For details on each screen, click on the appropriate link below:
• Detail Acknowledgment screen
To view an 277 Report in Intellect, go to Billing --►Tele Com --►Access Claim Report
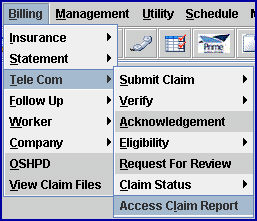
The Access Claim Report screen displays:
1.1 Only the previous day or prior dates may be entered in this field.
1.2 The current date may NOT be entered in this field in order to avoid duplication. If the current date is entered, an error message displays:
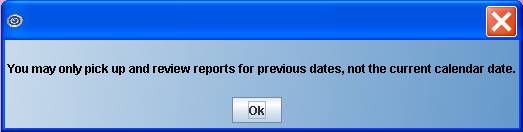
Press [OK] to go back to the <Date> field.
2. <Insurance> 
2.1 This field is optional.
2.2 To request a 277 report for only one specific insurance, enter the insurance name in this field (as set up in Utility --► Insurance --► Insurance).
3. When the information is completely entered, select one of these options:

3.1 [Access] goes to the Claim Acknowledgement screen where the patient claim records are displayed.
3.2 [Clear] clears the screen and returns the focus to the <Date> field.
3.3 [Exit] returns to Intellect’s main menu screen.
This screen displays the 277 Report where the patient claim records may be viewed to see whether they have been received, accepted, rejected, etc., along with the payer/clearinghouse explanations.
The report is divided into 3 sections:

4. The top portion of the 277 Report includes <File Name>, <Claims Count>, and <Claims Total>:
4.1 
This field displays 17-characters of the name of the file as submitted by the payer/clearinghouse. To display the detail for that file, select a file by clicking on it.
Note: If the first 17 characters of two files are the same, the last digits are truncated and the two files are merged together.
When this screen became available in version 9.12.20, this applied only to the CLM segment of the report. When Intellect sends an outbound electronic file, the program sends the file and claim designator in the CLM segment. When Intellect picks up the XML file, it gets everything in the CLM file. <File Name> groups everything by CLM file. When returned by the payer/clearinghouse, it should come back as a separate file, not truncating the last digits and bumping together ones that start the same.
Effective November 2019, Data Dimensions/WorkCompEDI changed the manner in which the 277 is sent out in order to give more insight into the timing of when Data Dimensions/WorkCompEDI received the bill and attachment and then when Data Dimensions/WorkCompEDI actually sent it out to the payer.
The naming conventions are:
• Inbound 837 file name: 20191003.1500.1.txt
• Initial 277: 20191003.1500.1.277 (just echoes your file name back)
• Second clearinghouse 277: 20191003.1500.1_201910040525080184.277 (adds a date/time stamp to the file name)
4.2 
Compare the number shown in this field to the number shown on the Electronic Billing Report.
4.3 
Compare the number shown in this field to the number shown on the Electronic Billing Report.

The middle portion of the 277 Report displays all of the files submitted to the payer/clearing house. The information is presented in columns by Status, Account, Insured Id, Date-of-Service (DOS) From, To, Payer Name, Patient Name, Provider Name, Insured Name, ICN, and Claim Value.
Note: Clicking on each column heading changes the order of the information from reverse-alphabetical to alphabetical and vice-versa.
4.4 
Indicates the condition of each claim as Accepted, Forward, Receipt, or Rejected. The information for each claim is displayed in reverse alphabetical order, which puts the Rejected items at the top of the report so that they are easier to access and correct. The claims may also be displayed in alphabetical order by clicking on the Status header at the top of the column.
4.5 
Displays the account number for each claim.
4.6 
Displays the ID number of the insurer for whom the claim was submitted.
4.7 
Indicates the starting date-of-service.
4.8 
Indicates the ending date-of-service.
4.9 
Displays the name of the Insurance against which the claim was submitted.
4.10 
Displays the name of the patient for whom the claim was submitted.
4.11 
Displays the name of the patient’s provider for whom the claim was submitted.
4.12 
Displays the name of the person who is the holder of the insurance used to pay the claim.
4.13 
When claims are entered into the PAYER system, they are issued a tracking number known as the internal control number ('ICN'). The ICN is a 13-digit number assigned to each claim received by the PAYER. Effective version 18.05.24, the 'ICN' column was added to the Access Claim Report so that when the data is displayed on the screen the claim's ICN may also be viewed.
4.14 
Displays the amount of the claim.
4.15 [View Detail] Click on a claim in the middle portion of this screen to highlight/select it. With a rejected claim highlighted, click on the [View Detail] button to see information for the rejected claim. Click the [View Detail] button to go to the Detail Acknowledgement screen which displays the 277CA report for the claim that is highlighted.
Note: Initially, when this screen was made available in version 9.12.20 and the [View Detail] button was clicked, the details for the claim (i.e., reason for rejection) were not available until claims had been submitted with the ‘Tracer Number’ (added in version 9.12.20) and the 277CA file received in return. If the [View Detail] button does not work as described, please contact Prime Clinical Support.
4.16 [Exit] returns the user to Intellect’s main menu screen.
This screen shows information for the claim selected on the Claim Acknowledgement screen and the reason it was rejected.
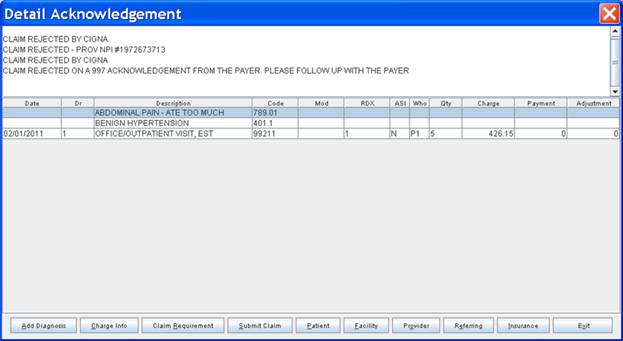
The screen is divided into 2 parts:
Top portion of the screen (the 277CA report):
The top portion of the Detail Acknowledgement screen displays the 277CA report for the claim that is highlighted on the table, including the reason the claim was rejected, and details for that claim. To make corrections and modifications to this claim, either use the buttons at the bottom of the screen OR use the right-click menu options. See Modify or Correct the Claim below for additional information.
For example:

In the example above, A1 indicates the claim has been received, but does not indicate that it has been processed. A7 indicates a claim rejection. 500 is an example of a claim rejection reason code.
Updates:
Effective November 2019: When the bills are accepted into Data Dimensions/WorkCompEDI's system, the attachments are not yet matched. They initially issue a 277 that says the clearinghouse has accepted them but the bills need attachments (R4:294). As soon as the attachment matching occurs, a second 277 is sent with the code A1:20 to indicate the claim is accepted.
Effective version 19.01.29, more specific information is included in the top portion of the Detail Acknowledgement screen. For example, instead of displaying general statements such as shown in the example above, the report lists specific errors, such as the following, to help in correcting the claim:
Note: This change is not retroactive.
This area displays a table showing the information on the claim as it was when the claim was submitted.
5.2 
Displays the date the charge was posted.
5.3 
Displays the provider number of the doctor who treated the patient.
5.4 
Displays the description of the Panel Code (as set up in Utility --►Procedure --►Procedure) or the Diagnosis Code (as set up in Utility --►Diagnosis).
5.5 
Displays the Panel Code or Diagnosis Code.
5.6 
Displays a modifier if, in Utility --►Procedure --► Procedure, modifiers were set up and the <Stop for Modifier> field is 'Y.'
5.7 
Displays the order number of posted diagnosis as attached to a posted procedure.
Effective Version 13.04.10: The number of characters allowed to be entered in the <RDX> field was increased to accommodate 2-digit pointers with comma separators.
5.8 
Displays a ‘Y’ or ‘N.’
5.9 
Displays the party responsible for the payment of the balance of the claim at the time the charge was posted.
5.10 
The claim count for this claim.
5.11 
Displays the dollar amount charged for the rejected claim.
5.12 
Displays the dollar amount paid on the rejected claim.
5.13 
Displays the adjustment, if any, on the dollar amount of the rejected claim.
The lower portion of this screen includes buttons. These buttons are used to modify or correct a claim, and are described the Menu buttons portion of the Modify or Correct the Claim section below.
Use either the buttons at the bottom of the Detail Acknowledgement screen OR the right-click menu to make modifications and corrections to information on the rejected claim. With the exception of the Modify Diagnosis and Delete Diagnosis options which are only on the right-click menu, the same change capabilities are available by using either method.
Click on a field (e.g., Date, Code, etc.) on the table in the lower-portion of the Detail Acknowledgement screen and then right-click the mouse to access the right-click menu:
As mentioned previously, the Modify Diagnosis and Delete Diagnosis options are only on the right-click menu. Their definitions follow. Since the remaining right-click options have the same change capabilities as the Menu buttons with the same name, they are defined in the Menu buttons section which follows.
5.14 Modify Diagnosis:
Select the diagnosis code to be modified, and click Modify Diagnosis to display a screen showing the current Diagnosis Code. For example, if the field below was highlighted before Modify Diagnosis was selected
![]()
the pop up screen shows 789.02 since it is the current Diagnosis Code for the selected field:
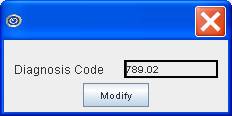
Clear the old Diagnosis Code using the backspace key and then enter a new Diagnosis Code. After entering a valid Diagnosis code, click [Modify] to save the changes and return to the Detail Acknowledgement screen. The highlighted entry now displays the newly-added Diagnosis Code on the screen.
5.15 Delete Diagnosis:
Select the diagnosis code to delete and click Delete Diagnosis to display:
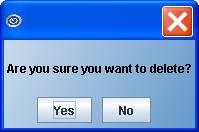
Click [Yes] to remove the highlighted row.
Click [No] to return to the Detail Acknowledgement screen without making changes.
Click on the appropriate field in the lower-portion of the screen (e.g., Date, Code, etc.), and then click on a button.

5.16  (Add Diagnosis)
Displays this screen where a Diagnosis Code may be entered:
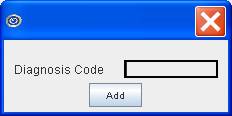
Enter a valid Diagnosis code and click [Add] to save the changes. Intellect returns to the Detail Acknowledgement screen with the newly-added Diagnosis Code displayed.
If an attempt is made to add a Diagnosis code that has already been used, Intellect displays:
Select a row(s) with a charge and click [Charge Info] to display the fields of the Charges --► Charge screen that may be modified for the rejected claim.
Note: Changes made in fields with an asterisk (*) are changed in the whole claim; therefore, the change only needs to be made once.
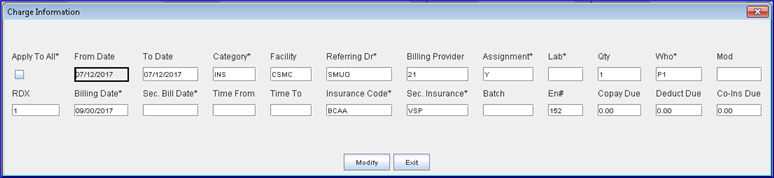
Note: If the Apply To All box is selected  , the changes are applied to all the currently selected rows with charges. This option works only with the fields with asterisks.
Updates:
Effective version 19.03.26 - Three new fields. The <Copay Due>, <Deduct Due>, and <Co-Ins Due> fields were added to the Charge Information screen to allow the unpaid copay, deductible, and co-insurance for a charge to be modified.
Effective version 18.07.18 - New field. Prior to this release, it was found that when posting charges with an encounter that also had a lab in the encounter and the encounter was no longer attached to the charge, the lab was still attached to the charges and printing in Box 32 and was also being included in the electronic 837 submission in NM1-77. As of version 18.07.18, a <Lab> field was added to the Charge Information window to allow the LAB to be removed from the charge history.
Effective version 15.09.02 - New Field. The <EN#> field was added to this screen, allowing an encounter that already exists to be entered.
Effective version 12.12.06 - New Field. The <Category> field was added to this screen.
Effective version 9.12.31 - New Field. The <Batch> field was added to this screen to enable the Batch number to be modified.
After making changes, click [Modify] to save changes OR click [Exit] to return to the Detail Acknowledgement screen without saving changes.
5.18 
Takes the user to the Modify CLAIM REQUIREMENT screen. The fields on this screen vary per claim (see Utility --►Procedure --►Procedure --►Modify for set up instructions). Information may only be added in the available fields. Information may not be modified on this screen.
After making changes, click [Modify] to save the changes, [Clear] to clear all the fields on the screen, OR click [Exit] to return to the Detail Acknowledgement screen without saving changes.
5.19 
Takes the user to the Modify ENCOUNTER screen. Information may be modified or added as needed. After making changes, click [Modify] to save the changes, [Clear] to clear all fields on the screen, OR click [Exit] to return to the Detail Acknowledgement screen without saving changes.
5.20  (Submit Claim):
Takes the user to the Submit Claim screen as originated in Ledger --►Create Collection and Ledger --►Review Collection. Information may be modified or added as needed. After making changes, click [OK] to save the changes OR [Clear] to clear all fields on the screen.
5.21 
Takes the user either to the Registration --►Regular --►Patient --►Modify or Registration --►Worker --►Worker --►Modify screen, as applicable, where information may be modified or added as needed. After making changes, click [Modify] to save the changes, [Clear] to clear all fields on the screen, OR click [Exit] to return to the Detail Acknowledgement screen without saving changes. Changes to insurance may also be made at this time.
5.22 
Takes the user to the Utility --►Facility --►Modify screen where information may be modified or added as needed. After making changes, click [Modify] to save the changes, [Clear] to clear all fields on the screen, OR click [Exit] to return to the Detail Acknowledgement screen without saving changes.
5.23 
Takes the user to the Utility --►Provider --►Provider --►Modify screen where information may be modified or added as needed. After making changes, click [Modify] to save the changes, [Clear] to clear all fields on the screen, OR click [Exit] to return to the Detail Acknowledgement screen without saving changes.
5.24 
Takes the user to the Utility --►Referring screen where information may be modified or added as needed. After making changes, click [Modify] to save the changes, [Clear] to clear all fields on the screen, OR click [Exit] to return to the Detail Acknowledgement screen without saving changes.
5.25 
Takes the user to the Utility --►Insurance --►Insurance --►Modify screen where information may be modified or added as needed. After making changes, click [Modify] to save the changes, [Clear] to clear all fields on the screen, OR click [Exit] to return to the Detail Acknowledgement screen without saving changes.
5.26 
Returns to the Detail Acknowledgement screen.

