Intellect™
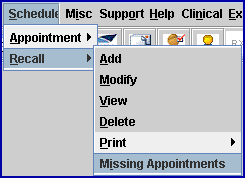
SCHEDULE MENU OPTIONS

Recall
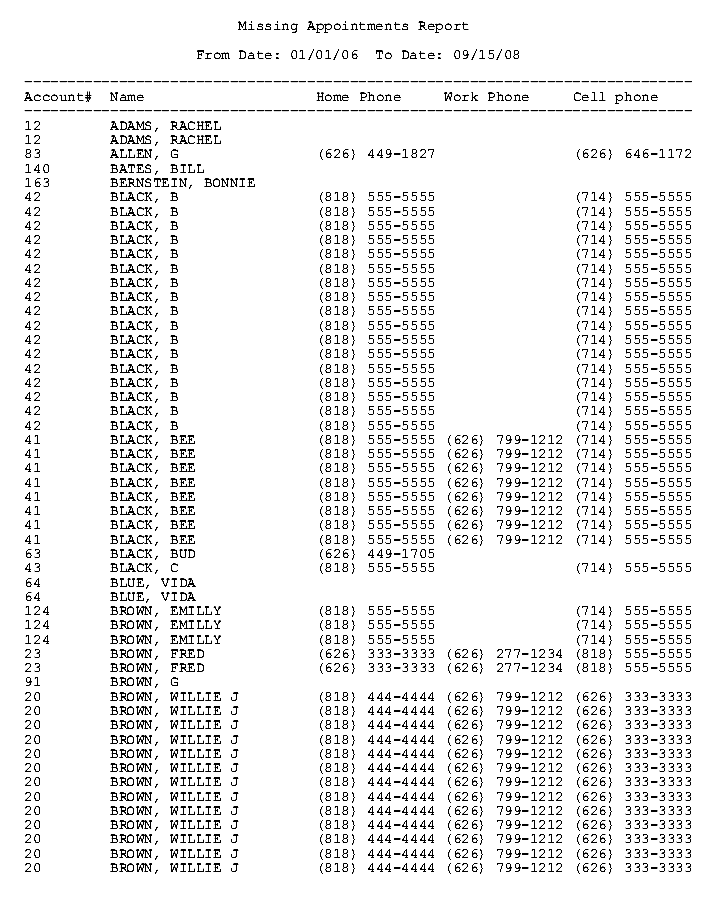
Missing Appointments
This option is used to create a report of patients who have had a recall notice, but as of the time period specified have not scheduled an appointment. Intellect searches for recalls for a user-designated period then compares it to the schedule for a user-designated From Date.
1. To run a missing Recall/Appointment list for patients in Intellect, go to Schedule --► Recall --► Missing Appointments:
The Print Missing Appointments printer dialog box displays:
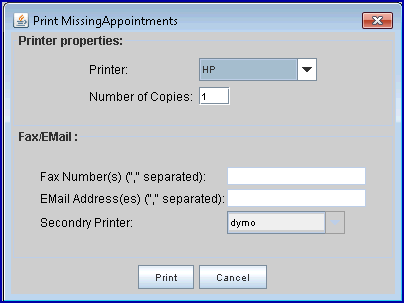
1.1 Printer: The default printer for the logged-in clinic and password is selected. To select a different printer, either click on the arrow, OR press the → (right arrow) on the keyboard to view the list of printer codes. In our example, the defaulted Printer is HP. This is just an example of a printer name and may or may not be set up on the system.
1.1.1 To select the printer type, click on the code, OR use the ↑ (up) and ↓ (down) arrows to highlight the correct code; then press the [Enter] key to select.
1.2 Number of Copies defaults to either 0 (zero) or 1. Both print 1 copy. To print more than one copy: enter the number of copies.
1.3 Select the [Print] button to display the Parameters box.
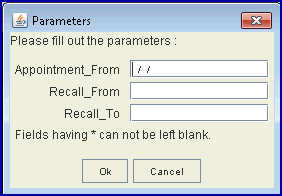
2. Appointment From ![]()
2.1 Type the beginning date for Intellect to search the Appointment Schedule.
2.2 This field is optional. If left blank, Intellect searches all dates.
3. Recall From ![]()
3.1 Type the beginning date for Intellect to search the Recall lists. This is a mandatory field.
4. Recall To ![]()
4.1 Type the ending date for Intellect to search the Recall lists. This is a mandatory field.
5. OK ![]()
5.1 Click [OK] to send the request to the printer.
5.2 Click [Cancel] to clear the screen and return the focus to the main Intellect screen without saving or printing.