
Intellect™
UTILITY MENU OPTIONS

Set Up
Maintenance
General Import
and
Maintenance
General Import
The General Import screen enables the population of Intellects’ tables through a bulk import function. This utility can be configured to accept several file types and formats.
Several conditions must exist and/or be set prior to the import:
• A data file must exist where it can be accessed for uploading.
Create the data file as an Excel spread sheet, then save the file with a .txt extension as Text (Tab Delimited) in a place where it can easily be found.
Effective Version 13.04.10:
The General Import screen is now capable of using Excel files. However, only .xls files may be used. If there is a need to use an .xlsx file, open the .xlsx file using Excel and save the file in the older .xls format.
• The appropriate vendor and company code must exist. See Utility --► Procedure --► Inventory --► Vendor Company.
• Effective version 9.12.20, the General Import Data screen can update the already-existing records in addition to inserting new ones.
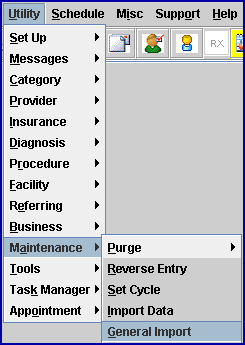
1. To import data in Intellect, go to Utility --► Maintenance --► General Import
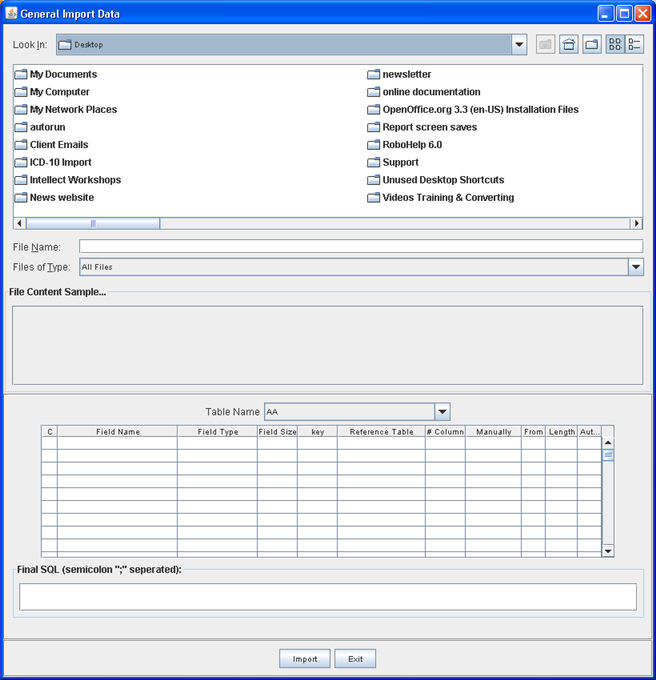
The General Import Data dialog box displays (as of version 13.06.24):
2. Use the 'Look in' drop-down to change directories if necessary.
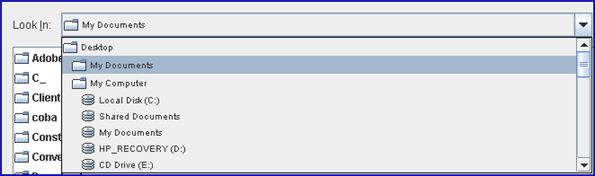
Double-click on the file that contains the desired data.
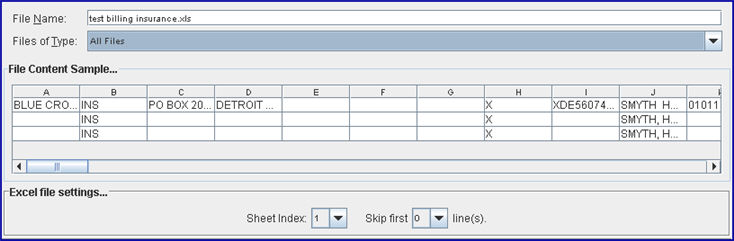
3.1 The name of the file is displayed in the <File Name> field:

- AND -
3.2 The General Data Import screen changes to accommodate the file type, based on whether the file is an Excel or non-Excel file.
3.2.1.1 File Content Sample
When an Excel file is selected, a portion of the file displays in the File Content Sample section:
3.2.1.2 Excel File Settings
The sample display shown above may be altered using these options in the Excel File Settings section.
• <Sheet Index> 
If the file has multiple sheets, use the <Sheet Index> drop-down to select the correct sheet.
• <Skip First Line(s)> 
If a file has the column title in either the first or first few lines, use <Skip First Line(s)> to specify the number of records to be discarded from the beginning of the file.
3.2.2.1 File Content Sample
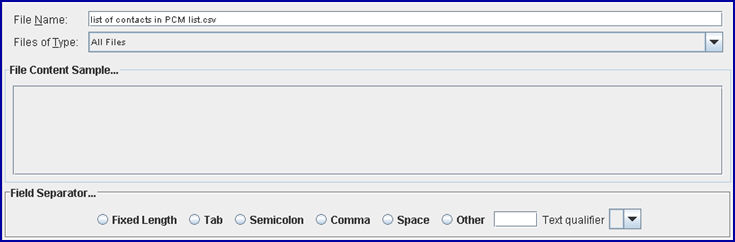
Initially, when a non-Excel file is selected, the File Content Sample section is blank (see below). To display a sample of the selected file, make a selection in the Field Separator section.
3.2.2.2 Field Separator
Click the radio button for the field separator that matches the file format. In the example below, Tab is selected for a Tab-separated file:

For formats other than Fixed Length, Tab, Semicolon, Comma, and Space, and for files that need additional qualifiers, use:
• <Other> 
Click the radio button, and enter a separator in the box. For example, '~'.
• <Text Qualifier> 

If necessary, select the appropriate qualifier; e.g., double quotes, single quotes, or none. In the above example, .Txt is formatted with none.
4. The data from the file is inserted into a table selected in the <Table Name> field.
• <Table Name> 
Click on the down arrow, scroll through the list, and select the table to which this data will be inserted.
4.1 For HIE communication users (Effective version 16.10.11): The URLs in the hospital's Excel file must be imported into the HIE_DESTINATION table:

See Utility --► Facility --► HIE Endpoint and Schedule --► Appointment --► Full Day --► Special Features --►HIE Request for information on using HIE communication.
4.2 Press [Enter] to load table information. Intellect first displays:
and then:
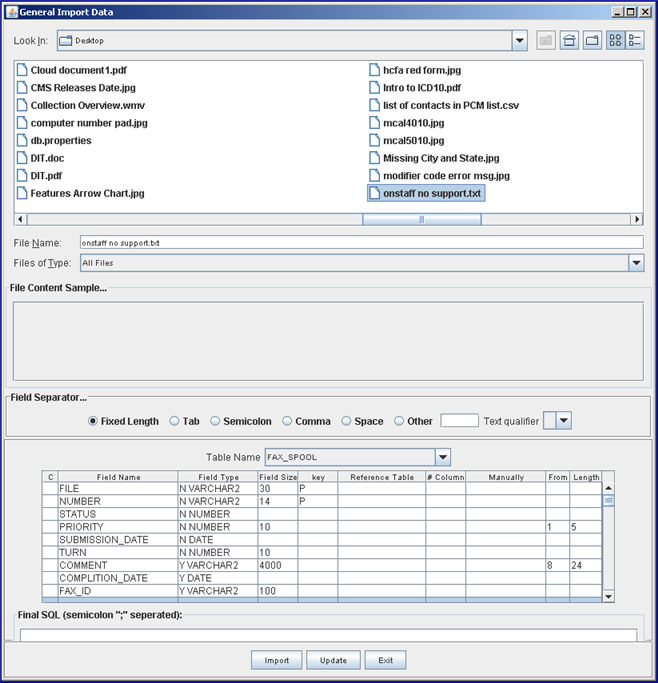
The Table columns are populated as follows:
4.3 <C> (Command) 
Type [F2] in the Command Column to view the list of the various actions that may be performed.
Displays the Intellect database field name. For non-Excel files whose information is not separated with a Field Separator such as tab or comma, it displays column names. This is a read-only field.
4.5 <Field Type> 
Displays the SQL data type this field accepts. This is a read-only field. Note: Types with a leading 'N' must have a value in either <# Column> or <Manually>.
4.6 <Field Size> 
Displays the number of characters allotted to this field. This is a read-only field.
Indicates Primary or Foreign Key constraints. This is a read-only field.
4.8 <Reference Table> 
For Foreign Keys, this indicates the location table of data. This is a read-only field.
This tells Intellect which column in the file maps to this field entry. All Keys, and any other fields to be populated, must be mapped.
This is used to enter a single field value which is applied to all records.
The <From> and <Length> columns work in conjunction with the <Field Name> column for non-Excel files whose information is not separated with a field separator (such as tab or comma). A column name must be selected in <Field Name> before information may be entered in the <From> and <Length> columns.
4.11 <From> 
For the file selected in the <File Name> field, enter the starting character in the data which should be placed in the selected <Field Name>. See example in 4.10 below.
4.10 <Length> 
For the file selected in the <File Name> field, enter the ending character in the data which should be placed in the selected <Field Name>.
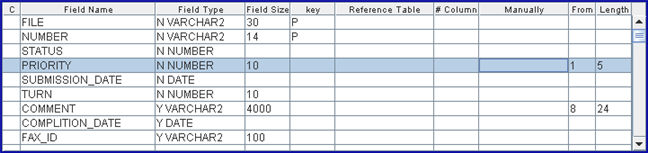
The example below (for a non-Excel file whose information is not separated with a Field Separator such as tab or comma) indicates data from characters 1 through 5 should be placed in the Priority column, and data from characters 8 through 24 should be placed in the Comment column.
5. Final SQL
Used by Prime Clinical personnel.

6. When the information is completely entered, select one of these buttons:
Note: Effective Version 13.12.12, the [Update] button (added in version 9.12.20) was removed.
6.1 [Import]: Click [Import] to display a moving progress bar while the file is inserted into the table.
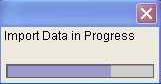
If the import is successful, Intellect displays a message indicating the number of processed records:
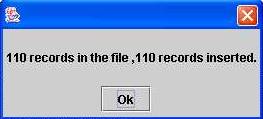
Click [OK] to close the pop-up box. If this message does not display, contact PCS support.
6.2 [Exit]: Click [Exit] to close the General Import Data dialog box without saving information.
Intellect versions prior to 13.12.12 have an [Update] button (added in version 9.12.20):
6.3 [Update]: Click [Update] to incorporate changes and display this message:
If a file name has not been entered and the [Update] button is clicked, this message is displayed:
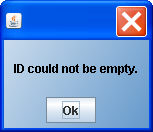
Note:Effective version 13.12.12, the [Update] button was removed.



