
Intellect™
UTILITY MENU OPTIONS

Set Up
Maintenance
Purge
Group of Patient
and
UTILITY MENU OPTIONS

Maintenance
Purge
Group of Patient
Use this option to permanently remove selected information from patient accounts in Intellect. Comments, recalls, superbills, appointments, or entire patient records may be purged. It can be used on an individual basis or small groups.
Effective version 14.04.28 there was a change to this option designed for Billing Services only. Billing Service clients may contact Support for further details.
1. To purge items or accounts in Intellect, go to Utility --► Maintenance --► Purge --► Group of Patient
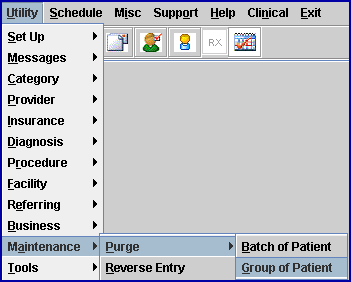
The Print GOP_PURGE screen displays:
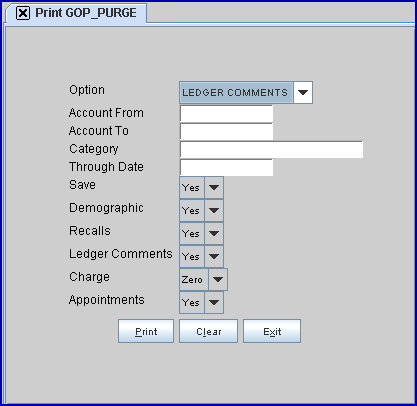
2.1 Accept the default 'LEDGER COMMENTS' OR use the drop-down to make an alternate selection.
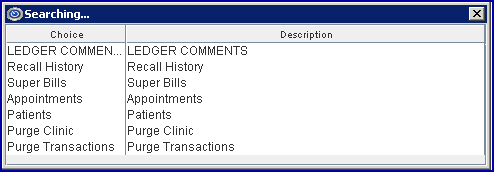
2.2 Click on the field, OR press the [F2] search key to display the valid choices:
3. Account From 
3.1 Enter the beginning account number for which to perform the selected purge.
3.2 Press [Enter] to bypass this field which requests ALL accounts, OR use this field as the beginning account number to be purged.
4. Account To 
4.1 Enter the ending number for which to perform the selected purge.
4.2 Press [Enter] to bypass this field which requests ALL accounts greater than any value entered in <Account From> (open ended), OR use this field as the ending account number to be purged.
5. Category 
5.1 This field allows the accounts selected in <Account From> and <Account To> to be filtered by <Category Code>.
5.2 Enter the Utility --► Category <Category Code>(s) to include. Multiple <Category Code>s must be separated by a comma with no spaces; for example,

6.1 Enter the most recent entry date of activity (Ledger --►Accounting <Date> NOT <DOS>) to purge.
7. Save 
7.1 Make a selection to save or not save purged information in an archive directory.
7.2 Accept the default 'Yes' to save purged information, OR use the drop-down list to select 'No' to not save the purged information.
Effective version 18.10.02, this field was removed from the screen, and ledgers have to be printed prior to running the purge. Prior software versions offered these options:
8.1 Make a selection to print or not print a final hard copy record of patients' accounting ledgers for all purged patients.
8.2 Accept the default 'No' to not print a hard copy, OR use the drop-down list to select 'Yes' to print a hard copy.
9. Demographic 
9.1 Make a selection to remove or not remove patient demographic information for all purged patients.
9.2 Accept the default 'Yes' to remove patient demographics, OR use the drop-down list to select 'No' to not remove the patient demographics.
10. Recalls 
10.1 Make a selection to remove or not remove appointment recall information for all purged patients.
10.2 Accept the default 'Yes' to remove appointment recall information, OR use the drop-down list to select 'No' to not remove appointment recall information.
11. Ledger Comments 
11.1 Make a selection to remove or not remove ledger comments.
11.2 Accept the default 'Yes' to remove ledger comments, OR use the drop-down list to select 'No' to not remove ledger comments.
12. Charge 
12.1 Make a selection to remove or not remove charges with zero balances.
12.2 Accept the default 'Zero' to purge charges with zero balances, OR use the drop-down list to select 'No' to not purge charges with zero balances.
13. Appointments 
13.1 Make a selection to remove or not remove appointments up until the date entered in the <Through Date> field on this screen.
13.2 Accept the default ' Yes' to purge appointments, OR use the drop-down list to select 'No' to not purge appointments.
14. When the information is completely entered, select one of these options:

14.1 Click [Exit] to clear the screen and return the focus to the main Intellect screen.
14.2 Click [Clear] to clear all information and return the focus to the <Option> field without saving.
14.3 Click [Print] (or press [Enter]) to display this warning message:
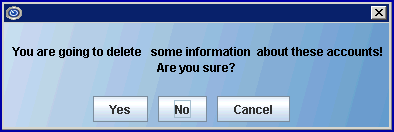
14.3.1 Select [Cancel] to return the focus to the Print GOP PURGE screen.
14.3.2 Select [No] to clear all information and return the focus to the <Option> field without saving.
14.3.3 Select [Yes] to display this warning:
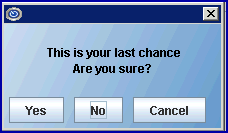
[Cancel]: Returns to the Print BOP PURGE screen.
[No]: Clears all information and returns the focus to the <Option> field without saving.
[Yes]: If the <Print Ledger> field is set to 'N,' select [Yes] completes the purge.
If the <Print Ledger> field is set to 'Y,' select [Yes] to display the Print Ledger dialog box:
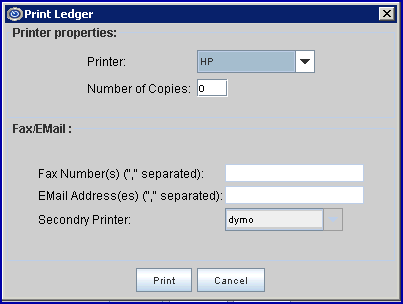
Click [Print] (or press [Enter]) to initiate the purge, and a pop-up box displays the status of the purge process:

If this error message displays, please contact PCS Support.
