Intellect™
UTILITY MENU OPTIONS

Task Manager
Modify
Effective version 17.06.09, clients can change what displays in the Subject line of the email for reports and/or files sent via the Task Manager. Please contact Support for more information.
This document discusses modification of tasks already set up on the Task Manager. In-depth information and instructions on adding a task to the Task Manager are given in Task Manager - Add.
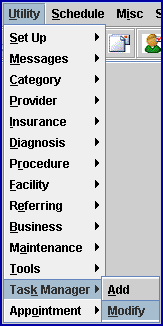
1. To modify automated tasks in Intellect, go to Utility --►Task Manager --►Modify
The Modify Task Manager screen opens:
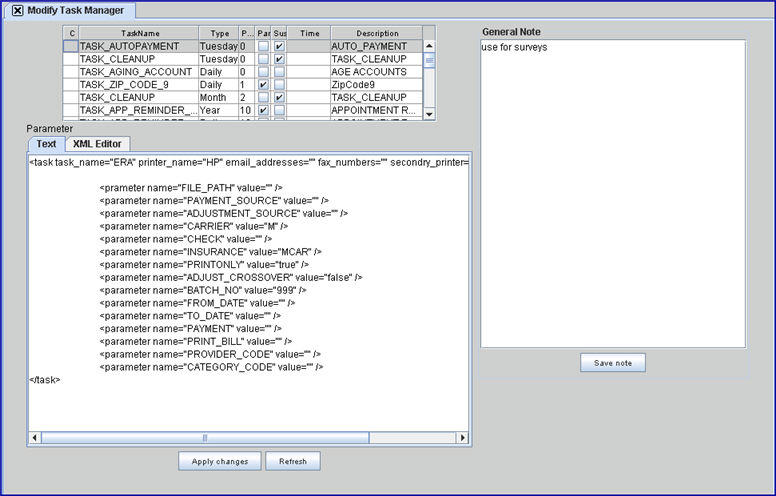
(Effective Version 9.12.18, a General Note section was added to the Task Manager feature)
2. Task Table

2.1 Click on the task to modify. In the example above, TASK_AUTOPAYMENT was selected. The parameters for the selected task display in the Parameter box.
3. Parameter
Parameters may be modified using either the [Text] or [XML Editor] tab.
Click the 'Text' tab to display:
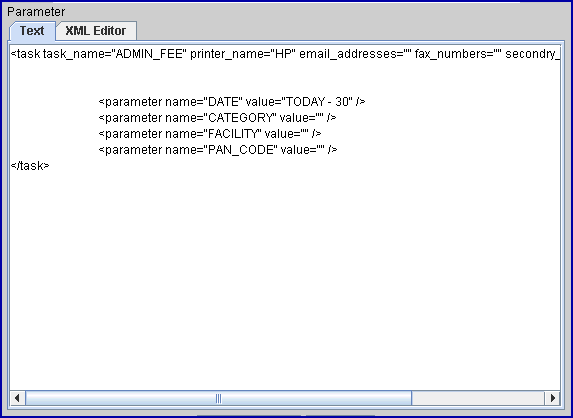
To make modifications directly on this screen, click in the screen where the change needs to be made and then add, or delete, and type information.
For example, the string value for the Doctor parameter below is 1. To change it to 2, click on the screen directly in front of the 1 and then press the [Delete] key on the keyboard. The 1 is then removed and a new value may be typed in, such as 2.

3.1.1 Apply Changes 
This button is located beneath the 'Text' and 'XML Editor' tabs. See sample Modify Task Manager screen.
Effective version 9.12.30: To save all changes, it is imperative that this button is selected after every single change. If a couple of tasks are modified and then [Apply changes] is pressed, the program only saves the very last change.
3.1.2 Refresh 
This button is located beneath the 'Text' and 'XML Editor' tabs. See sample Modify Task Manager screen.
Click the 'XML Editor' tab to display:
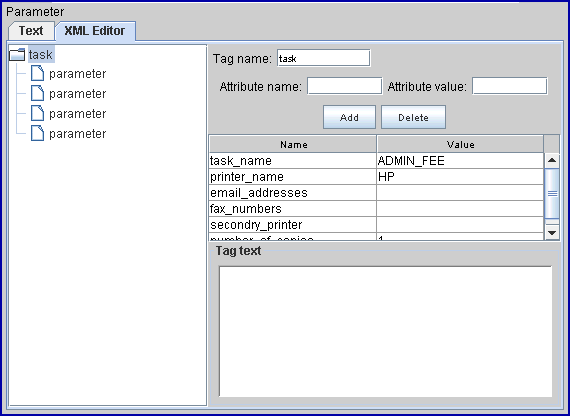
The 'XML Editor' is simply an alternate way to edit or add to the 'Text' script. Entries made in the right hand pane of the editor, as shown below, are added. See 'XML Editor' field definitions.
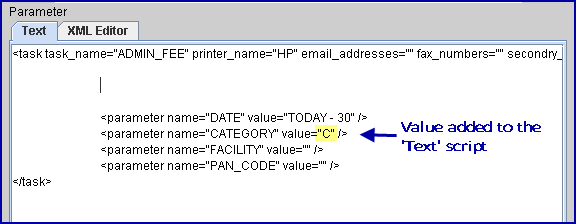
Effective version 9.12.28 and greater, Intellect's scheduled jobs accept the following date formats, in addition to the relative date parameters in the form of 'TODAY' or 'TODAY - 3' (as examples), as in prior versions:
[BEGINNING OF|END OF] [WEEK | MONTH | QUARTER | YEAR | JAN | FEB | ... | NOV | DEC | FIRST QUARTER | SECOND QUARTER | THIRD QUARTER | FOURTH QUARTER] [+ | -] [DIGITS]
There is 1, and only one, space between each part.
Following are a few examples, all of which assume the current date is 02/21/2012:
BEGINNING OF YEAR -> 01/01/2012
END OF YEAR -> 12/31/2012
BEGINNING OF QUARTER -> 01/01/2012
END OF QUARTER -> 03/31/2012
BEGINNING OF MONTH -> 02/01/2012
END OF MONTH -> 02/29/2012
BEGINNING OF WEEK -> 02/19/2012
END OF WEEK -> 02/25/2012
BEGINNING OF JAN -> 01/01/2012
END OF JAN -> 01/31/2012
BEGINNING OF DEC -> 12/01/2012
END OF DEC -> 12/31/2012
BEGINNING OF FIRST QUARTER -> 01/01/2012
END OF FIRST QUARTER -> 03/31/2012
BEGINNING OF THIRD QUARTER -> 07/01/2012
END OF THIRD QUARTER -> 09/30/2012
BEGINNING OF FOURTH QUARTER -> 10/01/2012
END OF FOURTH QUARTER -> 12/31/2012
----------------- +3 ------------------
BEGINNING OF YEAR + 3 -> 01/01/2015
END OF YEAR + 3 -> 12/31/2015
BEGINNING OF QUARTER + 3 -> 10/01/2012
END OF QUARTER + 3 -> 12/31/2012
BEGINNING OF MONTH + 3 -> 05/01/2012
END OF MONTH + 3 -> 05/29/2012
BEGINNING OF WEEK + 3 -> 03/11/2012
END OF WEEK + 3 -> 03/17/2012
BEGINNING OF JAN + 3 -> 04/01/2012
END OF JAN + 3 -> 04/30/2012
BEGINNING OF DEC + 3 -> 03/01/2013
END OF DEC + 3 -> 03/31/2013
BEGINNING OF FIRST QUARTER + 3 -> 10/01/2012
END OF FIRST QUARTER + 3 -> 12/31/2012
BEGINNING OF THIRD QUARTER + 3 -> 04/01/2013
END OF THIRD QUARTER + 3 -> 06/30/2013
BEGINNING OF FOURTH QUARTER + 3 -> 07/01/2013
END OF FOURTH QUARTER + 3 -> 09/30/2013
----------------- -8 ------------------
BEGINNING OF YEAR - 8 -> 01/01/2004
END OF YEAR - 8 -> 12/31/2004
BEGINNING OF QUARTER - 8 -> 01/01/2010
END OF QUARTER - 8 -> 03/31/2010
BEGINNING OF MONTH - 8 -> 06/01/2011
END OF MONTH - 8 -> 06/29/2011
BEGINNING OF WEEK - 8 -> 12/25/2011
END OF WEEK - 8 -> 12/31/2011
BEGINNING OF JAN - 8 -> 05/01/2011
END OF JAN - 8 -> 05/31/2011
BEGINNING OF DEC - 8 -> 04/01/2012
END OF DEC - 8 -> 04/30/2012
BEGINNING OF FIRST QUARTER - 8 -> 01/01/2010
END OF FIRST QUARTER - 8 -> 03/31/2010
BEGINNING OF THIRD QUARTER - 8 -> 07/01/2010
END OF THIRD QUARTER - 8 -> 09/30/2010
BEGINNING OF FOURTH QUARTER - 8 -> 10/01/2010
END OF FOURTH QUARTER - 8 -> 12/31/2010
'XML Editor' field definitions
As previously stated, the 'XML Editor' is an alternate way to edit or add to the information displayed in the 'Text tab' option using the fields defined below. Entries made in the Name and Value columns affect the script shown in the Text option. See the XML Editor sample above.
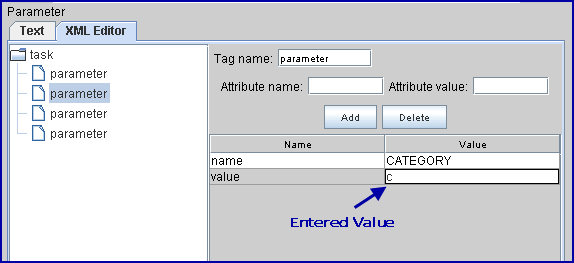
3.2.1 Tag name ![]()
3.2.1.1 This field displays the Tag selected in the tree on the left as seen in this graphic:

3.2.1.2 Do not change this entry.
3.2.2 Attribute name ![]()
3.2.2.1 Used only when adding a new parameter to the script.
3.2.2.2 Enter the name of the new parameter.
3.2.3 Attribute value ![]()
3.2.3.1 Used only when adding a new parameter to the script.
3.2.3.2 Enter the value for the parameter added in <Attribute name> above.
3.2.4 Add 
3.2.4.1 Used only when adding a new parameter to the script.
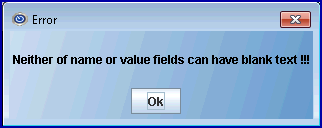
3.2.4.2 Click the [Add] button after entering the appropriate information into the <Attribute name> and <Attribute value> fields.
3.2.4.3 If the necessary information is not entered before clicking on [Add], an error message displays:
3.2.5 Delete 
3.2.5.1 Used only when deleting a parameter from the script.
3.2.5.2 Click the [Delete] button after entering the appropriate information into the <Attribute name> and <Attribute value> fields.
3.2.6 Name ![]()
3.2.6.1 Used to add information for tasks and/or their parameters.
3.2.6.2 For example, if a printer is being added to the task, printer_name could be entered. The actual printer name is then entered in the Value column.
3.2.7 Value ![]()
3.2.7.1 Used to add information for tasks and/or their parameters.
3.2.7.2 In the example for the Name column above, a printer was added but not defined. This field allows specific information for the printer to be entered; e.g., HP6, Lexmark 2420, etc.
3.2.8 Tag Text 
3.2.8.1 Not used at this time.
3.3 Apply Changes 
This button is located beneath the 'Text' and 'XML Editor' tabs. See sample Modify Task Manager screen.
3.3.1 Effective version 9.12.30: To save all changes, it is imperative that this button is selected after every single change. If a couple of tasks are modified and then [Apply changes] is pressed, the program only saves the very last change.
3.4 Refresh 
This button is located beneath the 'Text' and 'XML Editor' tabs. See sample Modify Task Manager screen.
4. General Note 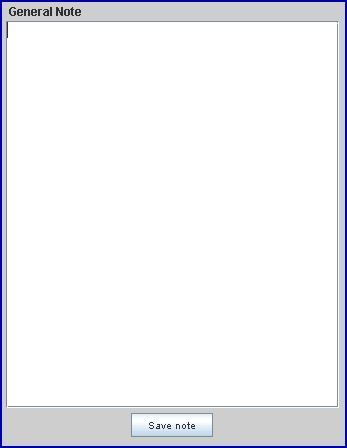
4.1 Effective Version 9.12.18, this section was added to the Task Manager feature. As automated tasks are usually set up and maintained by Prime Clinical, this feature may not be of interest to most clinics. This section may be entered per task and per clinic, and can be used to track any applicable information regarding the task; i.e., who requested the set up, when it was added, the conditions which should be applied to the task, etc.
4.2 Save note 
Click this button to save information entered in the General Note section.
For information on the most common tasks for automation, see Task Manager - Add.