
OnSTAFF 2000
Easy Print Software
Four Steps to Using Easy Print - 15 Pgs
Instructions Follow
1. Download Medicare’s Easy Print Software
(Goggle: Medicare easy print) with nine easy clicks of the mouse
Pages 2 through 6
Contact Medicare with any questions or for assistance in downloading their Easy Print software.
2. Main Menu à Payment à ANSI Autopay, download the ERA
Pages 7 through 10
Contact Prime Clinical Support Department with any questions or for assistance.
3. FTP downloaded ERA file to the PC which has the Easy Print software
Pages 11 through 14
Contact Prime Clinical Support Department with any questions or for assistance.
4. Open file with Easy Print software and print.
Pages 15 through
Contact Medicare with any questions or for assistance.
NOTE: Prime Clinical only supports the OnSTAFF software. Thus, any questions or needed assistance which has to do with Easy Print must be provided by Medicare.
Download Easy Print Software
Instructions Are Written for Windows XP or Windows 2000
Contact Software Support if you do NOT have Windows XP or Windows 2000
1. Log on to the internet and copy/paste this web address into Address area of your browser:
http://www.cms.hhs.gov/AccesstoDataApplication/02_MedicareRemitEasyPrint.asp
|

If you use a search engine such as Google, the following is the correct link. The link is in green BUT click on the top line:

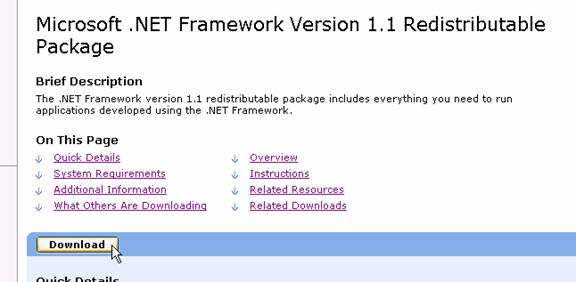
2. The following web page will display:
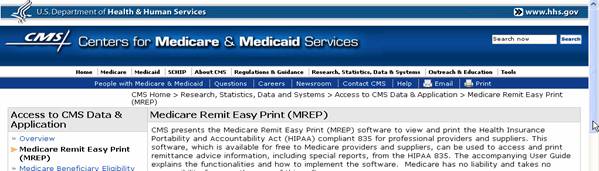
3. Scroll down until you see the Downloads section and click on Medicare Remit Easy Print – Version 2.5 [You may use the link below]. The version number and information within the brackets may change, but it is ALWAYS Medicare Remit Easy Print – Version **********,
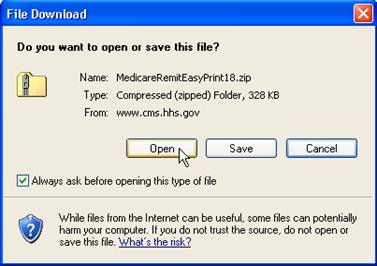
4. The following screen will appear. Click on Open.
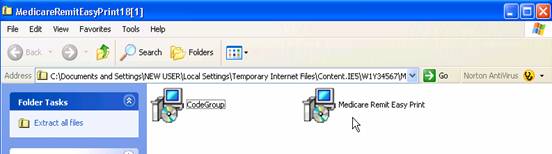
5. The following will display. Click on Medicare Remit Easy Print.
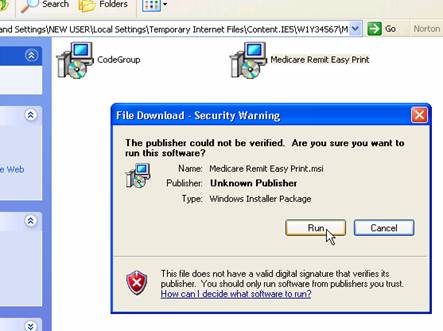
6. The following will display. Click on Run.
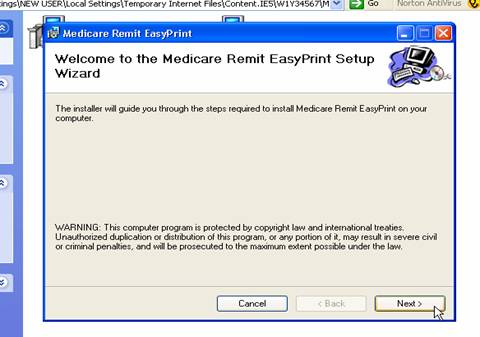
7. The following will display. Click on Next >.
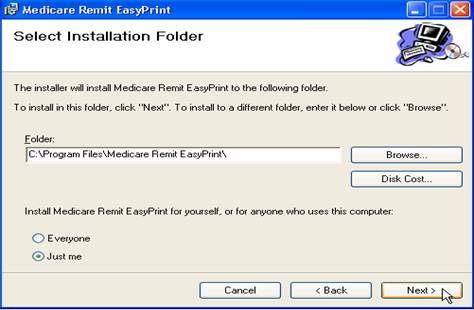
8. The following will display. Click on Next >.
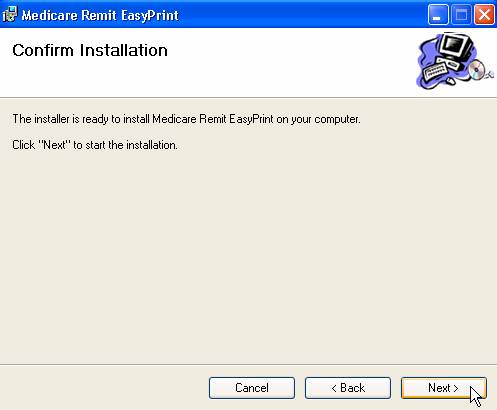
9. The following will display. Click on Next >.
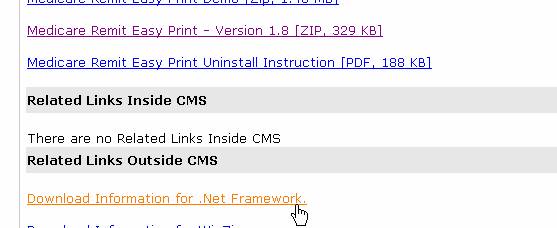
#9 NOTE: If you receive a message that states you need .net framework go back to CMS website (Steps 1 and 2). Scroll down to Related Links outside CMS and click on Download Information for .Net Framework.
#9 NOTE continued: The following screen will appear. Click on Download.
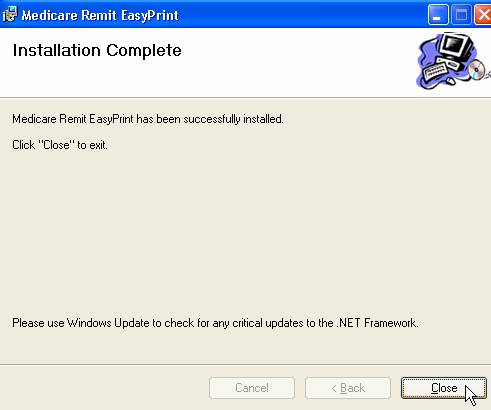
#9 NOTE continued: The following screen will appear. Click on Close.
# 9 NOTE COMPLETED. Repeat Steps 1 through 9.
Contact Medicare with questions or for assistance.
Main Menu à Payment à ANSI AutoPay
How Does this Work?
Medicare will place your ANSI ERA file in what is referred to as your CABBS mailbox. The file is picked up by your server (NOT Prime Clinical) using the OnSTAFF software Main Menu à Payment à ANSI AutoPay feature.
How Often Do I Execute the ANSI Auto Payment Feature?
The ANSI ERA file is to be picked up weekly for Southern California submitters (i.e., your submitter number begins with zeroes, e.g., 000012345) and daily for Northern California submitters (i.e., your submitter number begins with BBB, e.g., BBB12345B). Please contact support to automate the pick up of your ANSI ERA files.
What Am I Picking Up?
The printed ANSI ERA file, entitled EXPLANATION OF BENEFITS (EOMB), which contains the same information as Medicare’s EOMB. The check number(s), denial codes, crossover notification, etc. are included in the printout.
NOTE: The main difference between Medicare’s EOMB and the ANSI ERA file printout is that Medicare’s EOMB lists the denial code definitions and the ANSI ERA file printout does not. The denial code definitions may be obtained by accessing the following website:
A File Name is also included on the last page of the ANSI ERA file printout. This is composed of the date and time of file pickup followed by a dot and your 9 digit submitter number.
Example: 06012006091500.000001234 or 06012006091500.BBB12345B
é é
Report picked up June 1st, 2006 at 9:15:00 am
06012006091500.000001234 Or 06012006091500.BBB12345B
é é
Example submitter # 000001234 or BBB1234B (yours will display here)
The ANSI ERA file printout may contain an Error Report, entitled AUTOMATIC PAYMENT ERROR REPORT (See 1.D).
What happens if an ANSI ERA File Printout is Lost or Destroyed?
You may reprint a previously picked up ANSI ERA file at any time as long as you know your File Name. This is accomplished from the Payment/ ANSI Auto Payment feature (See 2).
NOTE: If you do not know your File Name go to EXTERNAL OPTIONS MENU àANSI Era to obtain this information. Press [N] to go to the Next page, [P] to go to the previous page, or [Q] to Quit. (Pressing the [End] key will also enable you to quit or exit this screen)
NOTE: NHIC Medicare ERA (Electronic Remittance Advice) enrollment must be in place prior to proceeding. You may contact NHIC for enrollment.
1. Pick up an ANSI ERA file
Prime Clinical can automate the pickup of these files for you. If your office is enrolled, and you would like this feature automated, contact software support at 626-449-1705.
Go to Main Menu à Payment à ANSI AutoPay and complete the screen as follows.
Enter your print out destination or Return for default? HP
Press [Enter] if the displayed default printer, HP here, is the correct printer or replace with the correct printer then press [Enter].
After responding to the above prompt the following will occur:
A: Your system will dial Medicare and pick up the ANSI ERA file, also known as the ANSI 835 report.
B: The report will ONLY be printed; NO payments or adjustments will be applied.
C. The File Name for this ANSI ERA file (or ANSI 835 report) will be included on the last page of the report.
D: An error report, entitled AUTOMATIC PAYMENT ERROR REPORT, may print when patient accounts can not be verified either due to a non-existent account number, incorrect subscriber number, procedure code not posted to the patient's account, charge amount(s) or date(s) of service not being found on account.
2. Reprint an ANSI ERA file
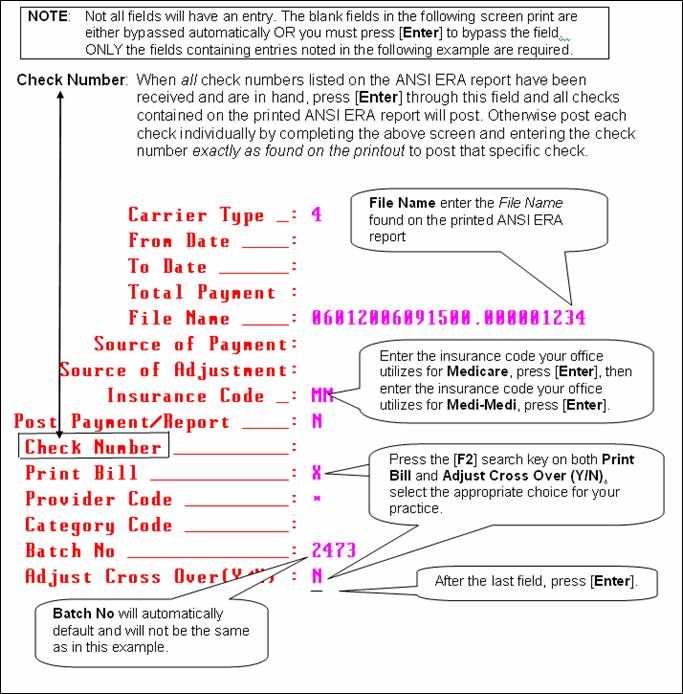
To reprint an ANSI ERA file, complete the screen as above with the following exception:
On field File Name enter the File Name of the ANSI ERA file you wish to reprint.
NOTE: The printout will contain a File Name. This File Name is what will be used to have the system automatically post payments and adjustments from the ANSI ERA file and to reprint an ANSI ERA file.
3. Post the ANSI ERA file
Prime Clinical cannot automate this step.
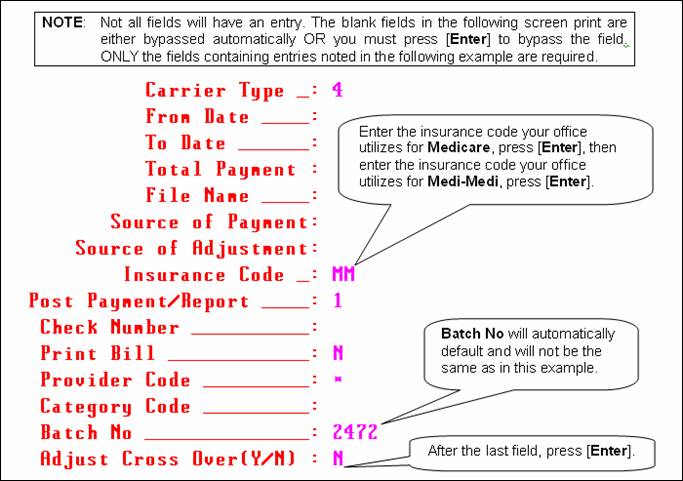
Go to Main Menu à Payment à ANSI AutoPay and complete
The system will next prompt:
Enter your print out destination or Return for default? HP
Press [Enter] if the displayed default printer, HP here, is the correct printer or replace with the correct printer then press [Enter].
After responding to the above prompt the following will occur:
A: The payments and adjustments of the entire ANSI ERA file (when Check Number is left blank) or only the payments and adjustments associated with the entered Check Number will be posted.
B: The ANSI ERA file will be printed.
C: Secondary claims will print depending on the option entered on Print Bill.
USE OF BATCH NUMBER:
A journal may be printed either by operator code and/or by batch number through Main Menu à Management à Journal by appropriately completing the Option, Operator Code, and Batch No. fields.
In the case of an operator error, an ANSI ERA posting can be reversed by operator code and/or by batch number through Main Menu à Utility à Maintenance à Reverse Entry. This can ONLY be done on the same clinic date as that of posting the ANSI ERA file (i.e., the same day the ANSI ERA file was posted AND prior to the day being closed).
Contact Prime Clinical with questions or for assistance.
FTP Downloaded ERA to PC which has the Easy Print Software
YOU MUST know the STATIC IP address of YOUR server
PRIOR to beginning this process.
1. Contact your IT and DSL provider to obtain your IP address.
2. When you have the ANSI AutoPayment printout from the OnSTAFF program, you will see a filename at the end of the report (last page) that contains the date, name, and the submitter#
For example:
11282005114410.000024360
11282005 à November 28th, 2005
114410. à a unique number for each report
000024360 à your submitter#
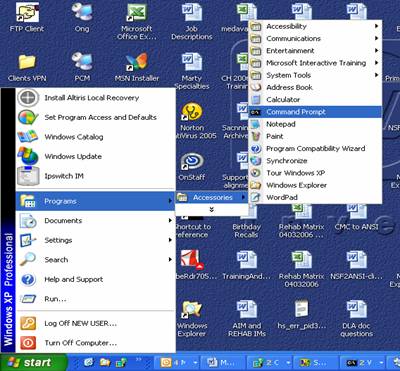
3. From your workstation (your PC), go to Start à Programs à Accessories à Command Prompt (or cmd prompt).
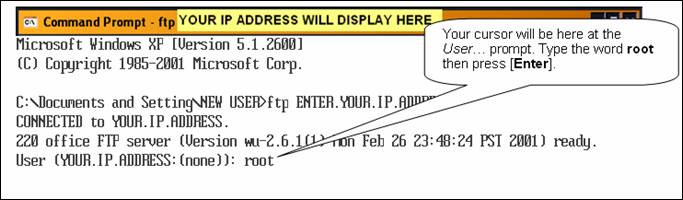
4. A screen will appear as in the following example. Type ftp, press the [Spacebar], type your IP address, and press [Enter].

5. Your cursor will be at the User… …: prompt. Type the word root and press [Enter].
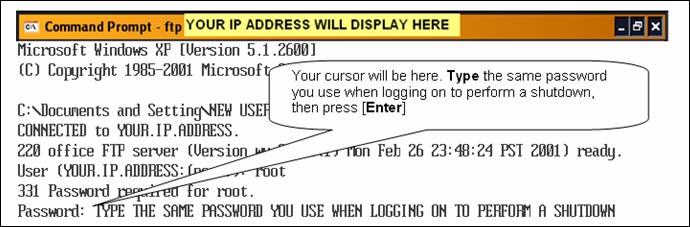
6. Your cursor will be at the Password: prompt. Type the same password you use when logging in to perform a shutdown, and then press [Enter].
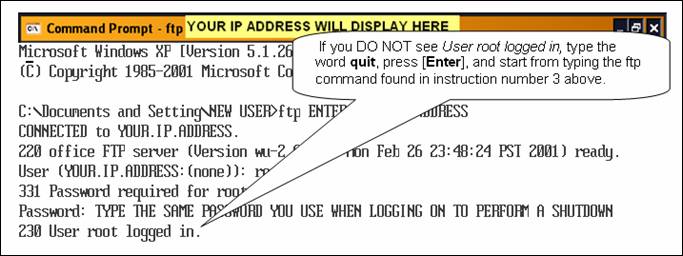
7. Next, if you DO NOT see User root logged in, type the word quit, press [Enter], and start from typing the ftp command found in step 3 above. If you DO see User root logged in, move on to step 7.
8. At the ftp prompt (ftp>) type the following being sure to copy spacing as well as upper and lower case lettering:
bin press [Enter]
cd /u/staff/bin/Era press [Enter]
pwd press [Enter]
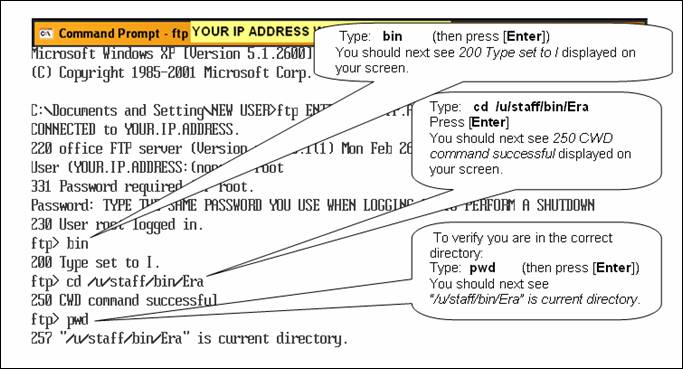
NOTE: If you do not see what is noted in the above callouts, type the word quit, press [Enter], and start from typing the ftp command found in step 3 above. If you DO see what is noted in the above callouts, move on to step 8.
9. In this step, at the ftp prompt (fpt>) type the word get press the [Spacebar] then type the filename retrieved in step 2, press [Enter]. Once the process completes, at the ftp prompt type quit, press [Enter], type exit, press [Enter], and the screen will close.
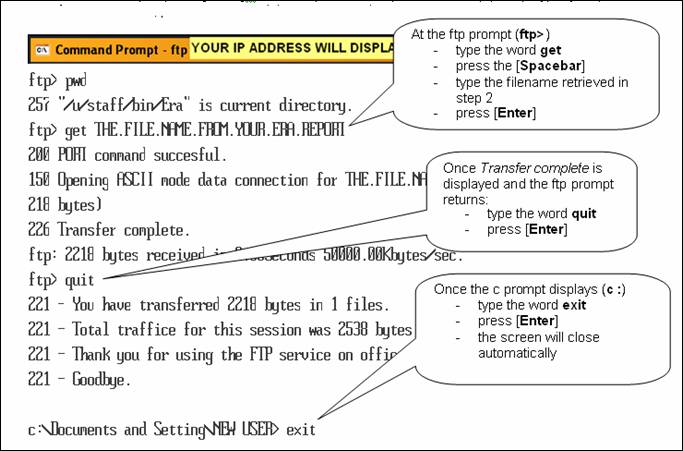
You have successfully transferred the file from the server to your workstation and are ready to enter the Easy Print program. The file is located in C:\Documents and Settings\username (the unique user name displayed during step 4).
Contact Prime Clinical with questions or for assistance.
Open ERA File with Easy Print
1. Double click on the Easy Print icon found on your desktop:
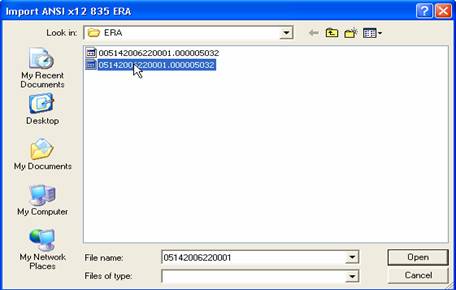
2. Import the file:

3. Double click on the file which you want imported:
For complete instructions on using Medicare’s Easy Print software follow steps 1 and 2 of Download Easy Print Software. At step 3, download Medicare Remit Easy Print User Guide.
Contact Medicare with questions or for assistance.