WWW.PRIMECLINICAL.COM
OnSTAFF 2000
[Ctrl] [E]
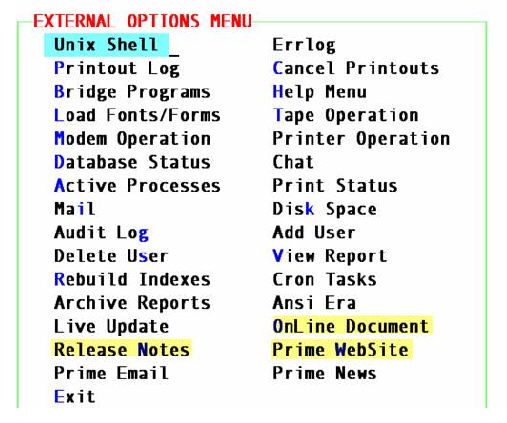
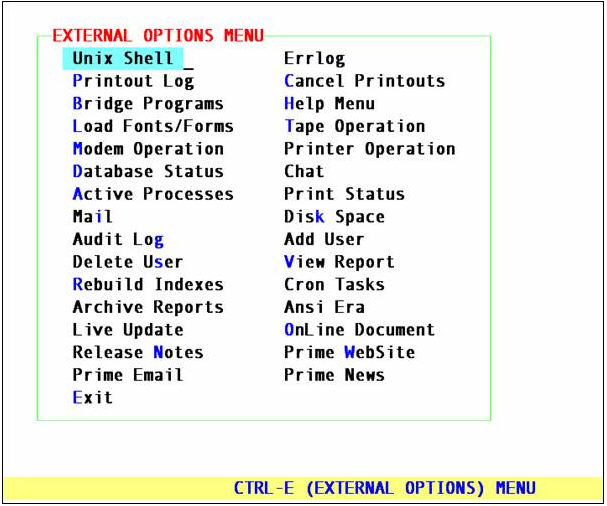
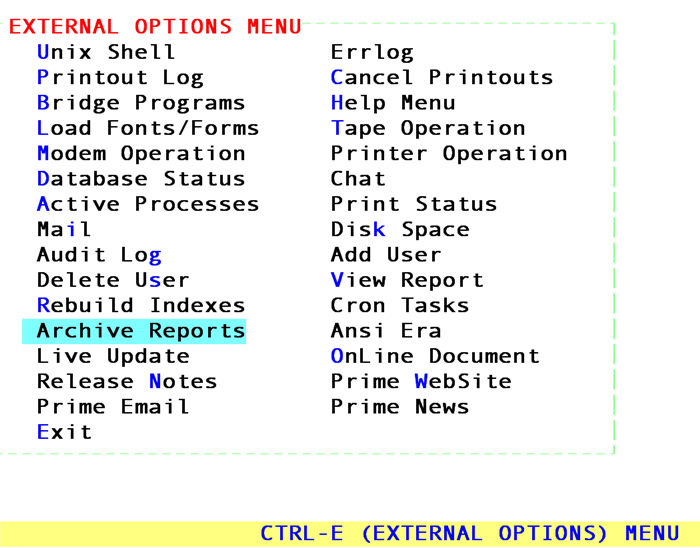
EXTERNAL OPTIONS MENU
The External Options Menu allows you to carry out various commands from any point in the system, including during the middle of entering a record such as New Patient or posting charges. To access this menu, press [Ctrl] [E] any time after logging into the clinic. This menu contains 21 options.
External Options Menu/UNIX SHELL
This option allows access to the Operating System Environment (AIX, UNIX or XENIX). Normally, the user will select this option at the request of the Software Support Department to assist them in solving a problem. They may ask you to execute a command from the Unix Shell. The following are standard key strokes for moving around in the shell.
~ Tildee The Tildee key is found in the upper left hand corner of the keyboard. You MUST use the [ñShift] key along with the Tildee key as the Tildee symbol appears at the top of the key.
| Pipe The pipe key is found in the upper right hand corner of the keyboard. You MUST use the [Shift] key along with the pipe key as the pipe symbol appears at the top of this key.
: Colon The colon key is found in the second row from the bottom on the right hand side of the keyboard. You MUST use the [ñShift] key along with the colon key as the colon symbol appears at the top of this key.
! Exclamation The exclamation point is found in the top row on the left hand side of the keyboard. You MUST use the [ñShift] key along with the exclamation key
Point as the exclamation symbol appears at the top of this key.
. Period The period is found in the bottom right hand corner of the keyboard.
/ Forward The forward slash is found in the bottom right hand corner of the keyboard.
Slash
\ Backward The backward slash is found in the top right hand side of the keyboard.
Point
 It is mandatory to use the 1 key (not a lower case L when support requests the user to type one (1).
To exit this option, with the cursor at the $ prompt, press [Ctrl] [D]. On-Staff will display the following:
$
Press any key to continue. __
Press any key to return to the External Options Menu.
External Options Menu/DATABASE LOG
This option allows the user to check the error log in the event that an internal systems error occurs. If such an error is encountered, simply access the External Options Menu ([Ctrl] [E]) and select the Database Log option. There should be two entries on the screen. Make sure the date is the current date and time. If so, copy down all of the information that appears for Notes and report the error to the Software Support Department. This allows our Support Department to pinpoint any problems easily. For example, upon entering the screen you may see the following displayed:
Mon Jul 29 15:35:06 1996
Program: SQL
Calling function: dbherr
Offending function: data dictionary function-see notes
Status: 0
Errno: 24
Notes: Unable to initialize lock manager: 24
***
Mon Jul 30 09:05:54 1996
Program: unknown
Calling function: error
Offending function: See notes
Status: -4
Errno: 0
Notes: gett (tnum=43, offset=8, words=1)
Press any key to continue.
To exit this option, as noted in the above example, On-staff displays the message Press any key to continue. Pressing any key will return to the External Options Menu.
Using this same example, the Software Support Department would be given the following Notes:
Unable to initialize lock manager: 24
gett (tnum=43, offset=8, work=1)
External Options Menu/PRINTOUT LOG
This option will advise the user whether or not a print request was sent to the printer and if fonts and forms were loaded. The Printout Log displays the five most current requests.
Date: Tue Jul 30 11:24:15 1996
Notes: Font/Form /u/staff/bin/lib/HCFA.PRN file
Function: Error
Date: Tue Jul 30 11:24:35 1996
Notes: Font/Form /u/staff/bin/lib/QMFS.PRN Spooled.
Function: Font Loading
Date: Tue Jul 30 12:15:15 1996
Notes: File LEa09809 Created for a printing request.
Function: Printing.
Date: Tue Jul 30 12:15:16 1996
Notes: Request LEa09809 was sent to the: 'HP'
Function: Printing
Date: Tue Jul 30 12:48:56 1996
Notes: Request LEa09916 was NOT sent to the printer since it was empty.
Function: Printing
Press any key to continue.
To exit this option, as noted in the above example, On-staff displays the message Press any key to continue. Pressing any key will return to the External Options Menu.
Using this same example:
HCFA 1500 forms are not printing due to an error in loading fonts and forms:
Date: Tue Jul 30 11:24:15 1996
Notes: Font/Form /u/staff/bin/lib/HCFA.PRN file
Function: Error
When printing a patient's ledger, the user received two beeps. When checking the Printout Log, the possible error was in the way the printout was requested, possibly the dates requested did not exist for this patient:
Date: Tue Jul 30 12:48:56 1996
Notes: Request LEa09916 was NOT sent to the printer since it was empty.
Function: Printing
With use and assistance from the Software Support Department, the user will become accustomed to reading the Printout Log.
External Options Menu/CANCEL PRINTOUTS
This option will cancel any pending printouts that have not been sent to the printer. When this option is selected and there are no printouts queued, On-Staff will display the following:
Please Wait Checking Printer Status
There Are No Print-outs Queued. Press Any Key To Continue.
To exit this option, as noted in the above example, On-staff displays the message Press Any Key to Continue. Pressing any key will return to the External Options Menu.
When there are printouts queued, On-Staff will display the following:
Page 1 of 1
To delete a print job, move the cursor adjacent to the print job line and press D. On-Staff will prompt with the following confirmation question:
Would You Like To Delete ( Y/N )
Y - to confirm the print job is to be deleted and return to the External Options Menu.
N - DO NOT delete the print job. Selecting N will return the cursor to the CMD (command) column. Press Q to return to the External Options Menu.
NOTE: If the Submitter field is displaying staff for all queued print jobs, it is recommended that you obtain the office manager's permission before deleting any print jobs to avoid deleting useful reports sent by another user.
To exit this screen, with the cursor at any point in the CMD (command) column, press Q and On-Staff will return to the External Options Menu.
External Options Menu/BRIDGE PROGRAMS
This option allows access to On-Staff’s Cron Log and any additional software applications such as Advanced Query, WordPerfect or Lotus, if applicable. When this option is selected, On-Staff will display the following menu:
Query Query is a report generator purchased separately from On-Staff. Query classes are available for those who choose to purchase the program.
To exit the Query program, continue to press [Esc] until the following message is displayed:
Press any key to continue.
Press any key to return to the External Options Menu.
Cron Log A log of all automated functions in order of execution. For example:
Calendar : Thu July 25 1996 1:05p
Notes : Starting Task 'CRON-MEDICARE ELECTRONIC'
Clinic : 1
Date : Wed July 24, 1996
Calendar : Fri July 26 1996 1:05p
User : PCS SUPPORT
File :
Notes : Starting Task 'CRON-IMS ELECTRONIC'
Calendar : Fri July 26, 1996 1:05p
Notes : Starting Task 'CRON-PRINT FORM C'
Calendar : Fri July 26, 1996 1:05p
Notes : Starting Task 'CRON-PRINT INS. F-U LTRS'
Calendar : Fri July 26, 1996 1:05p
Notes : Starting Task 'CRON-PRINT APPT/ALL PROVIDERS'
--More--__
When --More-- is displayed in the bottom left hand corner of the screen, pressing [Enter] will scroll through the remaining lines. To exit this option, press Q and On-Staff will display the following message:
Press any key to continue.
Press any key to return to the External Options Menu.
Exit Returns to the External Options Menu.
External Options Menu/HELP MENU
When implemented, this option will allow the user to call their vendor on demand. When the Help Menu is selected, On-Staff will display the following:
To exit this option, press [Enter] and On-Staff will display:
Support Extension:
Unknown Extension
Press any key to continue.
Press any key to return to the External Options Menu.
External Options Menu/LOAD FONTS/FORMS
This is one of two areas to Load Fonts and Forms. The other is at Main Menu/Misc/Load Forms. This option is used to load the fonts and forms to the memory of a laser printer which enables the system to print claim forms, registration forms, etc. using plain white paper. This function must be performed each time the laser printer is powered on or the computer has been shutdown. If you have more than one laser printer, this function must be performed on each printer.
When the Load Fonts/Forms option is selected, On-Staff will display the following screen prompting the user to select a printer destination. If you receive the prompt: Enter your print out destination or Return for default? HP (examples, HP, HPNET, IBM, etc.), you have previously set your default printout destination during this login. To obtain the Choose One Of The Printers Shown menu, press [Spacebar] then [Enter].
Accept the default or clear the field and press [Enter] to display other options.

Select the printer you wish to load fonts and forms to then press [Enter]. Even though On-Staff has returned you to the External Options Menu, note that the printers' Buffer or Ready light is blinking (denoting the fonts and forms are being loaded) To exit this option without loading fonts and form, choose E (Exit) to return to the External Options Menu.
NOTE: Any print request sent to the laser printer will print AFTER the printers' Buffer or Ready light has stopped blinking (denoting the fonts and forms are now loaded).
External Options Menu/TAPE OPERATION
This option allows the user to read, rewind, retention and verify a backup tape. Verification of the backup tape should be performed daily, or at the very least weekly. When Tape Operation is selected, On-Staff will display the following:
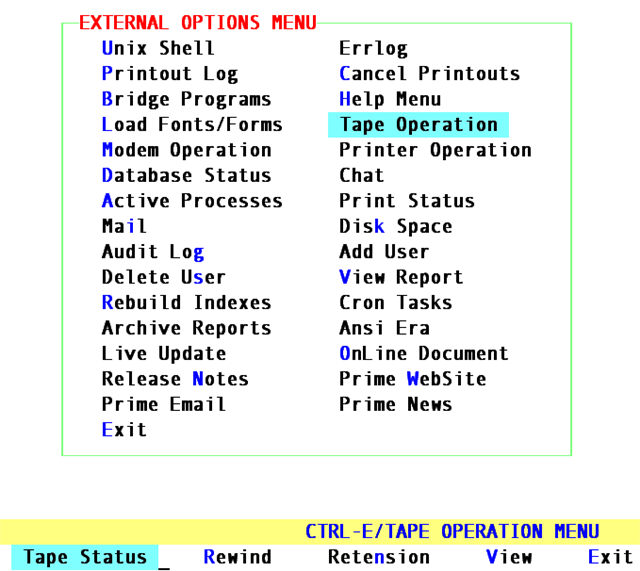
Tape Status This utility is designed to verify whether or not the tape back up is functioning. To exit this option, Press any key to continue to return to the Tape Operation Menu.
UNIX and XENIX Operating Systems: When anything other than status: ready is displayed, please contact your Hardware Support Department.
status : ready ç
soft errors : 0
hard errors : 0
underruns : 0
Press any key to continue.
AIX Operating Systems. When anything other than Available is displayed, please contact your Hardware Support Department (rmt0 Available 00-01-00-50...).
rmt0 Available 00-01-00-50 150MB 1/4-Inch Tape Drive
attribut é value description user_settable
mode yes Use DEVICE BUFFERS during writes
block_size 0 BLOCK size (0=variable length)
ret no RETENTION on tape change or reset
density_set_1 16 DENSITY setting #1
density_set_2 15 DENSITY setting #2
Press any key to continue.
To exit this option, as noted in the above example, On-Staff displays the message Press any key to continue. Pressing any key will return to the Tape Operation Menu.
Rewind This utility will rewind your backup tape to the beginning. It should be performed only if requested by the Software or Hardware Support Department. When the process is complete, On-Staff will display the following message:
Press any key to continue.
Press any key to return to the Tape Operation Menu.
Retention This utility will ensure that the tape doesn't have any slack in it. It should be performed on a new tape, prior to the first usage. When the process is complete, On-Staff will display the following message:
Press any key to continue.
Press any key to return to the Tape Operation Menu.
View This function is used to verify the contents of a backup (see page I-2-12 for details). The user does NOT want to see any error messages and is looking to verify that the file.db date matches the date of the actual backup. This date will not change when there has been NO activity in On- Staff. For example, backup is automatically running nightly. The user comes in on Monday, July 29, 1996 (Saturday and Sunday the office was closed). While verifying the backup the user notes that the file.db date is last Friday, July 26, 1996 not Sunday, July 28, 1996
External Options Menu/TAPE OPERATION continued
when the last automated backup was performed. Since the office was closed On-Staff had no activity since Fridays backup, thus this file.db date is fine. When the view process is complete, On-Staff will display the following message:
Press any key to continue.
Press any key to return to the Tape Operation Menu.
Exit Returns to the External Options Menu.
External Options Menu/MODEM OPERATION
This option allows you to reset your modem. When Modem Operation is selected, On-Staff will display the following:
Reset This feature will Reset the modem, enabling it to accept an incoming or out going call. This is used when the modem does not respond. To execute this command select Reset. When the process is complete, On-Staff will display the following message:
PLEASE TURN YOUR MODEM OFF, WAIT FOR 5 SECONDS, TURN THE MODEM ON.
PRESS ENTER AFTER THE MODEM HAS BEEN TURNED ON.
After pressing [Enter] On-Staff will display the following message:
Press any key to continue.
Press any key to return to the Modem Operation Menu.
External Options Menu/PRINTER OPERATION
This option allows access to various printer operations. When Printer Operation is selected, On-Staff will display the following:
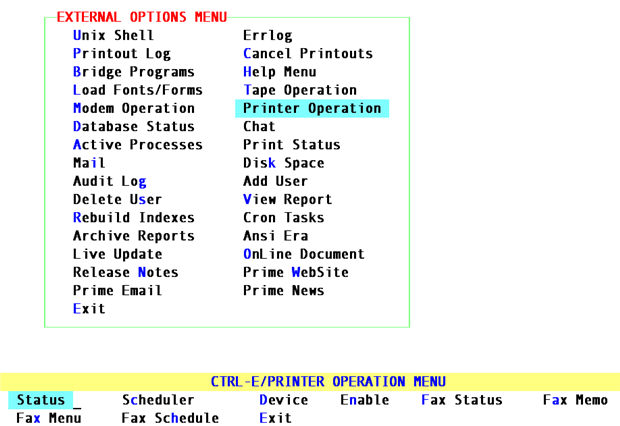
Status This feature will list all devices indicating whether they are enabled (accepting requests) and will also show whether the print scheduler is running. On-Staff will display the following message:
Press any key to continue.
Press any key to return to the Printer Operation Menu.
Scheduler This option will reset the print scheduler, which is similar to a traffic officer in that it controls the traffic of print requests. Occasionally a traffic jam will occur, resulting in two or more schedulers running. On-Staff can have only one officer, so this option will stop the extra schedulers, resulting in normal printer operation.
When the process is complete, On-Staff will display the following message:
Press any key to continue.
Press any key to return to the Printer Operation Menu.
Device This feature will display all print devices.
Enable This feature will enable all printers, in the event they become disabled due to paper jam, power outage etc.
|
Fax Status
Fax Memo
Fax Menu
Fax Scheduler
|
These Fax features require the VSI-Fax software (an additional purchase separate from On- Staff). If you purchased VSI-Fax, contact your vendor for instructions for its implementation.
|
Exit Returns to the External Options Menu.
External Options Menu/DATABASE STATUS
This area provides information as to whether the database is getting full and may require reconfiguration. In order to resize the database during a scheduled time to be down, the Database Status must be checked on a monthly basis. Make it part of your Month End routine to print this report, directing attention to the highlighted, italicized portions of the following sample Database Status report. Any table at 100% (166.7% is full) must be brought to the Software Support Department’s attention. If there are any questions, it is recommended that the Database Status be printed and faxed to your vendor for their review and confirmation of the statistics.
After selecting this option, On-Staff will display the following:
[P]rint or [D]isplay Statistics?__
[P]rint If you wish to print out this report, press P [Enter]. The two page report will be printed to the default destination printer. When the process is complete, On-Staff will display the following:
Press any key to continue
Pressing any key to return to the External Options Menu.
[D]isplay To display the information, press D [Enter]. On-Staff will display in the bottom left corner of the screen:
Display next page? [Return]continues, [n] terminates.
[Return] ([Enter]) will take you through several screens. When the last page has been reached, On-Staff will display the following:
Complete. Please enter RETURN to continue. -ñ -ñ
After pressing [Enter], On-Staff will display the following:
Press any key to continue
Press any key to return to the External Options Menu.
For additional information, please refer to the following sample Database Status report.
External Options Menu/ACTIVE PROCESSES
This option allows the user to free up a terminal that may be frozen. When selected, a list of all users who are currently logged onto the system, along with each of their processes, will be displayed as follows:
staff 8720 8719 2 14:04:13 01 0:00 grep menu
sondra 8832 8831 0 09:02:11 02 0:02 grep menu
kathy 8917 8916 1 May 04 03 76:00 grep menu
kathy has been logged on since May 4th for 76 hours
Would you like to kill any of the processes?
Valid choices are:
Y - Kill a process. On-Staff will then prompt:
Process Number:
This is the number displayed next to the user name. For example, to kill Sondra’s processes you would type 8832 [Enter]. When the kill process is complete, On-Staff will display the following message:
Press any key to continue.
Press any key to return to the External Options Menu.
N - DO NOT kill a process. When N is selected, On-Staff will display the following:
Press any key to continue.
Press any key to return to the External Options Menu.
NOTE: For Tiny Term or other terminal emulator programs, check here daily and kill hung processes caused by closing the emulator program without properly logging out (i.e., kathy in the above example).
External Options Menu/AUDIT LOG
This option will help prevent billing errors by advising the user of specific data entry errors, allowing their correction before billing. The Audit Log is created after the date has been changed. Printing the report clears the Audit Log of all entries, viewing the report continues to allow entries to be made. As charges are entered, On-Staff will be checking for the following and entering an explanation into the Notes field of the Audit Log:
Charges that are posted without a date of service (/Charges/Charges <Bdate> and <Edate> blank) -- On-Staff will add the clinic date as the date of service to these charges. This may be modified through the /Charge/Modify screen.
If there are charges posted for a future date, there will be a notation made in the Audit Log that this charge was posted for a date greater than the clinic date -- On-Staff will not make any changes on these charges. This may be modified through the /Charge/Modify screen.
When a charge was posted without relating it to a particular diagnosis -- On-Staff will not make any changes on these charges. This may be modified through the /Charge/Modify screen.
When Audit Log is selected, On-Staff will display the following:
View Viewing the report does not clear, but allows continued addition of information to the Audit Log. Upon selecting View, when the Audit Log is empty, On-Staff will display the following:
Audit.Err: No such file or directory
Press any key to continue.
To exit this option, as noted in the above example, On-Staff displays the message Press any key to continue. Pressing any key will return to the Audit File menu.
Following is a sample viewing of the Audit Log:
Clinic : 1
Date : Wed July 31 1996
Calendar : Wed July 31 1996 9:46a
User : (the User’s Name here)
File : /cl_acc.c
Error : 314
Notes : Wrong DOS: Patient = [1560] Visit = [1] DOS = 12/08/96 Charge = [00120.00]
Calendar : Wed July 31 1996 9:46a
Error : 289
Notes : Diagnosis: Patient = [1049] Visit = [1]
Calendar : Wed July 31 1996 9:46a
Error : 334
Notes : Patient = [1889] Visit = [1] DOS = [02/29/00] Charge = [00050.00]
Calendar : Wed July 31 1996 9:46a
Error : 308
Notes : Date > Ed: Patient = [1052] Visit = [1] DOS = [07/30/96] Charge = [00125.00]
Audit.Err: (2%)
Using the above example, Audit.Err: (2%) is displayed in the lower left hand corner of the screen denoting 98% of the report remains to be viewed. Press [Spacebar] to move to the next page. Audit.Err: END will display when the last page of the Audit Log has been reached. To abort viewing at any time, press Q. On-Staff will display the following message:
Press any key to continue.
Press any key to return to the Audit File menu.
Print If you elect to print this report, On-Staff will display the following message:
Press any key to continue.
Press any key to return to the Audit File menu.
Sample explanations of Notes:
There was no date of service or a future date was posted on the charge:
Notes: Wrong DOS: Patient = [1560] Visit = [1] DOS = [12/08/96] Charge = [00120.00]
Notes: Date > Ed: Patient = [1052[ Visit = [1] DOS = [07/30/96] Charge = [00125.00]
There was no transaction date:
Notes: Patient = [1889] Visit = [1] DOS = [02/29/00] Charge = [00050.00]
The charge was posted without a diagnosis:
Notes: Diagnosis: Patient [1049] Visit = [1]
External Options Menu/PRINT STATUS
This option allows the user to view or print a report which specifies the reason behind the print request being rejected. When Print Status is selected, On-Staff will display the following:

View Upon selecting View, when Print Status is empty, On-Staff will display the following:
Press any key to continue.
To exit this option, as noted in the above example, On-Staff displays the message Press any key to continue. Pressing any key will return to the Audit File menu.
Following is a sample viewing of Print Status:
Clinic : 1
Date : Fri August 2 1996
Calendar : Mon August 5 1996 4:30p
User : Clinic 1, Op#1
File : Electronic Billing
Calendar : Mon August 5 1996 4:30p
Error : 6
Notes : Patient 1002 Patient has no Insurance.
Calendar : Mon August 5 1996 4:30p
Error : 53
Notes : Primary/Secondary/All Error 1002
Calendar : Mon August 5 1996 4:30p
Error : 14
Notes : Charges posted to a cost center with no Ref Dr. 3388
Calendar : Mon August 5 1996 4:30p
Error : 513
Notes : No Insurance Coverage 1056
Calendar : Mon August 5 1996 4:30p
Error : 21
Notes : Patient 8000 No Charges Posted for the Requested Dates
Calendar : Mon August 5 1996 4:30p
Error : 6
Notes : Patient 1847 Patient has no Insurance.
Calendar : Mon August 5 1996 4:30p
Error : 3
Notes : Patient 486 Expired Insurance.
Clinic : 1
Date : Fri August 2, 1996
Calendar : Mon August 5 1996 4:40p
User : Clinic 1, Op#1
File : Statement
Calendar : Mon August 5 1996 4:40p
Error : 11
Notes : Patient 8014 has no balance or no family account is set up
Calendar : Mon August 5 1996 4:40p
Error : 10
Notes : Patient 50 Wrong Category Insurance.
Calendar : Mon August 5 1996 4:40p
Error : 13
Notes : Patient 1044 Not Enough Balance for Open Item.
Calendar : Mon August 5 1996 4:40p
Error : 66
Notes : Patients Balance is Zero. 1044
Clinic : 1
Date : Fri August 2 1996
Calendar : Mon August 5 1996 4:55p
User : Clinic1, Op#1
File : Aging Report Selsort Failed
Calendar : Mon August 5 1996 4:55p
Error : 410
Notes : Selsort Failed. 0
Clinic : 1
Date : Fri August 2 1996
User : Clinic1, Opp#1
File : Worker Comp Statement
Calendar : Mon August 5 1996 4:55p
Error : 3
Notes : Patient 1081 No Bill.
Calendar : Mon August 5 1996 4:55p
Error : 83
Notes : Category does not match. 8000
Clinic : 1
Date : Fri August 2 1996
Calendar : Mon August 5 1996 4:58p
User : Clinic1, Op#1
File : Eligibility Check
Calendar : Mon August 5 1996 4:58p
Error : 500
Notes : Patient Insurance Coverage No Medicare. 1009
Clinic : 1
Date : Fri August 2 1996
Calendar : Mon August 5 1996 4:58p
User : Clinic1, Op#1
File : Follow Up
Calendar : Mon August 5 1996 4:58p
Error : 63
Notes : Patients Category Does Not Allow Follow Up. 1002
Calendar : Mon August 5 1996 4:58p
Error : 62
Notes : Patient Has No Category. 66
Clinic : 1
Date : Fri August 2 1996
Calendar : Mon August 5 1996 5:00p
User : Clinic1, Op#1
File : Journal
Calendar : Mon August 5 1996 5:00p
Error : 31
Notes : Accessing mv failed.
Info.Err: (67%)
Using the above example, Info.Err: (67%) is displayed in the lower left hand corner of the screen denoting 33% of the report remains to be viewed. Press [Spacebar] to move to the next page. Info.Err: END will display when the last page of Print Status has bee reached. To abort viewing at any time, press Q. On-Staff will display the following message:
Press any key to continue.
Press any key to return to the Print Status menu.
Print If you elect to print this report On-Staff will display the following message:
Press any key to continue.
Press any key to return to the Print Info File menu.
Exit Returns to the External Options Menu.
About the viewed or printed Print Status Report:
Clinic Which clinic the operation was attempted from.
Date System date.
Calendar Calendar date.
User The name of the user requesting the print job (/Utility/Set Up/Security/Login Users <Operator Name>).
File The task you were trying to perform.
Error System assigned error number.
Notes System assigned explanation of why the request was unsuccessful.
Once this information is obtained, the user may make any necessary corrections and run the job again.
External Options Menu/MAIL
When you first log in, your computer system tells you if you have mail with a message such as You have mail. This option allows the user to read and reply to electronic mail and send mail to other On-Staff users. When Mail is selected, On-Staff will display the following:
View Mail If there are no messages in your mailbox, you will see a message much like No mail in /usr/spool/mail/judi, otherwise you are brought into your mailbox. An electronic mailbox lists all the messages you have waiting, and tells you a bit about each. For example, when your automated backup is completed or failed a message is sent by your computer system to the staff login. (If desired, the message may be sent to another user such as your system administrator. Please contact your Software Support Department to request this change.)
In the following View Mail example, there are three messages waiting. The most recent message appears first in the list:
SCO OpenServer Mail Release 5.0 Type ? for help.
"/usr/spool/mail/judi": 3 messages 3 new
> 3 tina Wed Jun 29 15:23 9/237 Please Call
2 michelle Wed Jun 29 9:00 23/863 Meeting
1 max Wed Jun 29 8:59 15/391 Needed Auth
&
> Marks the current message. Using the above example:
>3 tina Wed Jun 29 15:23 9/237 Please Call
Using the above example, the current message is the 3rd message in the users mailbox, sent by tina on Wednesday, June 29, at 3:23pm (15:23). The number of lines in the message are 9, with 237 total characters. As much of that subject line is shown, in this case Please Call.
& The Mail prompt from which you type commands while you are in Mail. To read a message, type its message number and press [Enter]. Using the above example, to read message number 3 from tina regarding Please Call at the Mail prompt (&) type 3 [Enter]. At this point you have several options to continue viewing your messages:
h You can have another look at the message headers after you have begun to read your mail by pressing h (headers) [Enter].
r You can respond to a mail message with the r command. If you have just read a message, typing r [Enter] at the mail prompt starts a response to that message. If you have not read any messages, pressing r [Enter] begins a response to the message at the bottom of your screen. You can also type r and the number of the message you want to respond to (i.e. r3 [Enter]).
d You can delete a mail message you have just read by typing d [Enter]. If you want to delete the message you have just read and then read the next message, type dp [Enter]. This deletes the message and prints the next one to the screen. Delete any message by typing d, the number of the message you want to delete, and press [Enter] (i.e. d3 [Enter]).
u You can recover the messages you deleted in the current mail session by typing u (undelete) [Enter]. The deleted messages reappear in your message list. If you want to undelete a particular message, type u and the number of the message you want to undelete (i.e. u3 [Enter]). You may only undelete messages you have deleted during the current Mail session. Once you quit Mail, the messages you have deleted are gone forever.
f You can forward Mail to other people from within the Mail program with the f command. To forward the message you have just read, at the Mail prompt (&), type f and the login name of the person to whom you want to forward the message to and press [Enter] (i.e. ftina [Enter]). You can forward any message by typing f, the message number, the login name of the person to whom you want it forwarded, and then pressing [Enter] (i.e. f3michelle [Enter]).
q To quit Mail, type q [Enter] at the Mail prompt (&).
NOTE: Once you read a message, it is automatically saved to a file called mbox.
Send Mail To send electronic mail, select Send Mail and complete the following prompts:
User: Enter the receiver's login name (i.e. june).
Subject: Enter the Subject of this message (i.e. Staff Luncheon) and press [Enter] to begin typing your message. The first portion of the Subject line shows in the list of messages in the receiver's mailbox.
When typing your message, to begin new lines in a logical way, press [Enter] for each new line of your message. If you make mistakes while you are typing a Mail message, backspace to correct them. However, you cannot backspace across more than one line. If you want to correct mistakes anywhere in a message, you need to use an editor such as vi (visual editor) to type your message.
When you have finished, press [Enter] to go to a new line, then press [Ctrl] [d]. This tells the Mail program to send the message.
User: June
Subject: Staff Luncheon
Christine has obtained several options for the staff luncheon. Drop by so we may finalize where, when, etc.
Bon Apetite!
[Ctrl] [d]
Exit Returns to the External Options Menu.
External Options Menu/DISK SPACE
This option allows the user to determine the amount of disk space available in their computer. When Disk Space is selected, On-Staff will display the following:
AIX Operating Systems
|
Filesystem
/dev/hd4
/dev/hd9var
/dev/hd2
/dev/hd3
/dev/hd1
/dev/lv01
/dev/lv00
.
|
Total KB
12288
8192
323584
12288
360448
20704
819200
|
used
4328
7832
240276
1496
315412
111320
283388
|
free
7960
360
83308
10792
45036
89384
535812
|
%used
35%
95%
74%
12%
87%
55%
34%
Ç
|
iused
695
137
20277
63
7790
157
60
|
ifree
2377
1911
61643
4033
82322
51043
204740
|
%iused
22%
6%
24%
1%
8%
0%
0%
|
Mounted on
/
/var
/usr
/tmp
/home
/u1
/home2
|
|
Press any key to continue.
|
|
|
|
|
|
|
|
|
|
|
|
|
|
|
|
|
|
|
|
|
|
|
|
|
|
Your Disk Space should be checked on a monthly basis. Any item under the heading %used that is at 80% or greater should IMMEDIATELY be brought to the attention of your vendor.
Following are symptoms of a nearing full Disk Space. If any of these occur, contact your vendor immediately.
An hdisk full error is displayed on a users screen.
Cannot search for an account.
When entering the Open Item Payment screen, On-Staff states no charges for selected dates of service, upon viewing the patient’s ledger those charges can be seen.
To exit this option, as noted in the above example, On-Staff dislays the message Press any key to continue. Pressing any key will return to the External Options Menu.
UNIX Operating Systems
Mount Dir File System blocks used free %used
/ /dev/root 299998 277354 22644 92%
/u /dev/u 1749900 302644 1447256 17%
Ç
Press any key to continue.
Your Disk Space should be checked on a monthly basis. Any item that is under the heading %used that is at 80% or greater should IMMEDIATELY be brought to the attention of your vendor.
Following are symptoms of a nearing full Disk Space. If any of these occur, contact your vendor immediately.
An hdisk full error is displayed on a users screen.
Cannot search for an account.
When entering the Open Item Payment screen, On-Staff states no charges for selected dates of service, upon viewing the patient’s ledger those charges can be seen.
To exit this option, as noted in the above example, On-Staff will display the message Press any key to continue. Pressing any key will return to the External Options Menu.
If you receive the following when accessing Disk Space, contact your vendor so they may correct this for your.
/ (/dev/root ) : 22644 blocks 29840 i-nodes
total : 299998 blocks 37504 i-nodes
/u (/dev/u ) : 1447256 blocks 61706 i-nodes
total : 1749900 blocks 65488 i-nodes
External Options Menu/CHAT
Available only if you have the ‘Enterprise’ version of Unix, this option will allow the user to simultaneously Chat with another user through the use of a split window dialog box that appears on your screen. Through this box, you and the other user may converse freely. You may contact your Vendor to determine if you have the Enterprise version of Unix.
When Chat is selected, On-Staff will display the following (the displayed (staff@office) will be unique to each office):
User to Talk(staff@office):
User to Talk
(staff@office): Type in the login name of the user you wish to chat with (i.e., tina) then press [Enter]. On-Staff will display the following:
User to Talk (staff@office): tina
[Waiting for your party to respond]
Other messages you could receive:
[Your party is not logged on]
[Ringing your party again]
[Connection closing. Exiting]
[You party is refusing messages]
The following message will appear on the terminal of the user you entered (the information displayed within the <_____> brackets will be unique to each office, <judi> is an example only):
Message from Talk_Daemon@<_____> at <current time>
talk: connection requested by <judi>@<_____>
talk: respond with : talk <judi>@<_____>
External Options Menu/CHAT continued
The user will then have to respond by accessing the External Options Menu/Chat, entering the requested by user’s name. Using the above example, the requested by user’s name (judi) is found in the following lines:
talk: connection requested by <judi>@<_____>
talk: respond with : talk <judi>@<_____>
Using this example, the user would respond by accessing the External Options Menu/Chat and entering judi at the following prompt:
User to Talk (staff@office): judi
Both will receive the following prompt on their screens:
[Connection established]
At this point, you may start chatting!
To exit the Chat option, press [Ctrl] [\] or the [Delete] key.
External Options Menu/ADD USER
This option will allow the user to add new users to a UNIX operating system ONLY. Contact your vendor to add new users to an AIX operating system. When Add User is selected, On-Staff will display the following:
User Name (maximum 8 character):
It is suggested to enter the user’s first name. This must be entered in lower case letters…NEVER capital letters. You may use a combination of alpha and numeric characters. For example, you employ more than one Sue, thus you could add users; sue, sue1, sue2, sue3 or their initials, smb, slm, etc. Press [Enter] after entering the user’s name. On-Staff will display the following (example of adding user michelle):
User Name(maximum 8 character): michelle
Deleting password for user: michelle
Password change is forced for michelle
Press any key to continue.
To exit this option, as noted in the above example, On-Staff displays the message Press any key to continue. Pressing any key will return to the External Options Menu.
NOTE: It is recommended that you log off the system and log on, entering the added user’s name at the login prompt to verify access.
External Options Menu/DELETE USER
This option will allow you to Delete unwanted users from the operating system. For example, person’s who are no longer in your employ. When Delete User is selected, On-Staff will display the following:
User Name(maximum 8 character):
Press [Enter] after entering the user’s name you wish to delete. On-Staff will display the following (example of deleting user sondra):
User Name (maximum 8 character): sondra
Press any key to continue.
To exit this option, as noted in the above example, On-Staff displays the message Press any key to continue. Pressing any key will return to the External Options Menu.
NOTE: It is recommended that you log off the system and log on, entering the deleted user’s name at the login prompt to verify they cannot access On-Staff.
External Options Menu / Archive Reports
Archive Reports allows access to view and/or reprint pre-set automated (Cron) features. Recommended settings are for super bills, paper and electronic claims, follow up letters, and electronic claims reports. Thus, in the event of a lost print out (toner running out, etc.) super bills captured through automation could easily be reprinted eliminating printing a new batch with new super bill numbers. Follow up letters captured through automation can easily be reprinted without having to calculate what dates to use in the /Billing/Follow Up/Itemized/Group of Patients screen. Electronic claims reports for submitted claims, ERA or Eligibility, etc. produced from automated electronic billing, etc. can easily be reprinted. All other automated features are easily reprinted (reproduced) through OnStaff’s menus (i.e., /Billing/Insurance or Statement for reprinting HCFAs or Statements, etc.). Archive Reports will hold captured files for six weeks. Files will be automatically deleted after six weeks.
Print / View an Archived File
1) Access the External Options Menu by pressing [Ctrl] [E]. Arrow down to and press enter on the Archive Reports option. A screen similar to what follows will display.
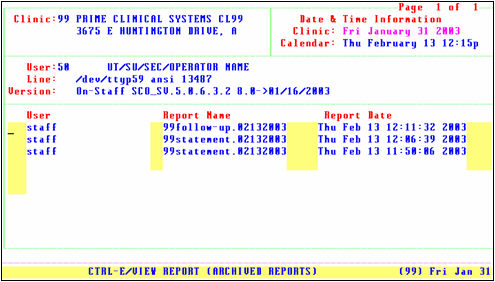
2) Place the cursor next to the report to be printed and press ‘I’ (capitol i). A screen similar to what follows will display.
3) While in the selected screen, to move in the file to view it’s contents use the following keys. To exit the screen press [End] or [Q] (quit).
[Page Up], [Page Down], [<] moves to the left, [>] moves to the right, [Shift] [G] goes to the end of the file, move in the direction of the arrows: 
4) While in the selected screen, to print the file, press ‘P’ to obtain the printer destination prompt as displayed in the following example. Enter your desired printer destination (the example is showing COPY as the printer destination). To exit the screen without printing, press [End] or [Q]

NOTE: Your printer destination may not be named COPY, contact support for clarification. Printing an archived file to printer destination COPY will create a new/duplicate archived file as well.
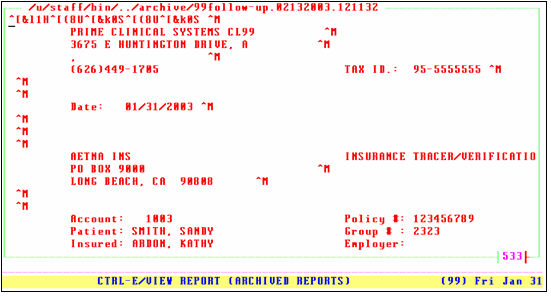
External Options Menu/VIEW REPORT
This option allows the user to view, delete or print a summary report for paper claims, electronic claims and/or statements requested through Group of Patients (i.e., billing requests made through Batch of Patients are not listed here). This report summarizes by category and displays/prints the dollar amount processed, how many patients within the specified category were processed, and each category’s percentage of the total. When View Report is selected, On-Staff will display the following:
Pressing the [F2] search key while in the above screen will display the following choices:
I - Review (inquire) the report. After pressing I, pressing P will print the displayed report.
D - Delete the report from memory.
Q - Quit the View Report option.
When I is selected, the following keys allow you to move around the screen:
[Page Up] To scroll the screen up.
[Page Down] To scroll the screen down.
[<] To scroll the screen to the left.
[>] To scroll the screen to the right.
P Print this report.
Q Exit the report.
External Menu New Features
1. Release Notes –Will connect to our website and display the latest update changes/corrections
2. Prime Email – Will take the user to their email option to send PCS an email to support@primeclinical.com.
3. On-Line Documentation – Displays options for the user to VIEW the ‘Manual’ on line.
4. Prime Website – When the client is on current support, will connect them directly to our website.
5.Prime News – Will direct the user to our website and display options for them to view the LATEST ‘Industry’ changes’ and our News Letters.