OnSTAFF 2000
Schedule/RECALL

This option is for scheduling and printing recall letters (or any type of letter which the user may decide to set up). On-Staff has a library of letters that will advise the patient that it is time to schedule an appointment for the indicated care, their lab test was normal/abnormal, and more. Additional letters may be added or existing letters modified through /Utility/Messages/Message (See Session II Training Documentation). When the Recall option is selected On-Staff will display the following:
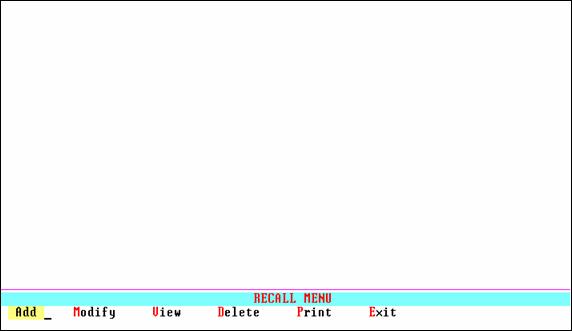
Menu Options:
Add Add or schedule a Recall.
Modify Modify an existing Recall scheduled.
Delete Delete a scheduled Recall.
View View a scheduled Recall.
Print Print patient Recall letters, a list of the letters scheduled to print and/or mailing labels.
Exit Returns to the Schedule Menu.
/Schedule/Recall/ADD
This option will allow you to add, modify and delete a recall letter. When the Add option is selected On-Staff will display the following:
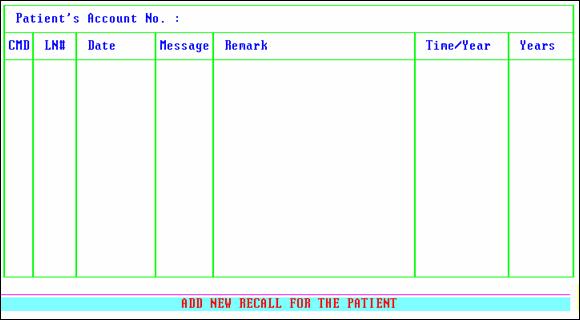
Patient's
Account No. Enter the account number of the patient. If you do not know the account number, enter the patient’s full name (last name, first name) and press [Enter]. On-Staff will then display the Selection Screen for Patient displaying all the patients whose names match the name entered. If you know only part of the patient’s name, you may use a Wild Card search. Highlight the desired patient and press [Enter].
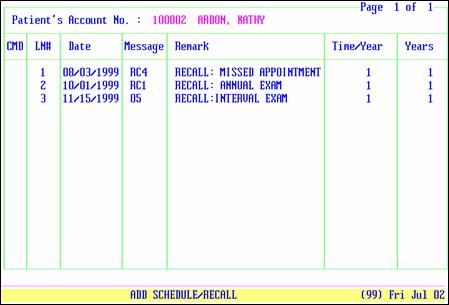
When the patient has had previously scheduled recalls: On-Staff will display these recalls and the cursor will be in the CMD (command) column.
When this is the first recall scheduled for the patient On-Staff will display 1 in the LN# column with the cursor in the Date column. Continue at Date
Date On-Staff will display the clinic date. Enter the date you want this recall printed. When assigning a date, remember to allow time to mail the letter, for the patient to call in to schedule the appointment, and also consider how far into the future your provider is booked.
Message Enter the appropriate recall message for the patient. This entry is the same as the Message Code for the actual letter in /Utility/Messages/Message. Pressing the [F2] search key will display the following valid choices standard to On-Staff (see Defining and Setting Up Your Recalls to customized this area to your needs):
RC1 Recall for Annual Exam
RC2 Recall for Overdue Follow Up
RC3 Recall for Pap Test
RC4 Recall for Missed Appointment
RC5 Recall for Payment Plan
RC6 Recall for Pre-Op
RC7 Recall for New Patient
RC8 Recall for Normal Lab Result
RC9 Recall for Abnormal Lab/Need Appointment
O1 Recall for Glaucoma Exam
O2 Recall for Annual Visual Field Exam
O3 Recall for Interval Exam w/Tests
O4 Recall for Repeat Retinal Evaluation
O5 Recall for Interval Exam
O6 Recall for Re-evaluation of Lens Implant
O7 Recall for Annual/Semi-Annual Eye Exam
O8 Recall for Fluoroscein Angiogram
MAMRCL Recall for 1 Year Mammogram
BXRCL Recall for 6 Month Biopsy Check
PTCALL Recall for Appointment Reminder
Remark On-Staff will automatically display the pre-defined remark set up in /Utility/Messages/Remark (see Defining and Setting Up Your Recalls to customized this area to your needs).
Time/Year Enter how many times, in a one year period, you would like to print this recall for the patient.
Years Enter how many years you would like to print this recall for the patient.
NOTE: After the information has been entered into the Time/Year and Years fields On-Staff will calculate the number of recalls necessary and will then display a separate line for each.
After pressing [Enter] at the last field, the cursor will return to the Date column allowing you to review the information entered. Press [Enter] to make corrections to the Message, Time/Year or Year fields or press [“] to exit the loop. The cursor will return to the CMD (command) column.
CMD Press Q (quit) and the cursor will go to the Patient’s Account No. field. You may enter the next account to schedule a recall for or press [“] to return to the Recall Menu. Pressing the [F2] search key will display the following valid choices:
A Add Recall for the Patient
M Modify Recall for the Patient
D Delete Recall for the Patient
A (add) On-Staff will assign the LN# column the next consecutive number and the cursor will go to the Date column allowing you to schedule another recall letter.
M (modify) On-Staff will move the cursor to the Date, Message, Time/Year, and Years fields allowing changes to be made as desired. After pressing [Enter] at the Years field, the cursor will return to the Date field, allowing you to review the changes for accuracy. If satisfied, press [“] and the cursor will return to the CMD (command) column.
D (delete) With the cursor adjacent to the desired line press D and On-Staff will display the following:
Would You Like to Delete ( Y/N )
Answering N (no), the cursor will return to the CMD (command) column and the record will not be deleted. Answering Y (yes) On-Staff will display the following:
From Line Enter the beginning LN# of the Remark code(s) to be deleted.
To Line Enter the ending LN# of the Remark code(s) to be deleted.
NOTE: When a line has been deleted, the remaining dates will resort themselves after you exit and re-enter the Recall screen.
Software Requirements for Recalls
To define your own recalls or other letters printed through the recall area or to modify and/or delete the standard On-Staff recalls, there are three areas of On-Staff that need to be addressed:
1) /Utility/Set Up/Field Choice/Modify Field Name: rc_me
This area contains the choices displayed when the [F2] search key is used on the Message field of the /Schedule/Recall screen.
2) /Utility/Messages/Remark
This area is a necessary link between the Message field of the /Schedule/Recall screen AND the letter entered at /Utility/Messages /Message.
3) /Utility/Messages/Message
This area contains the body of all letters printed through the Recall option.
You may want to take a screen print ([Ctrl] P) of both pages of the choices displayed when the [F2] search key is used on the Message field of the /Schedule/Recall screen to assist you in modifying or deleting choices. The Message Code (/Utility/Messages/Message) and Remark Code (/Utility/Messages/Remark) are identical to these choices. You may add, modify or delete choices. For example, one of the choices listed is RC1 Recall for Annual Exam. You may either modify the description of the recall (/Utility/Set Up/Field Choices/Modify Field Name: rc_me AND /Utility/Messages/Remark/Modify Remark Code: RC1), AND modify the letter itself (/Utility/Messages/Message/Modify Message Code: RC1) OR delete RC1 from all three areas of On-Staff, adding your own recalls to all three areas as desired.
1) Go to /Utility/Set Up/Field Choices/Modify Field Name: rc_me. From the C (command) column, press A (add), M (modify) or D (delete) to define or remove the appropriate Field Values.
2) Go to /Utility/Messages/Remark and choose Add, Modify or Delete to define or remove the appropriate Remark Code(s). These codes are identical to the choices displayed when [F2] is used in the Message field of the /Schedule/Recall screen and the Message Code in the /Utility/Messages/Message area. Remember to enter R as the Remark Type. To modify or delete recalls O1 through O8, be sure to enter capital O (NOT zero) and the numeric value or the following message will appear:
Remark: Record does not exist. Press Any Key To Continue.
3) Go to /Utility/Messages/Message and choose Add, Modify, or Delete to define or remove the appropriate Message Code(s). These codes are identical to the choices displayed when [F2] is used in the Message field of the /Schedule/Recall screen and the Remark Code in the /Utility/Messages/Remark area. Remember when adding or modifying, use your [’] arrow key to indent nine spaces before adding to or modifying the body of the recall letter. To modify or delete recalls O1 through O8, be sure to enter capital O (NOT zero) and the numeric value or the following message will appear:
Record Not Found. Press Any Key To Continue.
Add recalls at Main Menu/Schedule/Recall.
Example:
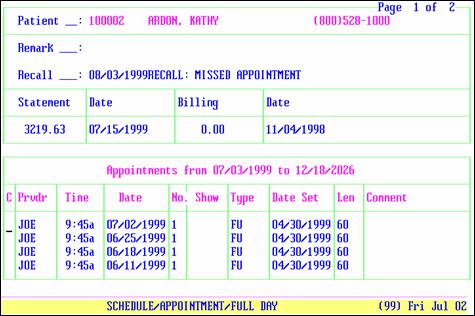
Recalls display in the patient’s appointment ledger. The following example shows the above recall for 08/03/1999 being displayed. Once the clinic date passes 08/03/1999, the above recall for 10/01/1999 would display next and so on.