
OnSTAFF 2000
SHUTDOWN, BACKUP and VERIFY PROCEDURES
SHUTDOWN PROCEDURES
It is recommended to perform a shutdown on a weekly basis. AIX, UNIX and XENIX are all different variations of a multi-user environment. This means two or more people may work on the machine at the same time accessing the same files. Unlike DOS, you may not just turn off the computer at the end of the day. This can cause serious damage to the file system and/or your programs. A procedure called shutdown is necessary to close all open files and reset all attached devices. Think of it like a file cabinet. Before locking the file cabinet, you have to put back all the pulled files and shut the drawers. A simple comparison, but similar. The following steps will instruct you through the shutdown procedure.
5 SIMPLE STEPS TO A SHUTDOWN
1. Go to the main console’s, main screen (Alt F1).
2. Log in as ‘root’.
3. Check to see who is logged on.
4. Broadcast a message to users if necessary.
5. When ready to proceed, type in the shutdown command.
1. The shutdown MUST be performed from the main consoles, main screen (Alt F1) making sure all alternate screens are logged off.
2. Log in as root and press [Enter].
Type the root password and press [Enter]. You will not see anything on your screen when the password is entered. If you do not know the root password, your vendor will require written authorization from the office management in order to reveal the root password to staff members.
At the TERM= (*): prompt press [Enter] (TERM=(*) is specific to your terminal type, i.e., ansi, ibm3151, etc.). You should then see the pound sign prompt (#).
Example:
login: root [Enter]
Password: type in password and press [Enter]
Term=(ansi) [Enter]
#__
3. To verify that you are the only person logged on the system, at the # (pound) sign, type who in lower case letters followed by pressing [Enter]. This will display all persons logged into the system, root should be the only user currently logged in. If this is the case, proceed with steps 4 (optional) and 5 (actual shutdown procedure).
Example of only root logged in:
#who [Enter]
root ttyp0 Apr 07 14:26
#__
If there are users other than root still logged in, you can send a broadcast message by completing step 4 or personally request the user(s) to log off the system.
Example of other users besides root still logged in:
#who [Enter]
root ttyp0 Apr 07 14:26
derrick ttyp2 Apr 07 08:35
june ttyp3 Apr 07 10:41
staff ttyp4 Apr 07 09:00
#__
4. Step 4 is optional. The command for sending a broadcast message is wall. Simply type the word wall and press [Enter]. Next, type the message you would like to send, press [Enter], followed by pressing [Ctrl] [D]. This will send the message to all terminals that have users logged in.
Wall Example:
# wall [Enter]
You have 30 seconds to log out before shutdown begins! [Enter] [Ctrl] [D]
You may proceed with Step 5 (the shutdown procedure) when all users are logged out. To verify all users are logged out, repeat Step 3.
Following are simple, step 5 instructions to proceed with the shutdown procedure for AIX, UNIX and XENIX operating systems. Be sure to select the correct instructions for your operating system!
AIX SHUTDOWN PROCEDURES
5. Proceeding with Shutdown
At the pound sign type shutdown -Fr then press [Enter]:
#shutdown -Fr [Enter]
The command shutdown -Fr brings the system down and reboots. To shutdown and power off the system type the command shutdown -F. If you have automated features running at night, it is recommended you use shutdown -Fr.
The system will proceed. You will see the following messages:
SHUTDOWN PROGRAM
(date and time)
Process accounting stopped...
Error logging stopped
Stopping NFS/NIS Daemons
Stopping TCP/IP daemons: lpdlpd: Terminating.
routed gated sendmail inet
All processes currently running will now be killed ...
Unmounting the file systems ...
At this point, if you typed the command shutdown -F you will see the following message
** Halt Completed **
At this point it is safe to turn the power off on the main CPU.
If your original command was shutdown -Fr the following messages will appear:
Rebooting . . .
Saving Base Customize Data to boot disk
Starting the sync daemon
Starting the error daemon
System initialization completed
Starting Multi-User Initialization
Performing
Next, the login prompt will appear:
IBM AIX Version # for RISC System/6000
(C) Copyrights by IBM and by others 19##, 19##
login:
At this point all users may login.
NOTE: It is important to remember that if you have features set to automatically run at night (Backup, Electronic and Paper Billing, Statements, etc.) that you leave your system on. This means that after you shutdown your system, be sure to reboot.
UNIX SHUTDOWN PROCEDURES
5. Proceeding with Shutdown
At the pound sign type shutdown -y -g0 (zero not O) in lower case letters then press [Enter]:
# shutdown -y -g0 [Enter]
After a few moments the system will prompt:
“Shutdown in progress, please wait”
The system will proceed with the actual shutdown process, then you will see the following message:
**Safe to Power Off **
-or-
** Press Any Key to Reboot**
After the Safe to Power Off message appears, you may turn the power off on the main CPU. To bring the system up, wait thirty (30) seconds, then turn the power back on. The system will now begin checking the memory and will then display the following message:
SCO System V/###
Boot
:
Press [Enter] at the : (colon) prompt:
: [Enter]
Next the system will check hardware integrity and display the following message for normal startup:
INIT: SINGLE USER MODE
Type CONTROL d to proceed with normal startup,
(or give root password for system maintenance):
Press [Ctrl] [D] to proceed with normal startup. The system will then prompt for the current system date and time (this is the calendar date which should not be confused with your clinic/posting date):
INIT: New run level: 2
Current System Time is Tue Oct 12 10:37:00 PDT 1993
Enter new time ([yymmdd]hhmm):
If this is correct simply press [Enter], otherwise follow the example below to change the date and time:
yy - Used to indicate two-digit year, for example 1995 will be entered as 95.
mm - Used to indicate two-digit months, for example April will be entered as 04.
dd - Used to indicate two-digit day, for example the first will be entered as 01.
hh - Used to indicate two-digit hour in military time, 4:35 p.m. will be entered as 16.
mm - Used to indicate two-digit minutes, for example .4:35 p.m. will be entered as 35.
Using the above examples the date would be entered as follows:
Enter new time ([yymmdd]hhmm): 9504011635 [Enter]
After accepting the new date value the system will then display the new date and time:
Thu Apr 01 04:35:00 PST 1993
Shortly after entering the date and time the system will initialize ports and printers, display a black screen with and x in the center, then display the SCO screen asking for password and login. At this point, hold down [Ctrl] [Alt] and press [F1] to finally display the login prompt:
Yourname
Welcome to SCO Unix System V/### Release #.#
Yourname!Login:
At this point all users may log into the system.
NOTE: It is important to remember that if you have features set to automatically run at night (Backup, Electronic and Paper Billing, Statements, etc.) that you leave your system on. This means that after you shutdown your system, be sure to reboot.
SHUTDOWN REMINDERS
· In all cases, you must make sure everyone is logged off the system prior to doing a shutdown.
· It is recommended to do a shutdown at least weekly. It is necessary to clear out the /tmp directory as this area holds temporary files such as print requests for superbills, registration forms, appointment schedules, claim forms, screen prints, electronic billing reports, etc. When this directory is full, the following could happen: your system is sluggish, after transmitting electronic claims no report prints, when searching for a patient nothing happens, superbills don’t print and [Ctrl] [X] states ‘Completed’, or when trying to print patient ledgers On-Staff displays the prompt An internal error has occurred-Please check the error log and upon checking the error log no information is found. As you can see, performing a shutdown clears out the /tmp directory allowing for optimal performance. Since everyone must be logged off the system during the shutdown and reboot process we recommend doing this when the least number of users are logged on such as during lunch. Others may choose to shutdown and turn off the system on Friday bringing it backup on Monday morning.
· Automated features will not run if the system is shutdown and turned off. For example, functions such as backup, account aging and update may have been set to automatically run nightly. None of these functions will run Friday evening if the system is shutdown and turned off over the weekend. Therefore, if for some reason the system needs to be restored the only available verified backup tape would be from Thursday and all of Friday’s work would then be lost. Also, electronic claims cannot be transmitted, superbills, statements, paper claims, follow up letters for unpaid claims cannot print.
REQUIRED BACKUPS & VERIFY
The importance of a daily backup and verify routine cannot be stressed enough. This procedure could prevent the loss of hours, days, and months of work if something should happen to your computer. Data corruption or loss is possible due to computer malfunction, user error, natural disaster, theft, fire, physical damage, program failure, power failure, software/hardware failure, or hard drive crash. Unless the above steps are done correctly, your vendor cannot and will not insure the possibility of any data recovery.
It must be understood that your vendor does not do your backup for you, and your vendor is not responsible for any data loss, recovery, restoration, repair, or incidental, indirect, or consequential damages whatsoever (including, without limitation, damages for loss of business profits, business interruption, loss of business information, or any other monetary loss). The following steps, if done properly, should adequately protect your system from potential data corruption or loss.
You must let your vendor know if you are using Word Perfect on your system as they will need to modify the default settings of the automatic and manual backup to adequately backup your word processing files also.
The following items must be completed in the manner explained below. If you have any problems understanding or completing these instructions, contact your vendor. It is your responsibility to inform any new employees of the following mentioned steps and policy.
1) Your vendor does not do your backup for you. The server (main computer) in your office does the backup on a nightly basis. Most client backup is done automatically at approximately 9pm. In no way does your vendor check, maintain, verify, or perform the backup for your practice.
2) It is your responsibility to have at least eight (8) tapes in good working order. Five of these tapes must be rotated on a daily basis for the automatic backup. This will insure at least five copies of your database in the event of a system failure. These five tapes should be labeled Monday through Friday.
3) In addition to the five tapes used in the automatic backup, you must have three more tapes to perform a manual backup at least once a week. This will insure you have a good backup in the case your automatic backup is not working.
4) Backup tapes should be replaced on an annual basis.
5) It is your responsibility to daily verify your backup. We suggest that in the morning while the previous days tape is currently in the drive, you perform your daily viewing. After successfully viewing the tape, you need to remove the tape from the drive and insert the current day’s tape.
6) It is your responsibility to take your daily and/or weekly backup tape somewhere safe off site. This will guard against natural disasters, fire, or theft.
7) It is your responsibility to daily verify each backup and weekly perform a manual backup.
VERIFY
All users may be logged on and performing their individual tasks while the backup is being verified. We suggest you verify each backup.
4 EASY STEPS TO VERIFY
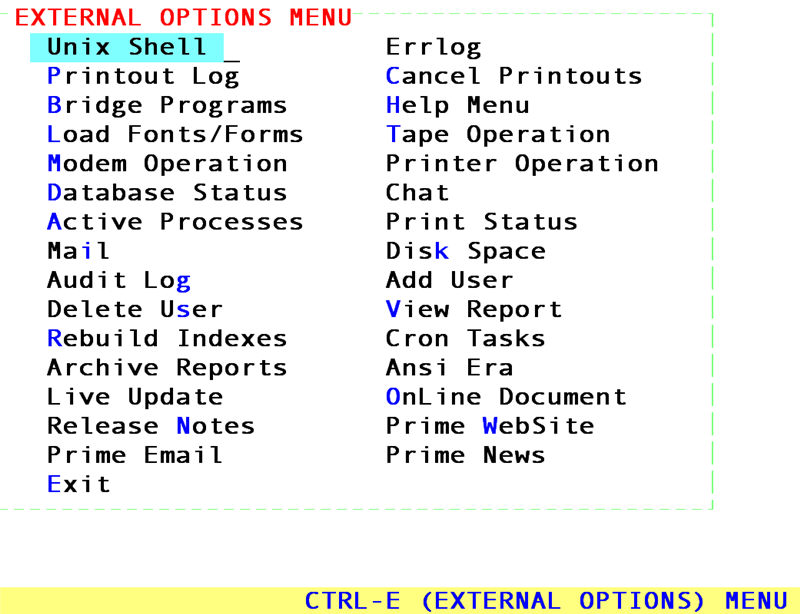
1. External Options Menu ([Ctrl][E]).
2. Select Tape Operation.
3. Select View.
4. Verify file.db appears and tape then continues and its date is correct.
While the backup tape is in the backup device, go to the External Options Menu ([Ctrl] [E]) and select Tape Operation:
From the Tape Operation Menu select View:
Tape Operation
Tape Status Rewind Retension View ç Exit
The screen will display the contents of the tape . The most important file to look for is file.db. The system will pause at this file for approximately 10-60 minutes. When it pauses at this file you must check to see that the date matches the expected date of that backup. The line will look
VERIFY continued
similar to the one below Note the date or size will NOT match the sample below. The date should be that of the calendar date the backup was actually created.
rwxrwxrwx 0/3 37595800 Aug 18 13:43 1999 /u/staff/bin/file.db
NOTE: If you do not see the file.db line or the date is incorrect (within one day of expected date), contact your vendor immediately. Remember, in the case of an accident or equipment failure, your backup is your only means of restoring your data.
After the file.db line is shown the tape will continue to show other miscellaneous files until the View is completed. If the program does not continue after the file.db line or does not display the prompt, Press any key to continue, contact your vendor immediately.
When the process is completed, On-Staff will display the message:
Press any key to continue.
Press any key to return to the Tape Operation Menu.
Quick Verify Backup Instructions:
1.) The previous day’s tape should still be in the tape drive. If it is not place it there.
2.) Press [Ctrl][E] (Hold down the Ctrl key while tapping the E key)
3.) When the External Options Menu appears choose Tape Operation then choose View from the menu section below.
4.) This will list all the files on your tape. We are mainly concerned with one of these files. The name of this file is named on the screen “file.db”. The system will pause at this file for approximately 10-60 minutes. When it pauses at this file you must check to see that the date matches the expected date of that backup. The line will look similar to the one below. *Note the date or size will not match the sample below. The date should be that of the calendar date the backup was actually created.
5.) After the “file.db” line is shown the tape will continue to show other miscellaneous files until the View is completed.
6.) If the program does not continue after the “file.db” or does not display the line: “Backup Completed Press Enter to Continue.” prompt please call Prime Clinical Systems, Inc. immediately.
rwxrwxrwx 0/3 37595800 Aug 18 13:43 1999 /u/staff/bin/file.db
NOTE: If you do not see the above line or the date is incorrect (within 1 day of expected date) call Prime Clinical Systems, Inc. immediately. Remember, in the case of an accident or equipment failure, your tape backup is your only means of restoring your data.
MANUAL BACKUP
In addition to the automatic daily backup, which requires one tape for each workday in the week, you must have three additional tapes to perform a manual backup at least once a week. This will insure you have a good backup in the case your automatic backup is not working. Following are four easy steps to performing a manual backup and verify.
|
|
|
|
4 EASY STEPS TO BACKUP & VERIFY
1. Make sure everyone is logged off.
2. Put the tape in the backup device.
3. Start the backup manually.
4. Verify your backup tape.
1. Make sure EVERYONE is logged off! This can be done by going to the External Options Menu ([Ctrl] [E]) and selecting Unix Shell:
At the shell prompt type who (in lower case lettering) and press [Enter]. This will display anyone left remaining on the system that needs to log off. Pressing [Ctrl] [D] will display the message Press any key to continue. Pressing any key will return to the External Options Menu.
2. Insert the backup tape into the backup device. Every week rotate to a different one of the three tapes.
3. To perform the manual backup, from Main Menu select Misc:
MAIN MENU
New Patient Charges Payment Account Ledger Date
Billing Management Utility Schedule Misc ç Exit
From the Misc File Menu, select Back Up:
MISC FILE
Back Up ç Load Forms Status Exit
The backup is completed when the Misc File Menu is again displayed on the screen.
Quick Manual Backup Instructions:
1.) Every week rotate to a different one of the three tapes and do the following:
1.) Have everyone except the main console log out ([Ctrl][E], Unix Shell, who, [Ctrl][D]).
2.) Insert one of the three tapes designated for this use in the tape drive (not the tape used the previous week)
3.) Log in as usual, select from the Main Menu, Misc then Backup press [Enter].
This will start the manual backup. It will run for approximately 10-60 minutes. No other users may log in during the manual backup. If you see the backup complete and you receive the message “Press any key to continue” the backup has completed. If there is any error message(s) whatsoever, do not use the system and call your vendor immediately.
2.) After you perform the manual backup for the week, take that tape to somewhere safe off site. This will guard against natural disasters, fire, or theft. You may swap it with the next manual backup on the following week.
BACKUP & VERIFY REMINDERS
l In all cases, you must make sure everyone is logged off the system prior to doing a BACKUP.
l Users may be logged on and performing their tasks while verifying a backup.
l We strongly recommend verifying your daily backups at least once a week, if not daily.
l Keep labeled backup tapes off the premises or in a fireproof safe.
l Make replacing ALL the backup tapes part of your year-end routine.
l The automated backup feature will not run if the system is shutdown and turned off.
l The importance of verifying a backup cannot be over emphasized. The computer may have been stolen, destroyed in a natural disaster, or the hard disk simply went bad. In any case, the data stored on the backup tape is all you have to rely on. But what if the backup tapes are not any good? A question no one wants to answer, however, it is something that should be thought about before an incident occurs, not after. Thus, the importance of verifying each backup!