Intellect™
LEDGER MENU OPTIONS

Collection
This menu option is used primarily to search for and display ledger remarks, letters, and tasks for patient accounts. Remarks may also be added by the clinic.
The top section of the Collection screen is a selection criteria entry area.
The bottom section of the screen is affected by the account and search criteria. It opens either of two ways:
• with an option to add a <Remark> for a single selected patient. This display is almost completely identical to the account display seen in Ledger --►Open Item and Ledger --►Accounting. See Add a Remark below for details.
- OR -
• as a multi-line table of ledger remarks as requested in the various search criteria fields. See Multi-Line Table below for details. Note: The multi-line table display of ledger remarks can also be accessed by patient account through Ledger --►Open Item and Ledger --►Accounting by using the command 'Q' in the Command Column.
Videos Available: Click Collection Overview or Collection Ledger to access the links. Depending on the system set up, the media player may need to be activated. Speakers need to be attached to the workstation to hear the instructions.
Note: To view the videos, log-in through the www.primeclinical.com website. Current support is required.
Additionally, Prime Clinical offers webinars/workshops on a variety of topics. For more information, contact PCS support.
1. To display the Collection Ledger in Intellect, go to Ledger --► Collection
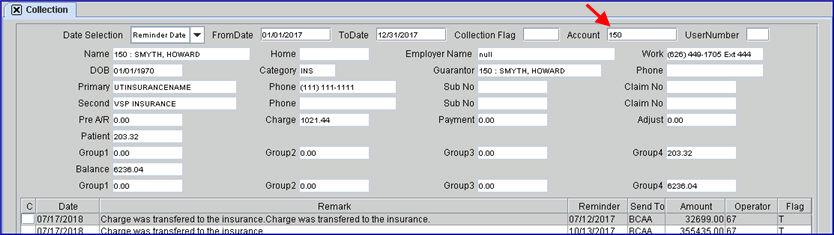
The Collection screen displays:
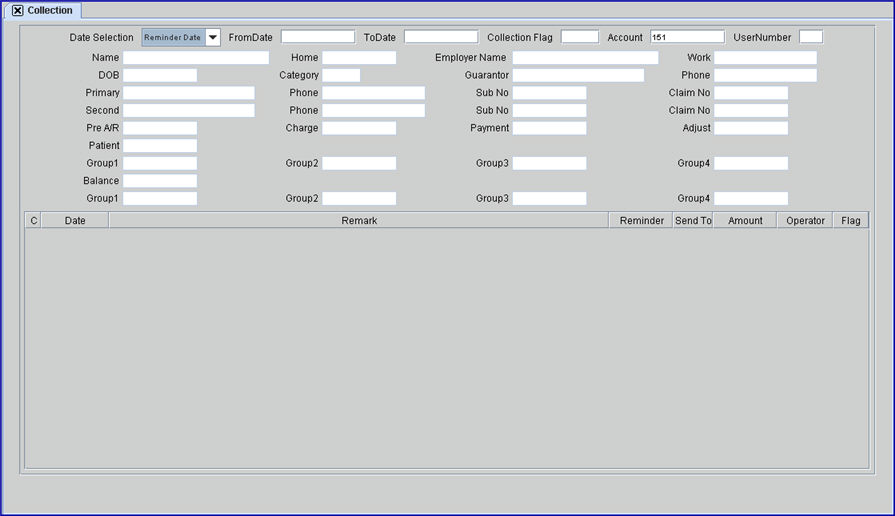
Selection Criteria Entry Area (top section of the Collection screen)
Users must make at least one entry other than the Date Selection or an error occurs.
2. Date Selection 
2.1 This search parameter determines what results are returned in the multi-line table.
2.2 Accept the default, Reminder Date, OR use the drop-down list to select Entry Date.

2.3 Reminder Date is usually the Calendar Date on which the task completed when the remark is system-generated. Refer to the chart below for exceptions.
2.4 Entry Date is usually the Entry Date/Clinic Date on which the task completed when the remark is system-generated. The current Clinic Date is displayed on Intellect's blue Title Bar:
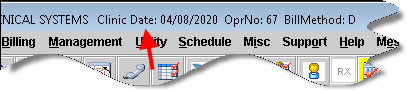
Refer to the chart below for exceptions.
|
Flag |
Remark |
Date |
Reminder |
|
System generated remarks: |
|||
|
I (paper claim) |
BILL WAS SENT TO THE INSURANCE… |
Clinic Date
|
Calendar Date |
|
TRACER WAS SENT TO INSURANCE… |
|||
|
WC PACKAGE WAS SENT TO INSURANCE… |
|||
|
E |
ELECTRONICALLY BILLED THE INSURANCE… |
Clinic Date |
Calendar Date |
|
S |
STATEMENT WAS SENT TO THE PATIENT. |
Clinic Date |
Calendar Date |
|
ATTORNEY STATEMENT SENT TO… |
|||
|
COMPANY STATEMENT… |
|||
|
R |
RECALL LETTER… |
Clinic Date |
Calendar Date |
|
F |
FOLLOW UP LETTER…SENT TO… |
Clinic Date |
Calendar Date |
|
L |
PRINT LETTER… (from Billing --► Worker --► Letter) |
Clinic Date |
Calendar Date |
|
T |
Tagged remarks entered for a specific charge line. |
Calendar Date |
DOS |
|
User generated remarks: |
|||
|
X |
Remarks entered by user to display at login on Reminder date. |
Clinic Date |
User Entered |
|
|
All other flags and user entered remarks. |
Clinic Date |
(blank by default) User Entered |
3.1 If desired, enter the beginning date of tasks to view based on either the Entry Date or Reminder Date, as selected.
3.2 Leave this field blank to view all patient transactions.
4. ToDate 
4.1 If desired, enter the ending date of tasks to view based on either the Entry Date or Reminder Date, as selected.
4.2 Leave this field blank to view all patient transactions.
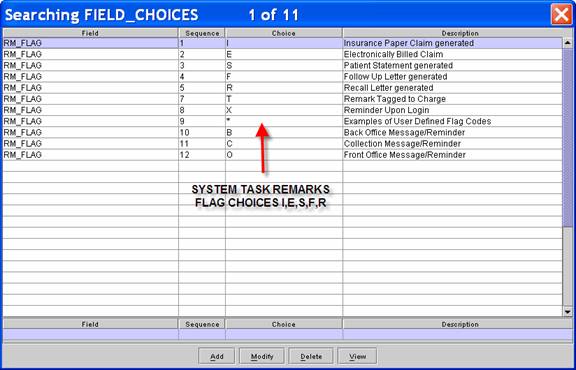
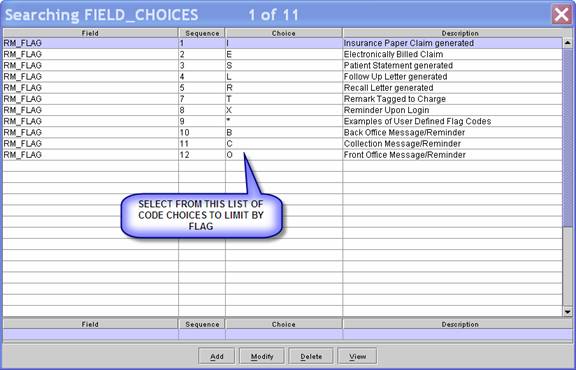
5.1 If desired, enter the Collection Flag <Choice > (Column Code) to return only remarks associated with that flag.
5.2 Leave this field blank to view all flag types.
5.3 This field accepts multiple Flags separated by a comma and no spaces. For example:

5.4 Press the [F2] search key to display the valid choices:
6. Account 
6.1 To return only a single patient account, enter the account number of the patient to be viewed or flagged.
6.2 If the system defaults a recent Patient No., use the [Spacebar] or [Backspace] to clear and enter the desired number.
6.3 Leave this field blank to view all Accounts.
7. User Number 
7.1 To limit the return information for only a specific user (operator), enter the Utility --► Set Up --► Security --► Login Users <User Number>.
7.2 Leave this field blank to view all user tasks.
Pressing [Enter] while the focus is in the <User Number> field completes the following informational fields:
8. Name 
8.1 The patient's name displays as Last, First.
8.2 This is a read-only field and may not be accessed for modification.
9. Home 
9.1 The patient's phone number displays, based on the <Home Phone No> field on the patient's registration screen.
9.2 This is a read-only field and may not be accessed for modification.
10. Employer Name 
10.1 The patient's employer name displays, based on the <Employer Name> field on the patient's registration screen.
10.2 This is a read-only field and may not be accessed for modification.
11. Work 
11.1 The patient's work phone number displays, based on the <Phone> field on the patient's registration screen.
11.2 This is a read-only field and may not be accessed for modification.
12. DOB
12.1 The patient's date of birth displays, based on the <DOB> field on the patient's registration screen.
12.2 This is a read-only field and may not be accessed for modification.
13. Category 
13.1 The patient's Category is displayed based on the <Category> field on the patient's registration screen.
13.2 This is a read-only field and may not be accessed for modification.
14. Guarantor 
14.1 The patient's Guarantor's name displays as Last Name, First Name.
14.2 This is a read-only field and may not be accessed for modification.
15. Phone 
15.1 The patient's Guarantor's phone number displays.
15.2 This is a read-only field and may not be accessed for modification.
16. Primary 
16.1 The primary insurance company name displays.
16.2 This is a read-only field and may not be accessed for modification.
17. Phone
17.1 The primary insurance company phone number displays.
17.2 This is a read-only field and may not be accessed for modification.
18. Sub No 
18.1 The subscriber number for the primary insurance displays.
18.2 This is a read-only field and may not be accessed for modification.
19. Claim Number 
19.1 The claim number from the primary insurance displays.
19.2 This is a read-only field and may not be accessed for modification.
20. Second 
20.1 The insurance company name for the secondary insurer displays.
20.2 This is a read-only field and may not be accessed for modification.
21. Phone
21.1 The secondary insurance company phone number displays.
21.2 This is a read-only field and may not be accessed for modification.
22. Sub No
22.1 The subscriber number for the secondary insurance displays.
22.2 This is a read-only field and may not be accessed for modification.
23. Claim No
23.1 The claim number from the secondary insurance displays.
23.2 This is a read-only field and may not be accessed for modification.
24. Pre A/R 
24.1 This is a rarely-populated field showing account discrepancies.
24.2 This is a read-only field and may not be accessed for modification.
25. Charge 
25.1 The total of all charges for the selected <FromDate> forward is displayed.
25.2 Data is from the committed charges on the Charges --►Charge screen.
25.3 This is a read-only field and may not be accessed for modification.
26. Payment 
26.1 The total of all payments for the selected <FromDate> forward is displayed.
26.2 Data from committed payments on the Payment screen.
26.3 This is a read-only field and may not be accessed for modification.
27. Adjust 
27.1 The total of all adjustments for the entered <FromDate> forward is displayed.
27.2 Data from committed adjustments on the Payment screen or the Charges --►Charge screen.
27.3 This is a read-only field and may not be accessed for modification.
28. Patient 
28.1 The total of all unpaid charges that are the responsibility of the patient (guarantor) are displayed.
28.2 This is a read-only field and may not be accessed for modification.
29. Group1 
29.1 Displays the total of all unpaid charges that are the responsibility of the patient (guarantor) that fall within the aging period designated in Utility --► Category <Aging Group 1>.
29.2 This is a read-only field and may not be accessed for modification.
30. Group2 
30.1 Displays the total of all unpaid charges that are the responsibility of the patient (guarantor) that fall within the aging period designated in Utility --► Category <Aging Group 2>.
30.2 This is a read-only field and may not be accessed for modification.
31. Group3 
31.1 Displays the total of all unpaid charges that are the responsibility of the patient (guarantor) that fall within the aging period designated in Utility --► Category <Aging Group 3>.
31.2 This is a read-only field and may not be accessed for modification.
32. Group4 
32.1 Displays the total of all unpaid charges that are the responsibility of the patient (guarantor) that fall within the aging period designated in Utility --► Category <Aging Group 4>.
32.2 This is a read-only field and may not be accessed for modification.
33. Balance 
33.1 Displays the total of all unpaid charges that are the responsibility of the patient's insurers.
33.2 This is a read-only field and may not be accessed for modification.
34. Group1
34.1 Displays the total of all unpaid charges that are the responsibility of the patient's insurers that fall within the aging period designated in Utility --► Category <Aging Group 1>.
34.2 This is a read-only field and may not be accessed for modification.
35. Group2
35.1 Displays the total of all unpaid charges that are the responsibility of the patient's insurers that fall within the aging period designated in Utility --►Category <Aging Group 2>.
35.2 This is a read-only field and may not be accessed for modification.
36. Group3
36.1 Displays the total of all unpaid charges that are the responsibility of the patient's insurers that fall within the aging period designated in Utility --► Category <Aging Group 3>.
36.2 This is a read-only field and may not be accessed for modification.
37. Group4
37.1 Displays the total of all unpaid charges that are the responsibility of the patient's insurers that fall within the aging period designated in Utility --► Category <Aging Group 4>.
37.2 This is a read-only field and may not be accessed for modification.
Bottom Section of the Collection Screen
After entering the last search criteria in the top portion of the Collection screen, the bottom section opens either of two ways:
• with an option to add a <Remark> for a single selected patient. See Add a Remark below for details.
-OR -
• as a multi-line table of ledger remarks as requested in the various search criteria fields. See Multi-Line Table below for details.
If no records were found for the single selected patient, this message displays:
• Select [No] to clear the screen
• Select [Yes] to open a screen with the focus in the <Remark> field to add a remark tagged to a charge:

Note: A remark may also be added via the Ledger --►Open Item or Ledger --►Accounting screens by selecting a procedure and typing 'A' in the Command column.
Properties for user-added remarks
1. Command Column 
1.1 See Multi-Line Table, step 2 for details.
2. Date 
2.1 If manually added in the Collection Ledger (command 'A' from Collection, or 'Q' from Ledger --►Open Item or Ledger --►Accounting), this field defaults to clinic date, but may be changed only the first time when adding. This date, once entered, keeps a permanent record of this transaction.
2.2 If manually added in other Ledgers by attaching the remark to a procedure (command 'A'), this field displays the calendar date and cannot be modified.
3. Remark 
3.1 If a system task is completed, the Remark field displays the appropriate default description and cannot be modified.
3.2 If it is a user-created remark, type a brief description in this box.
4. Reminder 
4.1 The displayed date is defined by the calendar day of the task if it is system-generated, or the posting date if it is a user-defined remark attached to a procedure, otherwise a date can be manually entered or field left blank.
5. Send To 
5.1 Tasks for Insurance Billing and Letters display the insurance company code in this column.
5.2 Statements to patients display '1.'
5.3 Letters and Recalls to patients leave this column blank.
5.4 This is a read-only field and may not be accessed for modification.
6.1 Tasks completed by the system (Statements, Billing, Letters, and Follow Up) display a value here. For system-completed tasks, this is a read-only field and may not be accessed for modification.
6.2 A manually-added task enables this field to accept a value, if desired.
6.3 A task attached to a procedure in one of the ledgers displays the line balance amount.
7. Operator 
7.1 Displays the Utility --► Set Up --► Security --► Login Users <User Number> of the user active (with an operator logged on) when the task was completed.
7.2 If a task is completed by automation, Intellect reads the Utility --► Set Up --► Clinic <Administrator Password> to determine the user number (this number is coded by our staff).
7.3 If this is a user-added remark, the displayed Operator Number may be changed.
7.4 When adding a remark, the field always defaults to the current operator number.
8. Flag 
8.1 All tasks have an assigned Flag indicating the type of remark.
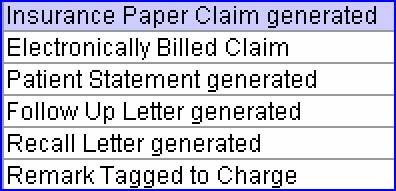
8.2 Use [F2] to display a listing of Ledger Flags:
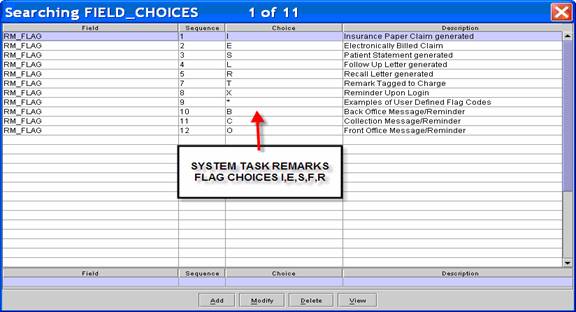
8.3 A noted exception to most Flag types that indicate a task that has been completed is 'X,' which when configured with a Reminder date, displays the Multi-line Table Display of the active account number at the time the remark is added on all Log On for that Reminder date.
8.4 Flag Code I, E, S, F, and R may not be modified, but may be deleted.
8.5 For other Flag types, the <Remark>, <Reminder>, <Amount>, <Operator>, and <Flag> columns may be modified, or the entire Remark may be deleted.
After entering the last search criteria in the top portion of the Collection screen, the multi-line table displays with the focus in the Command Column of the first line:

Note1: The multi-line table display of ledger remarks is also accessed by patient account through Ledger --►Open Item and Ledger --►Accounting by using the command 'Q' in the Command Column.
Note2: To sort any column either by ascending or descending, click the column heading.
1. It is important to note the functionality that this screen provides. Whatever row of the Multi-Line Table is highlighted, it triggers the corresponding Patient Account Number to display in the selection area at the top of the screen. As a result, the information header area displays that patient's information, as available, in the appropriate fields.
2. Type [F2] in the Command Column to display these options:
2.1 In addition to the keys above, these keys are also available:
'G' - Opens Ledger --►Accounting
'R' - Opens Billing --►Follow Up (Letters) --►Batch of Patients
'E' - Opens Ledger --►Open Item
2.2 Note: When using option 'J,' only the reminders set by the current user print. Also, right-clicking in the displayed remarks area then displays this context menu with very similar actions to the previous Key's Help screen:
3. These Ledger remarks are created by Intellect when a certain task has been performed, either by a user or by automation:
For example: