
Intellect™
LEDGER MENU OPTIONS

Review Collection
This menu option is used to open an existing collection file for accounts with unpaid balances, and is designed for internal use. The file may be viewed by selecting a <Status> of either 'Worked' or 'Unworked'. All Collection files are keyed by the operator number of the creator in conjunction with the date of creation. If an operator creates multiple files on the same day, they are combined into one file when working in Review Coll File.
See details on working a Collection File.
Videos Available: Click Review Collection File and/or Collection Overview to access the link. Depending on the system set up, the media player may need to be activated. Speakers need to be attached to the workstation to hear the instructions.
Note: To view the videos, log-in through the www.primeclinical.com website. Current support is required.
Updates:
Effective version 15.02.17 - Modification
Intellect saves the operator code and the clinic date whenever a charge is modified in Charges --►Charge Review, Ledger --►Create Collection, and/or the Ledger --►Review Collection screens.
Effective Version 9.12.14, if creating an XML file from the Create Collection or Review Collection screens, the phone number for all insurances on file for the patient, and the patient home phone number, are included in the XML file.
Note: The XML file is usually used to provide patient, insurance, and charge information to an out-of-office collection agency.
1. To work a Collection File in Intellect, go to Ledger --► Review Collection File:

The Review Collection File screen displays:

Effective Version 9.12.10 - Field Modification. The one- and two-character code choices on the drop-down lists have been replaced with explanatory choices, making the code selection more user-friendly and comprehensive.
Note: The drop-down list descriptions for the code choices have remained the same, allowing correlation between the old and new code choices.
2.1 Type the Utility --►Set Up --►Security --►Login Users <User Number> for the operator who created the file.
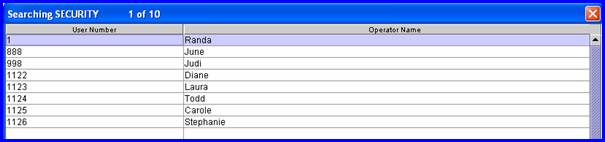
2.2 If the operator number is not known, type up to 10 characters of the operator's name and press the [F2] key. To select the code from the list, either highlight the record and press the [Enter] key, OR double-click on the record. OR, after clearing the field, press the [F2] key twice to view the entire list of operators.
2.3 This field is mandatory and must be completed. If left blank, an error message displays:
Press the [OK] button to return the focus to the <User Number> field.
3. File Date 
3.1 Type the calendar date the file was created OR press the [F2] key to view the list of files for the operator number entered. Highlight the desired file and press [Enter] to select.

3.2 The field is mandatory and must be completed. If left blank, an error message displays:
Press the [OK] button to return the focus to the <File Date> field.
3.3 Note: If an operator creates multiple files on the same day, they are combined into one file when working in Review Coll File.
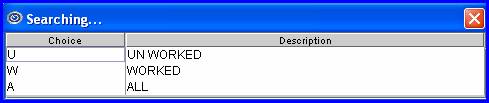
4.1 This is used to select the status of the file entries that display.
4.2 Accept the default Unworked (formerly 'U'), OR use the drop-down to make an alternate selection.
4.3 To view the list of codes with descriptions, click on the field OR press the [F2] key.
To view the list of only the codes, either click on the arrow, OR press the → (right arrow) on the keyboard. To select, double-click on the correct code, OR use the ↑ (up) and ↓ (down) arrows to highlight the correct code, and then press the [Enter] key to select.
Effective version 9.12.10
All versions prior to 9.12.10
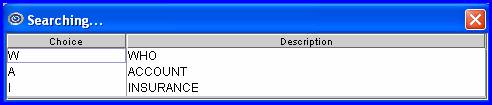
5.1 This is used to select the sort order of the file.
5.2 Accept the default Who (formerly 'W'), OR use the drop-down to make an alternate selection.
5.3 To view the list of codes with descriptions, click on the field OR press the [F2] key.
To view the list of only the codes, either click on the arrow, OR press the → (right arrow) on the keyboard. To select, double-click on the correct code, OR use the ↑ (up) and ↓ (down) arrows to highlight the correct code, and then press the [Enter] key to select.
Effective version 9.12.10
All versions prior to 9.12.10
6. When the information is completely entered, select one of these options:

6.1 Select [Review]:
6.1.1 If the conditions are valid, the previously created file displays.
See Collection File in Ledger --►Create Collection for an in-depth explanation of the file.
Note: Effective version 18.07.18 - New field. Prior to this release, it was found that when posting charges with an encounter that also had a lab in the encounter and the encounter was no longer attached to the charge, the lab was still attached to the charges and printing in Box 32 and was also being included in the electronic 837 submission in NM1-77. As of version 18.07.18, a <Lab> field was added to the Charge Information window to allow the LAB to be removed from the charge history. See sample Charge Information window.
6.1.2 If the conditions are not valid, this message displays:
Press the [OK] button to return the focus to the <User Number> field.
6.2 Select [Clear] to clear all information and return the focus to the <User Number> field.
6.3 Select [Exit] to clear the screen and return the focus to the main Intellect screen.


