Intellect™
MISC MENU OPTIONS

NOTE: Non-commercial email carriers have a cap on the number of emails that may be sent per day. If a clinics' current email carrier does not support the number of emails needed to be sent on a daily basis, the clinic needs to contract with a commercial email vendor.
Utilizing the email capability in Intellect requires these steps:
A. Enter a Valid Email Address
B. Ensure that an 'Email Device' is Enabled
Updates:
Effective Version 9.12.30 - New Feature:
Emailing Encrypted Reports with Financial Information from Intellect
As of version 9.12.30, to meet HIPAA requirements, Intellect documents being emailed are sent as an encrypted pdf attachment which requires a password to open/un-encrypt. The password is sent in a separate email. This applies to ALL reports which include financial information; i.e., charges, payments, adjustments, balances, etc.
The standard message in the body of the email is: 'We have attached a report for your review; the information in the report has been encrypted. The password to open the attachment will be sent in a separate email.'
The message in the body of the email can be customized for your office. To do so, create your message and send the exact text to: support@primeclinical.com. Our staff will set up the message in your system.
The message, standard or custom, is sent in only the first email with the report attached. It is not part of the email containing the password.
Encrypting the report as an attachment and the email message does NOT apply to the Appointment Reminder emails.
Set up must be completed before email may be utilized.
A. Enter a Valid Email Address
Users who are going to use the email function should complete their Utility --► Set Up --► Security --► Login Users <Operator Email> field with a valid email address.
B. Ensure that an 'Email Device' is Enabled
Often, Intellect has a default Email Device which is set up like a Print Device.
1. To add a default Email Device in Intellect, go to Utility --► Set Up --► Printer --►Devices --►Add which provides information in addition to this document for different printer devices. This document includes only the information necessary to configure email.
The Add PRINTER_CODE screen displays:
1.1 Printer Code 
If not already configured, type a code for this device that indicates its purpose; i.e., EMAIL.
1.2 Direction 
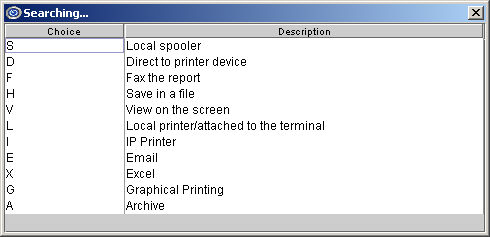
Select 'E' from the drop-down list, as shown in the [F2] screen below:
1.3 Capability Code 
Leave the default.
1.4 Save as Chart 
This field does not apply to email.
1.5 When the information is completely entered, select one of these options:

• Click [Add] to save the information entered on the screen.
• Click [Clear] to remove information from the screen and start over.
• Click [Exit] to leave the Add Printer Code screen and return to the main Intellect screen.
Offices must have a mail server to forward outgoing Email. Whether an Internet Service Provider, a subscription mail server (Yahoo, MSN etc), or an internal server is used, this information is needed:
a. SMTP address
b. User name to connect to the SMTP SERVER, if required
c. Password to connect to the SMTP SERVER, if required
d. What port to use (default 25)
e. Whether or not to use SSL
1. To configure the Mail Server in Intellect, go to Utility --► Tools --► Configuration.
Note: This document includes only the information necessary to configure email. The Utility --► Tools --► Configuration document provides additional information for different situations.
The Modify CONFIG screen displays. Note: Sample settings are shown below. The settings for each office are unique for that office.
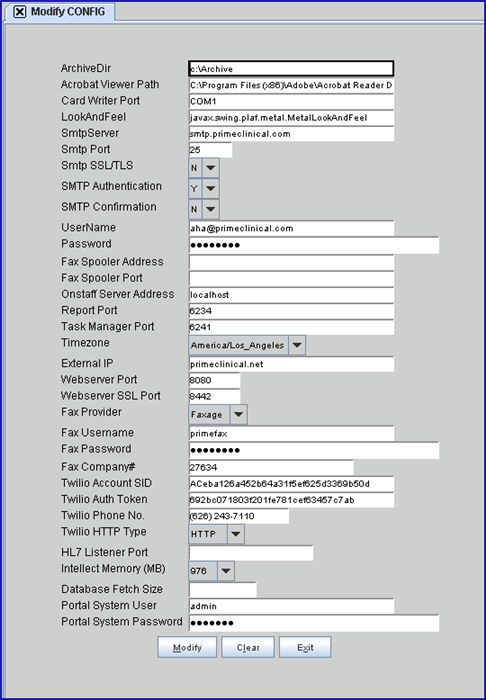
The fields that need to be set up in order to use email are defined below:
1.1 SmtpServer 
Type the address for the mail server’s outgoing mail. For example, smtp.sbcglobal.yahoo.com.
1.2 Smtp Port 
If the server displays port 25, leave this unchanged; otherwise, type in the required port number. If a clinics' SMTP server uses a port other than 25 (the default port for SMTP protocol) and also if it needs to use SSL (secured connection) inform PCS. For example, gmail uses SSL.
1.3 Smtp SSL 
Effective version 17.08.24, Intellect supports TLS security protocol.
Follow the mail provider setup instructions as this can vary per mail provider.
Click on the field, OR press the [F2] key to display the valid choices:
N: Select 'N' if no protocol is required. This is the default.
S: Select 'S' if the email server requires SSL (for example 'gmail').
T: Select 'T' if the email server requires TLS.
1.4 UserName 
Type the user name for the mail server account, if required.
1.5 Password 
Type the password for the mail server account, if required.
2. Press the [Modify] button, shut down Intellect, and re-logon so the settings take effect.

3. These screens accept Email addresses: Registration Regular Patient, Registration Worker, Utility Insurance, Utility Provider, Utility Referring, Utility Business. However, without the aid of Report Designer they DO NOT create automatic Email.
3.1 Intellect uses the Utility --►Set Up --►Clinic <Name> as the sender's name when sending out an email. The person who receives the email sees the clinic's name in the sender column (from column) instead of the sender email address.
3.2 The Utility --►Set Up --► Printer --►Report Set Up <Description> column appears as the email's subject (by default). You may put something more meaningful by modifying that entry.

Note: Additional set up also needs to be done by PCS Support to allow a patient to respond to email reminders. For more information and/or set up, please contact PCS Support.
1. Access the Print Dialog Box
The Print Dialog Box is available from many menu options, including when using a Management Report, a Statement, a letter, a Bill to Insurance, a Super Bill, a Schedule, or a Recall letter, etc.
2. Printer 
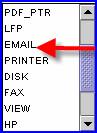
Use the drop-down list to select EMAIL, or whatever you named the Email device, in Utility --► Set Up --► Printer --► Devices.
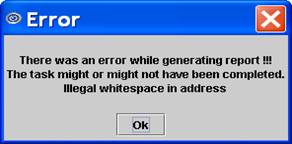
3. Email Addresses 
Type the recipient’s Email address. If multiple addresses are required, separate them with a comma. DO NOT leave spaces or your mailing will fail, this error message will be generated, and you will have to start over:
NOTE: Non-commercial email carriers have a cap on the number of emails that may be sent per day. If a clinics' current email carrier does not support the number of emails needed to be sent on a daily basis, the clinic needs to contract with a commercial email vendor.
4. Secondary Printer 
When Report Designer is set for multiple mailings and the recipient’s <Email Address> field is empty, the mail is sent to the back Secondary Printer
5. Click [Print] ![]()
The return address on all email sent by the current operator comes from Utility --► Set Up --► Security --► Login Users <Operator Email>.
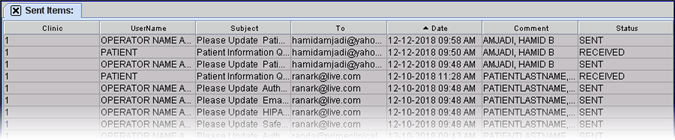
If the email can be handed-over to the email server correctly, then Email transmissions are logged and can be seen at Misc --► View Sent Items