
Intellect™
ADDITIONAL FEATURES

Online Payment Portal
Effective version 19.12.04
Intellects' Online Payment Portal provides the patient with the ability to pay statement balances online.
Feature Overview
The Online Payment Portal is used in coordination with patient statements, whether paper, electronic or using a third-party statement vendor.
For this feature to be fully functional, there are certain options within Intellect that are required to be set up by the provider. In addition, a set up fee will be incurred for the use of the Online Payment Portal. Please contact Marty at 626-449-1705 ext. 222 for payment information.
An instructional video is available: Click Online Payment Portal to access the link. Depending on the system set up, the media player may need to be activated. Speakers need to be attached to the workstation to hear the instructions.
Note: To view the videos, log-in through the www.primeclinical.com website. Current support is required.
____________________________
This document gives set up information for the online payment portal and guidelines on posting patient payments to Intellect. Examples of the process of using the Online Payment Portal are included.
Online Payment Portal Set Up (clinic)
Online Payment Procedure (patient)
Post Online Payments to Intellect (clinic)
1. Clinics must have a Merchant account set up with Authorize.net. See Credit Card Authorization Set Up Procedure in the online documentation for Authorize.net set up information.
2. Clinics must have the ability to send SMS messaging and emails from their server. See online documentation for SMS messaging set up (complete section B) and email set up (complete sections B and C) for these requirements.
The clinic must also have a current SSL certificate loaded onto the server to use this feature.
3. Complete the Patient information: Go to Registration --►Regular --►Patient and/or Registration --►Worker --►Worker and verify the <Email Address>, <Cell Phone No>, and <Cell Phone Carrier> fields are populated. All fields must be filled-in.
4. Complete the Parameter setting: Go to Utility --►Set Up --►Parameter <Email Payment Link> and use the drop-down to select the type of messaging the clinic will use to send Online Payment Portal information to the patient for online payment.
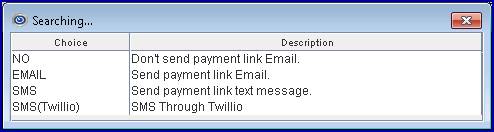
Make a selection keeping this in mind:
4.1 No: A payment link is not sent to the patient.
4.1.1 Select this option if your clinic does not allow patients to make online payments at this time.
4.1.2 Select this option if your clinic only sends paper billing statements to patients and would like to allow them to make online payments.
4.1.2.1 Note: If this option is selected, please notify Prime Clinical so the Online Payment Portal URL and a verification code may be added to the statement.
4.2 EMAIL: A payment link is sent to the patient via email.
4.2.1 For clinics who email billing statements, patients receive an email with their regular billing statement and also receive a second email with information for Online Payment Portal.
4.3 SMS/SMTP: A payment link is sent to the patient via an SMS/SMTP message.
4.3.1 Note: This option is not recommended as it sends the messages over the clinics email server and many carriers have a limit and or do not return the result. Because Prime Clinical does not recommend using this option, information for accessing the Online Payment Portal via SMTP is not given in this documentation. Clinics who would like to use this method should contact their carrier.
4.4 SMS (Twillio): A payment link is sent to the patient via your Twillio SMS messaging.
4.4.1 Offices already using Twillio who would like to use the SMS are required to update their online account with Twillio and purchase a phone number through Twillio for the SMS messaging.
Online Payment Procedure (patient)
Receipt of a Verification Code and Opening the Online Payment Portal
Online Payment Portal Screen Overview and Use
A billing statement may be sent as a paper statement via the postal service, electronically via email, or through a third-party vendor.
• Paper statements include the Online Payment Portal URL and a verification code used by the patient to login to the Online Payment Portal. Note: There is also the option to include a QR barcode/scan code on the statement which can be used with mobile devices to log into the Online Payment Portal (see sample below). Contact PCS support for details.

• The emailed statement is the same as previously, but the patient also receives a second email with Online Payment Portal information. See Step 7.2 below for details. Note: There is also the option to include a QR barcode/scan code on the statement which can be used with mobile devices to log into the Online Payment Portal (see sample below). Contact PCS support for details.
• The Statements billed via a third-party vendor include the link and the password on the statement that is printed by the vendor.
7. Receipt of a Verification Code, and Opening the Online Payment Portal
Your patients receive the Online Payment Portal login information based on the selection made in the <Email Payment Link> field on the Utility --►Set Up --►Parameter screen. See Step 4 above for selection details.
The information in this section includes receipt of the verification code via paper, email, or SMS and opening the Online Payment Portal.
Paper statements include the Online Payment Portal URL and a verification code used by the patient to login to the Online Payment Portal. The patient types the URL into a browser to open the Online Payment Portal login screen and then enters the verification code where indicated to display the 'Login to Make Payment Online' screen. See Step 8 for information on making payments.
Note: There is also the option to include a QR barcode/scan code on the statement which can be used with mobile devices to log into the Online Payment Portal (see sample below). Contact PCS support for details.
Patients who receive their statements via email receive a second email with the option to click ‘Pay Online’:
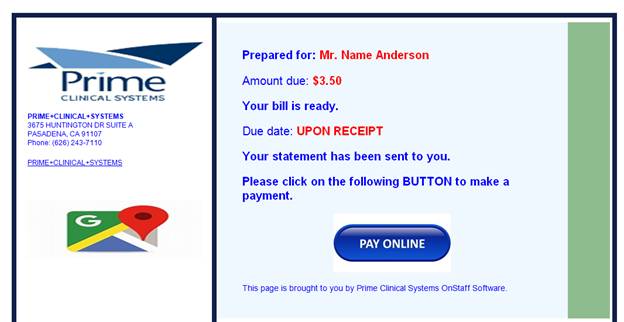
7.2.1 When the patient clicks on the ‘Pay Online’ button, the Online Payment Portal login screen opens and an SMS message with a verification code is sent to the patient:
7.2.2 The patient enters the verification code where indicated to display the 'Login to Make Payment Online' screen. See Step 8 for information on making payments.

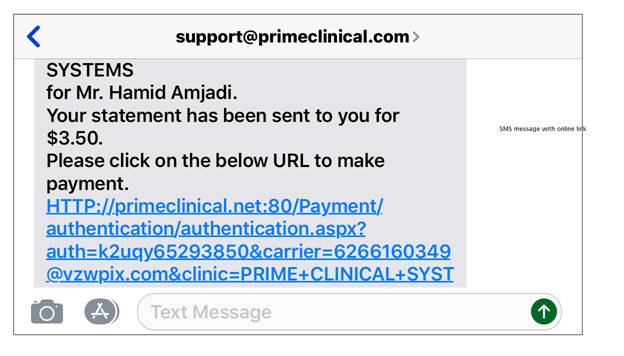
Although billing statements may not be sent via SMS/Twilio, clinics may send an SMS to their patients that includes the Online Payment Portal's URL and a verification code for logging into it. Sample screen shots follow.
7.3.1 The patient receives an SMS message with a link to receive a verification code:
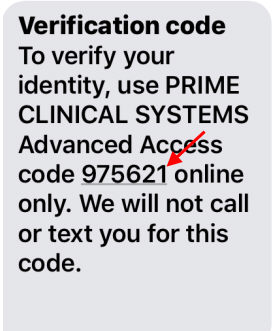
7.3.2 Clicking the URL link opens the Online Patient Payment Portal login screen and sends the patient another SMS message with the verification code used to login to the Online Payment Portal. See sample SMS message:
7.3.3 Patients enter the verification code (shown above as 975621) into the Online Payment Portal where indicated below to display the 'Login to Make Payment Online' screen. See Step 8 for information on making payments.
8. Online Payment Portal Screen Overview and Use
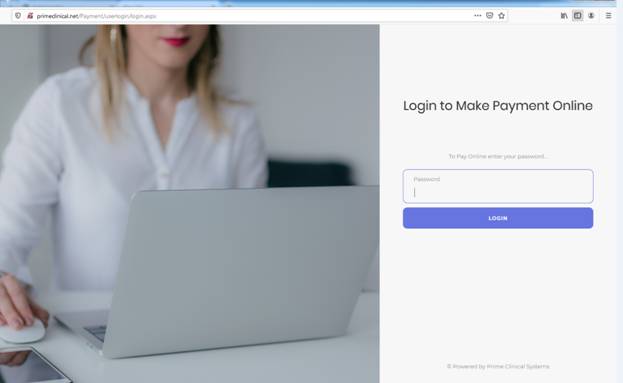
After entering the verification code and clicking 'LOGIN,' the 'Login to Make Payment Online' screen opens:
Effective version 22.03.22 - <Account Number> field added

On this screen, patients enter the appropriate account number, enter their Online Payment Portal password, and click 'LOGIN' to open the Online Payment Portal.
The <Account Number> field was added to accommodate clients who have more than one account that receive statements within several months of each other and both statements have the same password to pay their balance online. Previously, when a patient accessed the portal to pay using the provided password, the wrong account was accessed. To avoid this, an <Account Number> field was added to the portal screen when making a payment.
Versions prior to 22.03.22
Version prior to 22.03.22: Patients enter their Online Payment Portal password and click 'LOGIN' to open the Online Payment Portal.
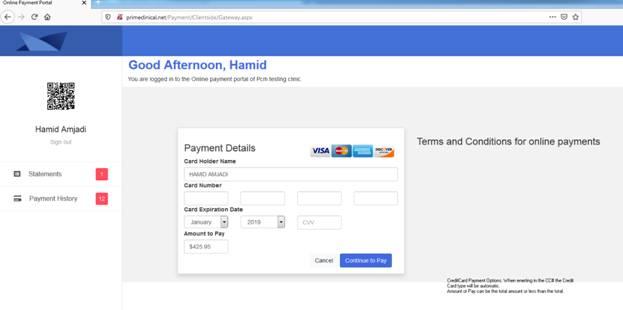
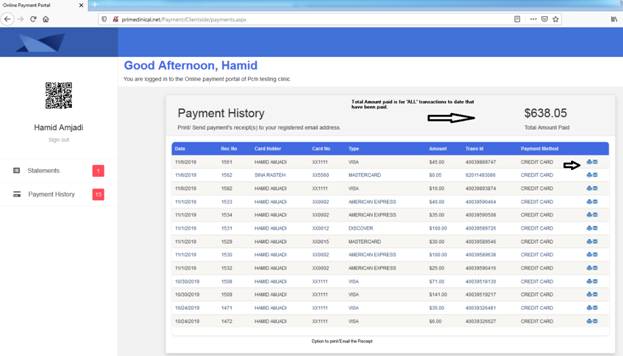
As shown in the sample below, the left side of the screen has links to Statements and Payment History. The center portion of the screen displays the Amount to Pay, which is the balance due on the statement. The <Amount to Pay> field defaults to the balance due; however, patients may be changed the amount to an amount less than the total -- see Step 8.2 for details.

8.1 To move forward with a payment, the patient clicks on the [Pay] box on the right to open Payment Details (sample shown below) where patients may enter their credit card information. In addition to the credit card number, the card expiration date and CVV# on the back of the card must be entered. Visa, MasterCard, American Express, or Discover are accepted.
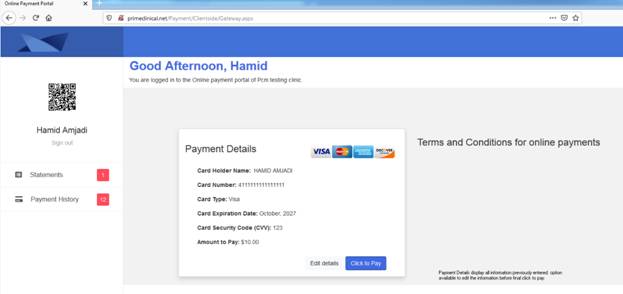
8.2 Patients then click the [Continue to Pay] button to open the Payment Details screen where the credit card information entered by the patient and the Amount to Pay may be reviewed (see sample below).
• If corrections need to be made to the credit card information, or if the patient wants to change the amount in the <Amount to Pay> field, the patient may click on Edit Details to make the changes.
• If the credit card information and <Amount to Pay> are correct, the patient clicks on the [Click to Pay] button.
8.3 Once [Click to Pay] has been clicked, a payment confirmation screen displays (see sample below). This screen notifies patients that their payment is completed and includes the payment amount, account number of the patient, and the confirmation code for the payment.
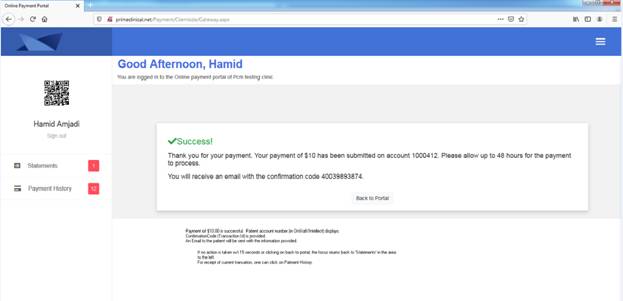
8.4 As shown above, the payment confirmation screen also notifies patients that they will receive an email with the confirmation code of their payment. Sample confirmation email:
While in the portal, patients also have the option to email or print a receipt for their transaction by clicking the red Payment History button on the left side of the screen to display their payments.
9.1 Clicking on either the email or printer icon to the far right of the payment generates the receipt. See small arrow below.
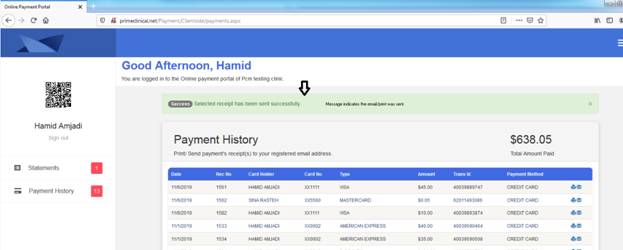
9.2 As shown in the sample below, emailing of the receipt displays in the top left, indicating the email was sent successfully.
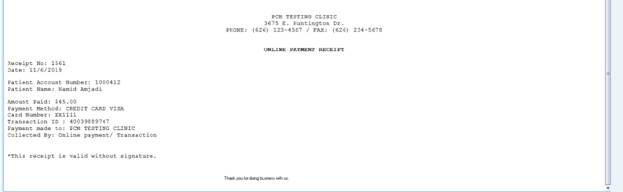
9.3 Sample of an emailed receipt via the Online Payment Portal:
Post Online Payments to Intellect
When the payment is made, the information and amount of the payment is sent to Intellect and a receipt is added to Schedule --►Appointment --►Receipt; however, payments are not automatically posted. It is the responsibility of the clinic to process payments, as follows:
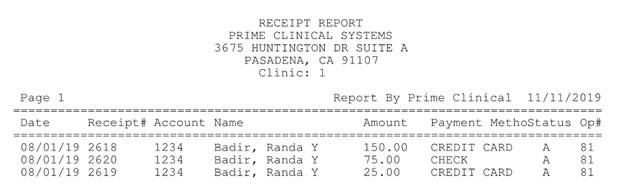
1. Go to Schedule --►Appointment --►Receipt on a regular basis (it is suggested this be done daily) and run a Receipt Report to see what online payments have been made. See Schedule --►Appointment --►Receipt for details on running the report. See sample Receipt Report showing an online payment below.
2. Post payments to the patient account. See Payment --► Open Item in the online documentation for information on posting payments.