
Intellect™
REGISTRATION MENU OPTIONS

Regular
Patient
Modify Patient
Once a patient has been added to the system, use this option to make changes or additions to the demographic data. This option is also the only way to modify Regular Patient Insurance in Intellect.
1. To modify patient demographics in Intellect, go to Registration --► Regular --► Patient --► Modify
The Modify PATIENT screen opens:
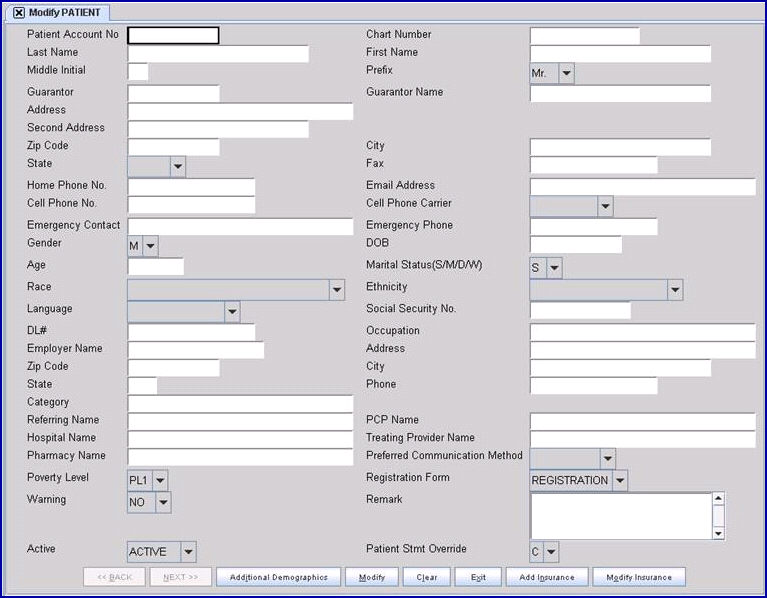
This screen, like many in Intellect, has several optional fields, and the placement of fields in this documentation may vary slightly from clinic to clinic. See the optional fields at the bottom of the Add Patient document and/or the documentation on adding/removing fields.
1. Patient Account No 
1.1 The focus automatically starts here.
1.1.1 When starting from a fresh login, the field is empty.
1.1.2 If a patient was recently created or modified, it could default to that number
1.2 Unlike Add Patient, numbers are not auto generated.
1.2.1 Manually type the number of the patient to modify.
1.3 To clear, use the [Spacebar], [Backspace], OR type over the number.
2. Once the correct account number is entered, press [Enter], [Tab], [↓], OR use the mouse to advance the focus. Intellect completes any field that had previous data from when a patient was first created or previously modified.
3. All fields have the same characteristics as described in Add Patient.
3.1 Other than <Patient Account No>, modifications or additions may be made by pressing [Enter], [Tab], [↓], OR using the mouse to advance the focus to the desired field(s).
4. The buttons at the end of the form are different from Add Patient:
Effective version 17.06.09 and greater:

Effective version 9.12.20:
![]()
Versions prior to 9.12.20:
![]()
4.1 [Modify]:
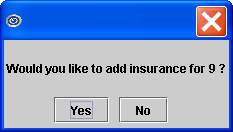
4.1.1 Click [Modify] if there is existing insurance, to display this message:
4.1.1.1 Click [No] to save changes and return the focus to the <Patient Account No> field.
4.1.1.2 Click [Yes] to open the Modify PATIENT_INSURANCE screen for the patient’s first insurance record with all previously entered insurance information display.
4.1.2 Click [Modify] if there is no existing insurance, AND Utility --►Category <Type (C/P/W/O/F/G)> = 'G' for patient's <Category>> to return the focus to the <Patient Account No> field.
4.1.3 Click [Modify] if there is no existing insurance, AND Utility --►Category <Type (C/P/W/O/F/G)> is not = 'G' for patient's <Category> to display this message:
4.1.3.1 Select [Yes] to open the Add PATIENT _ INSURANCE screen to allow insurance to be added.
4.1.3.2 Select [No] to clear all fields and return the focus to the <Patient Account No> field.
4.2 [Clear]: Click on the [Clear] button to remove all data from the screen; it does not save changes, and it returns the focus to the <Patient Account No.> field with the same account number.
4.3 [Exit]: Effective version 14.05.14, when pressing [Exit] after having already saved data changes/additions by pressing [Modify], Intellect closes the Modify PATIENT screen and returns to the main menu.
Versions prior to 14.05.14:
Click on the [Exit] button to display this message:

4.3.1 Select the [Yes] button to save the information. The system prompts whether or not to add or modify insurance information.
.3.2 Select the [No] button to NOT save the information. The focus returns to the <Patient Account No> field.
4.3.3 Select the [Cancel] button to return the focus to the [Exit] button.
4.4 [Add Insurance]: Effective version 9.12.20 and greater: Select the [Add Insurance] button to go to the Add PATIENT INSURANCE screen.
4.5 [Modify Insurance]: Effective version 9.12.20 and greater: Select the [Modify Insurance] button to go to the Modify PATIENT INSURANCE screen. See below.
There is no menu path to the Modify PATIENT INSURANCE screen. To access this option, go through Modify PATIENT.
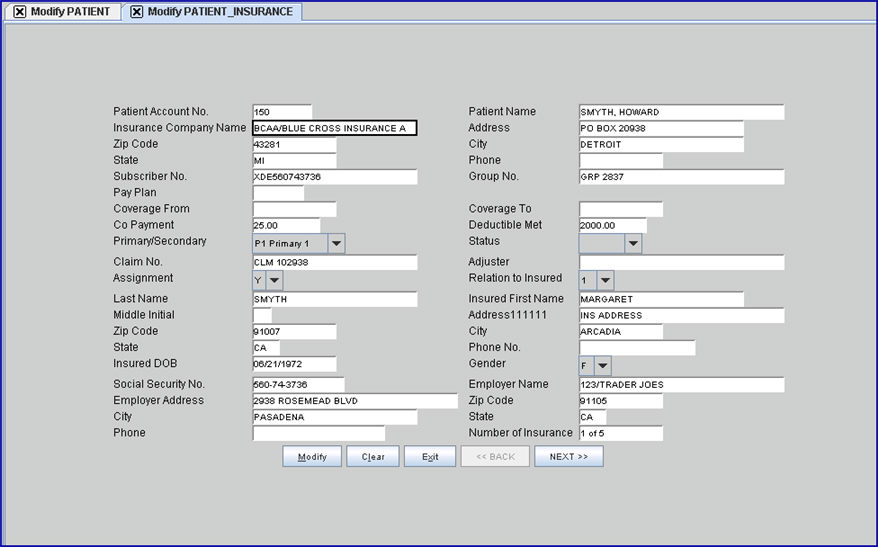
1. The focus is in the <Insurance Company Name> field 
1.1 Since the screen is only accessed through Modify Patient, the current <Patient Account No.> and <Patient Name> are displayed. These are read-only fields and may not be accessed.
1.2 All previously completed information from this patient's insurance is displayed.
2. The following fields, except <Insurance Company Name>, are read-only fields and may not be accessed. The <Insurance Company Name> may be changed, which updates the address and phone fields.

3. All subsequent fields have the same properties as described in the document on adding patient insurance.
4. With the exception of the <Number of Insurance> field, information may be modified or added to these fields:

5.1 [Modify]: When a single insurance exists, click [Modify] to save the changes to the patient's insurance and exit the Modify Insurance screen, returning to Modify Patient with the focus in the <Patient Account No.> field and the current patient's account number displayed.
5.2 [Clear]: Click [Clear] to display this message:
5.2.1 Select [No] to clear all information and return the focus to the current <Patient Account No>.
5.2.2 Select [Yes] to clear the form without saving and exit to Modify Insurance, returning the focus to Modify Patient.
5.3 [Exit]: Click [Exit] to move the focus to a blank Modify Patient screen, without saving the changes, unless [Modify] was previously selected.
5.4 [Back]: When the patient has either one insurance (as noted in the <Number of Insurance> field:  ), OR an additional insurance has not been accessed, the [Back] button is disabled (see step 5 above). When the patient has multiple instances of insurance, and an additional insurance is being viewed, the [Back] button is enabled (
  ). Click on the [Back] button to return to a previously displayed insurance.
5.5 [Next]: When the patient only has one insurance (as noted in the <Number of Insurance> field:  ), the [Next] button is disabled (
  ). When the patient has multiple instances of insurance, the [Next] button is enabled (see step 5 above). Click on the [Next] button to access a subsequent insurance.
5.5.1 [Exit] must be selected after [Modify] to leave the screen.
5.5.2 If [Next] is clicked before [Modify], the record is not yet saved.
Note: When posting charges or payments, the Registration --►Regular --► Patient (or Worker) Add or Modify screens must be closed or an error occurs.