
Intellect™
UTILITY MENU OPTIONS

Business
Attention clinics who also use PCM: Although Intellect does not require an Employer to be entered when registering patients, it is important to note the following:
• When importing information into PCM forms/documents, the Database field inserter tree always requires the Employer to have been entered into Intellect during registration in order to import the employer information.
• Offices who prefer to enter the employer name, address, etc. manually, should use the right-click menu option to import employer information. It is recommended to use only one method to import employer information when setting up forms. Using the right-click method can import the employer information whether or not an Employer was used.
• Employer information for regular patients and Worker's Comp patients come from two different tables. For additional information, contact a trainer or PCS support.
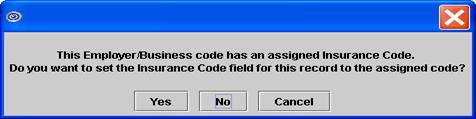
This option is for adding and maintaining employer information of Worker's Comp employers and/or common employers of patients. By setting up these employers in Intellect as companies and then entering a <Company Code> in the Registration --►Regular --►Patient --► Add <Employer Name> field or Registration --►Worker --►Worker Insurance --► Add Worker Insurance <Employer> field, the employer fields in the patient's account are completed with the employer's demographic information and the employer's <Insurance Code> (carrier), <Group No.>, and <Plan Code> (pay plan; when applicable) as set up on the employer's Add EMPLOYER screen. This pop-up appears on the Insurance screen if a <Company Code> was entered:
This screen, like many in Intellect, has several optional fields. The graphics in this documentation may vary slightly from actual clinics'. See the documentation on adding/removing fields.
1. To add a company in Intellect, go to Utility --► Business --► Add:
The Add EMPLOYER screen displays:
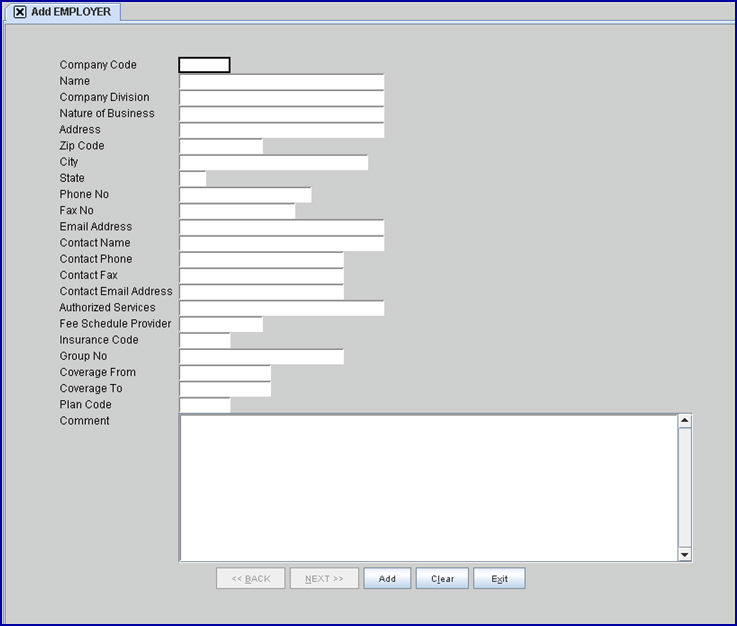
2.1 Type a unique user-defined code for this business.
2.2 If not unique, Intellect displays this error message:
Press the [OK] button to return the focus to the <Company Code> field.
2.3 This field is mandatory and must be completed. If left blank, an error message displays:
Press the [OK] button to return the focus to the <Company Code> field.
2.4 Different <Company Codes> may identify subdivisions in one company; e.g., PCS1, PCS2. etc. These would be used for different company divisions and/or contact names.
2.5 This code is used as the <Employer Name> on the Registration --►Regular --►Patient Add/Modify Patient screen.
2.6 When this <Company Code> is entered in the Registration --►Worker --► Workers Insurance <Employer> field, Intellect automatically displays a prompt to add the contract and coverage information:

Press [Yes] to accept and complete the Insurance and Pay Plan information on the Worker Insurance screen.
3. Name 
3.1 Type the name of the company.
4. Company Division 
4.1 Effective version 13.10.29 - New field.
4.2 If one company is subdivided into different divisions, enter the division in this field.
4.3 See also 2.4 under <Company Code>.
5.1 Type the nature of business for reference purposes.
5.2 Note: Effective version 15.09.02, the Registration --►Worker --►Worker Insurance <Nature of Business> field defaulted to this field. However, the Registration --►Worker --► Worker Insurance <Nature of Business> field was removed from the screen effective version 14.02.04.
6. Address 
6.1 Type the business’s address with street or box numbers.
6.2 Generally, this is the billing or office address of the company.
7. Zip Code 
7.1 Type the business’s zip code.
7.2 When a zip code is unknown, press [Enter] through the <City> and <State> fields.
7.3 For more information, see Adding Zip Codes.
8. City 
8.1 This field is populated automatically if the zip code is known to Intellect; otherwise, enter the city for the zip code.
9. State 
9.1 This field is populated automatically from the zip code if it is known to Intellect; otherwise, enter the state for the city and zip code.
10. Phone No. 
10.1 Type the phone number of the business in standard format.
11. Fax No. 
11.1 Type the fax number of the business in standard format.
11.2 With the use of Report Designer, a FAX can be used to automatically send patient statements, letters, and appointment information.
12. Email Address 
12.1 Type an appropriate business email address.
12.2 With the use of Report Designer, e-mail can be used to automatically send patient statements, letters, and appointment information.
13.1 Effective version 13.10.29 - New field.
13.2 If there is a specific company contact person, enter the name of that person.
13.3 For information regarding multiple contacts, see 2.4 under <Company Code>.
14. Contact Phone 
14.1 Effective version 13.10.29 - New field.
14.2 If there is a specific company contact listed in <Contact Name>, enter the phone number of that person.
15. Contact Fax 
15.1 Effective version 13.10.29 - New field.
15.2 If there is a specific company contact listed in <Contact Name>, enter the Fax number of that person.
16. Contact Email Address 
16.1 Effective version 13.10.29 - New field.
16.2 If there is a specific company contact listed in <Contact Name>, enter the email address of that person.
17.1 Effective version 13.10.29 - New field.
17.2 This field is used with the Charges --►Charge screen for company accounts.
17.3 Authorized services (e.g., cpt codes) may be entered in this field for services that are authorized by the business identified in <Company Code>.
17.4 Multiple CPT codes should be separated by a comma (,).
17.5 When posting charges for company codes:
17.5.1 If CPT codes have been entered in this field, and a CPT code is entered in the <Panel> field on the Charges --►Charge screen that is NOT in this <Authorized Services> field, Intellect pops up a message notifying the user.
For example, if 99213 was entered in the <Authorized Services> field and 99214 was entered when posting charges, Intellect displays:
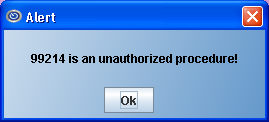
Note: After displaying the notification, Intellect allows the user to continue entering information associated with the unauthorized CPT code.
17.5.2 If cpt codes have been entered in this field, and a CPT code is entered in the <Panel> field on the Charges --►Charge screen that IS in this <Authorized Services> field, Intellect does not display a message regarding authorized services at the time of charge posting. Also, please note that it is irrelevant what is entered in the <Provider> field.
17.5.3 If the <Authorized Services> field is blank, Intellect does not display a message regarding authorized services at the time of charge posting.
18.1 Effective version 13.10.29 - New field.
18.2 This field is used with the Charges --►Charge screen for company accounts.
18.3 A unique fee schedule may be set up with an insurance specifically for this <Company Code>. If a unique fee schedule has been set up, enter it in this field.
18.3.1 If this field and the <Insurance Code> field on this screen are filled, Intellect checks the fee schedule for the related record to calculate the charge amount. If the fields are not filled, Intellect gets the charge amount from the Utility --►Procedure --►Procedure screen.
19.1 Type the business’s Utility --►Insurance --►Insurance <Insurance Co Code>, if known.
19.2 Enter the <Insurance Co Code>, OR type up to 6 characters of the name and press the [F2] key. To select the code from the list, either highlight the record and press the [Enter] key, OR double-click on the record. Alternately, after clearing the field, press the [F2] key twice to view the entire list of codes.
19.3 Effective version 13.10.29 - If this field and the <Fee Schedule Provider> field on this screen are filled, Intellect checks the fee schedule for the related record to calculate the charge amount. If the fields are not filled, Intellect gets the charge amount from the Utility --►Procedure --►Procedure screen.
20. Group No. 
20.1 Type the business’s group number for this insurance carrier.
20.2 If the group number is not available, leave blank.
21. Coverage From 
21.1 Type the starting date of the business’s insurance coverage.
21.2 Billing is only for effective dates.
22. Coverage To 
22.1 Leave this field blank as long as insurance is in force.
23.1 Enter the Utility --►Insurance --►Pay Plan <Plan Code> of the pay plan to attach to this business. When a <Plan Code> is present in this field, entering this <Company Code> in the Registration --►Worker --►Worker Insurance --►Add Worker Insurance <Employer> field automatically displays this prompt to add the contract and coverage information:
Press the [Yes] button to include the <Plan Code> and all contractual information from this plan.
24. Comment

24.1 Enter a comment about this business if desired. This is an informational field.
25. When the information is completely entered, select one of these options:

25.1 Click [Add] to clear the screen and return the focus to the <Company Code> field, saving the new business.
25.2 Click [Clear] to clear all information and return the focus to the <Company Code> field.
25.3 Click [Exit] to clear the screen and return the focus to the main Intellect screen without saving.


