Intellect™
SCHEDULE MENU OPTIONS

Appointment
Receipt
Add Receipt
This option is used to create, record, and print patient payment receipts. At the <Print Receipt> field, with the YES default option selected, Intellect prints a two-part receipt: patient and office. Once created, a report displaying a record of receipts may be viewed at Schedule --►Appointment --►Receipt --►Print Report Receipt.
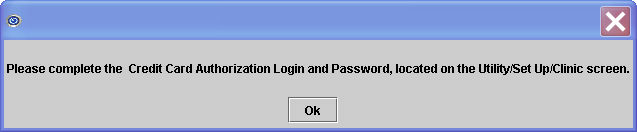
This option may also be used to enter, authorize, and process credit card payments. See Self Check In for more information on using credit cards. NOTE: If using a credit card, please complete Utility --► Set Up --► Clinic as indicated in Credit Card Authorization or Intellect displays an error message:
See directions to add/print patient payment receipts in Intellect.
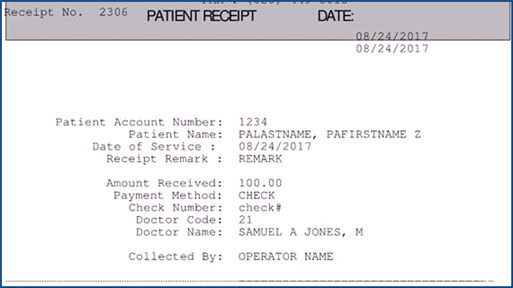
Effective version 17.08.24, Office Receipts may now include the doctor’s name and code, pulled from the <Last Name>, <First Name>, and <Provider Code> fields on the Add DOCTOR screen. For example:
Video Available: Click Receipts to access the link. Depending on the system set up, the media player may need to be activated. Speakers need to be attached to the workstation to hear the instructions.
Note: To view the videos, log-in through the www.primeclinical.com website. Current support is required.
To add/print patient payment receipts in Intellect, go to the Add Receipt screen. The Add RECEIPT screen can be accessed three ways.
1. Schedule --►Appointment --►Receipt --► Add as shown below.
- OR -
Schedule --►Appointment --►Full Day.
1.1 From the Appointment Schedule screen, the Add RECEIPT screen can be accessed two ways:
1.1.1 With the cursor in the patient name field, right-click to display a drop-down menu as shown below.
1.1.2 Select Receipt to display the Add RECEIPT screen.
- OR -
1.2 From the Appointment Schedule screen, highlight a scheduled appointment and press the letter 'R' to pop up the Add RECEIPT screen.
The Add RECEIPT screen is shown below.
2. Patient Account No 
2.1 Type the patient account number for whom the payment is to be recorded.
2.2 The field is mandatory and must be completed. If left blank, an error message displays:
Click [OK] to return the focus to <Patient Account No>.
2.3 Enter the account number, OR type up to 6 characters of the last name, and press the [F2] key. To select the account from the list, either highlight the record and press the [Enter] key, OR double-click on the record.
2.4 Note: When making a credit card payment, if the card is swiped at the <Patient Account No> field and the card holder name exactly matches a patient’s name in the database, Intellect selects the account number.
3. Patient Name 
3.1 The patient name is displayed: Last, First.
3.2 This is a read-only field.
3.3 Note: If the <Patient Name> and <Name on Card> are different when making a credit card payment, enter the patient account number, complete all fields prior to <Payment Method>, and then swipe the card, with the focus in the <Card No> field.
4. Patient Balance 
4.1 The balance for the patient is displayed.
4.2 This is a read-only field and may not be accessed.
5. Family Balance 
5.1 The balance for the patient and his/her family is displayed.
5.2 This is a read-only field and may not be accessed.
6. CoPay/Deductible 
6.1 This indicates the patient's copay/deductible as set up on the patient's insurance screen.
6.2 This is a read-only field and may not be accessed.
7.1 Type the date of service to which this payment applies.
7.2 The field is mandatory and must be completed. If left blank, an error message displays:
Click [OK] to return the focus to <Date of Service>.
8. Provider 
8.1 Optionally, type the Utility --►Provider --►Provider <Provider Code>.
9. Provider Name 
9.1 The provider name is displayed.
9.2 This is a read-only field.
10.1 Optionally, type the Utility --►Facility <Facility Code>.
10.2 Completing this field is necessary to post payments by facility through Payment --►Apply Receipt.
10.3 Enter the <Facility Code>, OR type up to 6 characters of the description and press the [F2] key. To select the code from the list, either highlight the record and press the [Enter] key, OR double-click on the record. Alternatively, after clearing the field, press the [F2] key twice to view the entire list of codes.
11. Facility Name 
11.1 The facility name is displayed.
11.2 This is a read-only field.
12. Remark 
12.1 Optionally, type any appropriate remark.
13. Entry Date 
13.1 The current calendar date is displayed. This is a read-only field and may not be accessed for modification of data.
14. Payment Method 
14.1 Optionally, use the drop-down to select the method of payment.
14.2 Valid options include Cash, Check, or Credit Card.
15. Check Number 
15.1 Optionally, type the check or card number.
Credit Card Authorization and Processing
Video Available: Click Receipts to access the link. Depending on the system set up, the media player may need to be activated. Speakers need to be attached to the workstation to hear the instructions.
16. Card No. 
16.1 When a credit card is swiped, the card number automatically displays.
17.1 When a credit card is swiped, the name on the card automatically displays.
17.2 If the card is not present, enter the name as it is displayed on the card.
18. Expiration Date 
18.1 When a credit card is swiped, the card expiration date automatically displays.
19.1 This feature is used to automatically post any co-payment if the Utility --►Procedure --►Procedure <Copayment> field = 'Y', and when payments are posted in the screen Payment --►Apply Receipt.
19.2 If desired, enter the amount of this payment that will be applied strictly to co-payments for this patient's account.
19.3 To enter information into this field, a password must be entered. If a password is not entered, this message displays:
Click [OK] to return the focus to <Copay Amount>.
(formerly <Bal. Amount Received>)
20.1 This field should be completed when payments are intended for old patient balances. Intellect automatically posts the amount entered to the patient's account for charges with a balance and the Who column = 'G' when payments are posted in Payment --►Apply Receipt.
20.2 If desired, enter the amount of this payment that will be applied strictly to patient balances for this patient's account.
21. Operator Password 
21.1 Type a valid operator password. This field is mandatory to complete the transaction.
21.2 This field is required. If [Enter] is pressed before populating this field, an error message displays:
Click [OK] to return the focus to <Operator Password>.
21.3 Version 9.12.10 - Modification. When Adding, Modifying, or Deleting a Receipt, versions 9.12.10 and greater verify that the operator's password is still current and has not expired in Utility --►Set Up --►Security --►Login User <Operator Expire Date>. If it has expired, or if the password is invalid, the program displays the message:
Click [OK] to return the focus to <Operator Password>.
22. Operator No. 
22.1 The Operator Number displays. This is a read-only field.
23. Operator Name 
23.1 The Operator Name is displayed. This is a read-only field.
24. Print Receipt 
24.1 Accept the default 'NO' to not print, OR use the drop-down list to make an alternate selection.
25. When the information is completely entered, select one of these options:

25.1 When selecting [Add]
25.1.1 When a credit card is used and [Add] is selected, Intellect forwards the request for authorization to the card authorization company. A pop up message displays whether or not the request has been accepted or rejected. The authorization number from the credit card authorization company is stored in a file and prints on the credit card receipt. It does NOT show on the screen.
When requesting to print a receipt for a Credit Card payment, a different receipt from the standard receipt prints with information specific to the card and the authorization.
25.1.2 If the <Operator Password> is not completed, Intellect displays this message:
Note: If the Modify/Delete Receipt screen is selected and then clicked on the [Modify] or [Delete] button to modify or delete a receipt, Intellect displays this error message if the <Operator Password> field has not been completed:
Click [OK] to return the focus to <Operator Password>.
When complete, the record is saved and a printer dialog box displays:
Printer Properties:
25.1.2.1 Printer: The default printer for the logged-in clinic and password is selected. To select a different printer, either click on the arrow, OR press the → (right arrow) on the keyboard to view the list of printer codes. In our example, the defaulted Printer is HP. This is just an example of a printer name and may or may not be set up on the system.
To select the printer type, click on the code, OR use the ↑ (up) and ↓ (down) arrows to highlight the correct code; then press the [Enter] key to select.
25.1.2.2 Number of Copies: This field defaults to either 0 (zero) or 1. Both print 1 copy. To print more than one copy, enter the number of copies.
Fax/Email:
In addition to printing reports, Intellect provides the capability to export reports to an Excel spreadsheet, Email, Fax, Disk, or Archive. A secondary printer may also be selected, if one is set up, by clicking on the arrow to display the drop-down list.
25.1.2.3 Select the [Print] button to send the request to the printer (or as a Fax or email).
25.1.2.4 Select the [Cancel] button to clear the screen and return to the Add Receipt screen without saving or printing.
25.2 Select [Clear] to remove any information already entered on the Add Receipt screen.
25.3 Select [Exit] to close the Add Receipt screen and return the user to the main Intellect menu.
Sample Office Receipt