Intellect™
UTILITY MENU OPTIONS

Set Up
Appointment
Template
Add
The Template option allows the definition of a pre-set module of time for a provider to work for a given day, including some Appointment Types such as LUNCH, SX-surgery, WI-walk in, MTG-board meetings, etc. Use this option to define (for any given day the provider sees patients) what hours patients are seen and any additional NON office hour time slots that may be needed (such as hospital surgeries, board meetings, or walk-in appointment slots).
Videos Available: Click Intro to Appointment Setup and Appointment Template Set Up to access the links. Depending on the system set up, the media player may need to be activated. Speakers need to be attached to the workstation to hear the instructions.
Note: To view the videos, log-in through the www.primeclinical.com website. Current support is required.
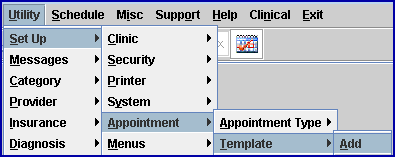
1. To set the Appointment Templates in Intellect, go to Utility --► Set Up --► Appointment --► Template --► Add:
The Add TEMPLATE screen displays:
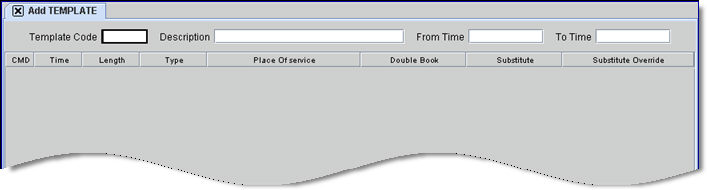
2.1 This is used to attach to a Provider's Appointment Schedule when creating and defining scheduling characteristics.
2.2 Type a user-defined code for the template using up to 6 characters.
2.3 The field is mandatory and must be completed. If left blank, an error message displays:
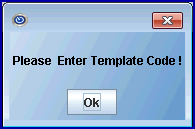
Press the [OK] button to return the focus to the <Template Code> field.
3. Description 
3.1 Type a description for the template.
3.2 The field is mandatory and must be completed. If left blank, an error message displays:
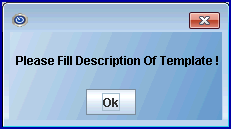
Press the [OK] button to return the focus to the <Description> field.
4.1 Type in the time of day this template should begin.
4.2 The field is mandatory and must be completed. If left blank, an error message displays:
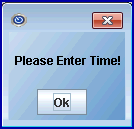
Press the [OK] button to return the focus to the <From Time> field.
4.3 Use either military time 00:00-23:59 or designate AM or PM after the number. Intellect converts all to standard time designation. When entering morning times, be sure to enter the zero before the number (09 :).
4.4 Caution: When entering times intended to start or end at 12 noon, 'PM' must be manually added.
5.1 Type in the time of day this template should end.
5.2 This is not a required field. Leave it blank to create a single time template using the From Time.
5.3 Use either military time 00:00-23:59 or designate AM or PM after the number. Intellect converts all to standard time designation. When entering morning times, be sure to enter the zero before the number (09:).
5.4 Caution: When entering times intended to start or end at 12 noon, 'PM' must be manually entered.
After pressing [Enter] in the <To Time> field, Intellect moves the focus to the first line in the table display. The <CMD> column is populated with 'a' for add mode, and the focus is in the <Length> field.

Multi-line display column definitions:
6. CMD 
6.1 After filling-in the required fields for the first line of the template, Intellect completes the rest of the template depending on the defined times. If desired, these commands may be used in the Command column for editing:
6.1.1 'M' to modify existing time slots.
6.1.2 'A' to add another time slot.
6.1.3 'D' to delete a time slot.
6.1.4 [Esc] to clear.
7.1 Initially, this field is blank and not able to accept data. It eventually displays the time each slot begins (see 7.2).
7.2 Once the entire first line is configured, Intellect completes the time slots, beginning at the time entered in From Time and ending at the <To Time>, and using the <Length> to compute the difference from each slot to the next.
8. Length 
8.1 This field is used to create the desired minimum time increments for scheduling an appointment.
8.2 Type the default length of time (minutes) increments for scheduling each appointment.
8.3 The field is mandatory and must be completed. If left blank, an error message displays:
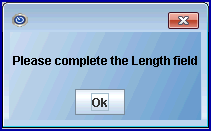
Press the [OK] button to return the focus to the <Length> field.
9.1 This ties the template to properties configured in the creation of an Appointment Type.
9.2 Enter the Type Code, OR type up to 6 characters of the description and press the [F2] key to display the Searching screen. To select the code from the list, either highlight the record and press the [Enter] key, OR double-click on the record. Alternately, after clearing the field, press the [F2] key twice to view the entire list of codes. For more information on the Searching screen, see Introduction to Intellect --► Intellect Characteristics and Features -- Searching.
9.3 The field is mandatory and must be completed. If left blank, an error message displays:
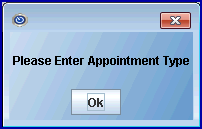
Press the [OK] button to return the focus to the <Type> field.
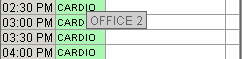
10.1 Entering a <Facility Code> allows its' <Name> to appear as a tool tip when the mouse is passed over the Type column in the Schedule screen for this template. For example, if <Facility Code> 'O' has the <Name> OFFICE 2,when 'O' is entered into this field, the Facility <Name> displays:
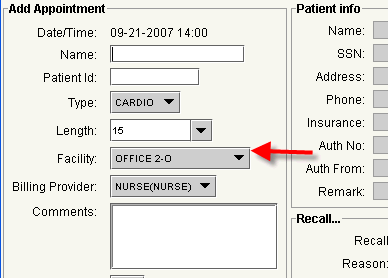
And, the <Facility Code> entered in this <Place of Service> field is the default <Facility> in the Add Appointment Dialog Box for the <Type> entered in step 9. See example below if CARDIO is entered in step 9 and 'O' is entered in <Place of Service>:
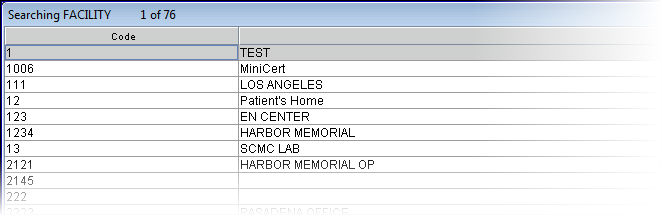
10.2 Enter the Facility Code, OR type up to 6 characters of the description and press the [F2] key to display the Searching screen. To select the code from the list, either highlight the record and press the [Enter] key, OR double-click on the record. Alternately, after clearing the field, press the [F2] key twice to view the entire list of codes. For more information on the Searching screen, see Introduction to Intellect --► Intellect Characteristics and Features -- Searching.
Sample partial list:
10.3 This field is mandatory and must be completed. If left blank, an error message displays:
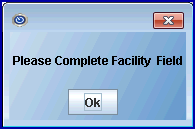
Press the [OK] button to return the focus to the <Place of Service> field.
11.1 This field is used to determine if this time slot allows more than one patient to be scheduled.
11.2 Enter 'Y' (Yes) to allow multiple bookings determined by Utility --► Set Up --► Appointment --► Appointment Type <Maximum per Time Slot> for the <Type> designated for this slot.
11.3 Enter 'N' (No) to prohibit multiple booking. See the document on Multiple Booking for more information.
11.4 Effective 22.07.15 (included in the 22.08.08 release note), an 'X' option was added to this field. Enter 'X' to restrict the addition of appointments beyond the number in the <Maximum Per Time Slot> field on the Utility --►Set Up --►Appointment --►Appointment Type screen.
12. Substitute 
12.1 Used to prohibit or allow the substitution of the Appointment Type assigned to the templates time slot.
12.2 Enter 'Y' (yes) to allow or 'N' (no) to prohibit.
13. Substitute Override 
13.1 Used to determine what level of security is necessary to override the Substitute parameter above.
13.2 Enter the minimum numeric level of security (0-99) necessary to override the existing settings.
All additions and modifications are automatically committed.