
Intellect™
INTRODUCTION TO INTELLECT

Intellect Characteristics and Features
This document contains a brief listing and descriptions of various tools and methods found throughout Intellect. While most remain consistent, there are some minor variations, as necessary.
Video Available: Click Keystrokes & Commands to access the link. Depending on your system set up, you may need to activate your media player. You need to have speakers attached to your workstation to hear the instructions.
Note: To view the videos, you need to have logged-in through the www.primeclinical.com website, and you must have current support.
In this document:
Email Containing Report Password
Searching (see also Patient Search)
When using Windows 7, it must be set up in 'Windows Classic Style.' To verify or change your Windows setting:
1. Right-click on the desk top.
2. Choose Properties.
3. Click on the Appearance tab.
4. In the <Windows and Buttons> field, click on the down-arrow and select Windows Classic Style.
If you do not know what version of Windows you are running, click on the [Start] button in the bottom left corner of your screen. A pop-up box displays your Windows version written vertically on the left.
Note for Linux and VOSINC clients:
If your office has the automation running on a workstation, not on your server, you needs to 'stop' and 'start' the services monthly. The types of clients this affects are:
• Clients who have a Linux server and have the automation running on a workstation
• VOSINC clients who were switched to have their automation on a workstation.
Please contact PCS Support for additional information.
Microsoft Extended Support Ended January 14, 2020
Microsoft announced the end of life (EOL) of all Windows 7, Windows 2008/R2, and Exchange Server 2010 on January 14, 2020. This means Microsoft no longer supports and sends critical security updates, leaving computer systems vulnerable to attack and exploitation. All workstations running Windows 7 must be upgraded to Windows 10 Pro and all servers running Windows 2008/R2 must be upgraded to Windows 2012, 2016, or preferably 2019 in order to stay HIPAA compliant. For further information or to schedule your server upgrade, please contact the Hardware Department.
The software version you are currently on is shown in the top left border of your screen once you have logged-in to Intellect:

When new software is released, a release note is published on our website, and the current software version is displayed on the Release Note website opening page:

For more information on release notes, see Help --► Release Notes.
Intellect provides several methods to move from menu to menu. Ether use the arrow keys or press [Enter] to select a highlighted item OR hold down the [Alt] key and press the underlined letter of the menu option OR use the mouse and left click on menu option.

Intellect's menu contains 23 short cut icons and an RX button for E-Prescribing. Hover the mouse over each icon to display the name of the task it performs.
Note: The icons are available based on security settings of the operator.
1. ![]() Add New Patient
Add New Patient
1.1 Select this icon to go to the Add PATIENT screen. See online documentation for Registration --► Regular --► Patient --►Add Patient for screen details.
2. ![]() Modify Patient - Effective Version 12.12.06
Modify Patient - Effective Version 12.12.06
2.1 Select this icon to go to the Modify PATIENT screen. See online documentation for Registration --►Regular --►Patient --►Modify Patient for screen details.
3.  Charge
3.1 Select this icon to go to the Charge screen. See online documentation Charges --►Charge for screen details.
4. ![]() CHDP - Effective Version 12.12.06
CHDP - Effective Version 12.12.06
4.1 Select this icon to go to the Add CHDP screen. See online documentation Charges --►CHDP --►CHDP for screen details.
5. ![]() Charge Review - Effective Version 12.12.06
Charge Review - Effective Version 12.12.06
5.1 Select this icon to go to the Edit Charge Review screen. See online documentation Charges --►Charge Review for screen details.
6. ![]() Payment Open Item - Effective Version 12.12.06
Payment Open Item - Effective Version 12.12.06
6.1 Select this icon to go to the Payment screen. See online documentation Payment --►Open Item for screen details.
7. ![]() Auto Payment - Effective Version 12.12.06
Auto Payment - Effective Version 12.12.06
7.1 Select this icon to go to the Auto Payment screen. See online documentation Payment --►Auto Payment (Pickup ERA, Post ERA, PrePaid/Capitated Accounts, or Write Off Balance) for screen details.
8. ![]() Accounting
Accounting
8.1 Select this icon to go to the Accounting screen. See online documentation Ledger --► Accounting --►Display for screen details.
9. ![]() Open Item - Effective Version 12.12.06
Open Item - Effective Version 12.12.06
9.1 Select this icon to go to the Open Item screen. See online documentation Ledger --►Open Item --►Display for screen details.
10. ![]() Review Collection - Effective Version 12.12.06
Review Collection - Effective Version 12.12.06
10.1 Select this icon to go to the Review Collection File screen. See online documentation Ledger --►Review Collection for screen details.
11. ![]() Billing Insurance - Effective Version 12.12.06
Billing Insurance - Effective Version 12.12.06
11.1 Select this icon to go to the Print GOP Insurance screen. See online documentation Billing --►Insurance --►Group of Patients for screen details.
12. ![]() Submit Claim - Effective Version 12.12.06
Submit Claim - Effective Version 12.12.06
12.1 Select this icon to go to the Submit GOP EBilling screen. See online documentation Billing --►Tele Com --►Submit Claim --►Group of Patients for screen details.
13. ![]() Access Claim - Effective Version 12.12.06
Access Claim - Effective Version 12.12.06
13.1 Select this icon to go to the Access Claim Report screen. See online documentation Billing --►Tele Com --►Access Claim Report for screen details.
14.1 Select this icon to go to the appointment schedule, open to the Day tab. See online documentation Schedule --► Appointment --►Full Day--► Schedule Overview --►Introduction: Overview and Context/Right-Click Menu and Schedule --► Appointment --►Full Day--► Schedule Overview --►Day View for screen details.
15. ![]() Call Status - Effective Version 13.06.24
Call Status - Effective Version 13.06.24
15.1 Select this icon to go to the Call History screen. The Call History screen displays a history of every call sent to patients via Twilio, from any Intellect menu option where Twilio is available for use, and indicates it's status; i.e., completed, failed, etc. Refer to Twilio Call History in the online documentation for screen details.
16. ![]() Job Manager - Effective Version 13.06.24
Job Manager - Effective Version 13.06.24
16.1 Selecting this icon is the same as typing Ctrl-J as it opens the OnSTAFFJob Manager screen which displays print jobs generated by the logged-on user, as well as SCHEDULED Automation set up for the clinic. See [Ctrl+J] in the Keyboard Commands section of this document for details.
17. ![]() Primeclinical.com
Primeclinical.com
17.1 Select this icon to go to Prime Clinical's web site.
18. ![]() Open a Support Ticket - Effective Version 13.10.29
Open a Support Ticket - Effective Version 13.10.29
18.1 Select this icon to go to the New Ticket screen. See online documentation Support --►Open New Reference for screen details.
19. ![]() Survey - Effective Version 13.10.29
Survey - Effective Version 13.10.29
19.1 Selecting this icon brings up a browser and opens a page where a survey may be filled-out regarding different aspects of our company and software.
20. ![]() Patients Check In - Effective Version 9.12.26
Patients Check In - Effective Version 9.12.26
20.1 For clinics wishing to utilize it, Intellect comes equipped with an appointment check in and/or self-schedule option. With this function, once a patient has checked-in, the [Patients Check In] icon begins to blink, changing from the original figure (see above) to a figure with a 'plus' sign: ![]()
Click on the blinking [Patients Check In] icon to display a report. For additional information, see Results on Intellect's Main Screen in Schedule --►Appointment --►Self Check In.
21. ![]() RX Button - Effective Version 9.12.01
RX Button - Effective Version 9.12.01
21.1 The RX button works in conjunction with ePrescribing. It can be solid white, green, yellow, or flashing red and white.
White: Indicates the server is connected and there are no pending pharmacy calls (refills) or faxes.
Green: Indicates there are pending pharmacy calls (refills), or faxes. The system checks the status every 5 minutes, but you can also re-login to update.
Yellow: Indicates the jre file needs to be updated to 1.6. Contact Prime Clinical Systems and open an Intellect support reference.
Flashing Red and White: Flashing can occur when the server can not be reached. Hovering a mouse over the flashing [RX] button displays a statement stating the reason the button is flashing. See the example below:

Someone at the correct password level, such as a doctor, can click on this button and be taken directly to Intellect’s Check RX Status option. See the online documentation at Clinical --►Check RX Status for additional information.
22.  Office Task Manager - Effective Version 16.05.20
22.1 Select this icon to open Intellect's Office Task Manager option. See online documentation for Additional Features --►Office Task Manager for additional information.
22.2 Effective version 19.09.03, when clicking on the Tasks Icon, the screen now condenses when the resolution is changed.
23.  My Patient Chart Approval - Effective Version 24.03.01
23.1 For PCM users only. The icon flashes yellow when there are pending requests to access electronic health information via MyPrimeChart app. See online documentation for Additional Features --► Patient Portal --► My Patient Chart Approval for more information.
23.2 Select this icon to open the My Patient Chart Approval screen.
1. Use [Enter], [Tab], [↓] or your mouse to advance the focus to the next field.
2. Use the mouse, the [Shift][Tab] keyboard combination, or [↑] to move the focus to the previous field.
3. When your cursor is in a text box field, the [Tab] and [Shift][Tab] keys do not advance the focus to another field, so:
o Use the [Ctrl] [Tab] keyboard combination, [↓], or the mouse to advance the focus to the next field.
o Use the [Ctrl] [Shift][Tab] keyboard combination, [↑], or the mouse to advance the focus to the previous field.
1. [Insert]: Press to allow the insertion of characters in the beginning or middle of an entry without over-writing existing characters.
2. [Enter]: Press [Enter] or move the focus to another field to turn off the feature.
3. [Delete]: Press [Delete] anywhere within a field to clear it.
4. [Page Up]:
o When a screen with a multi-line table or [F2] search is displayed, press [Page Up] to display the next set of records towards the top of the list.
o After making a selection from an [F2] search where more than one record is returned, press [Page Up] to activate the [Back] button displayed on the screen.
5. [Page Down]:
o When a screen with a multi-line table or [F2] search is displayed, press [Page Down] to display the next set of records towards the bottom of the list.
o After marking a selection from an [F2] search where more than one record is returned, press [Page Down] to activate the [Next] button displayed on the screen.
6. [Space Bar]: Press the [Space Bar] with the focus at the beginning of a field to clear it.
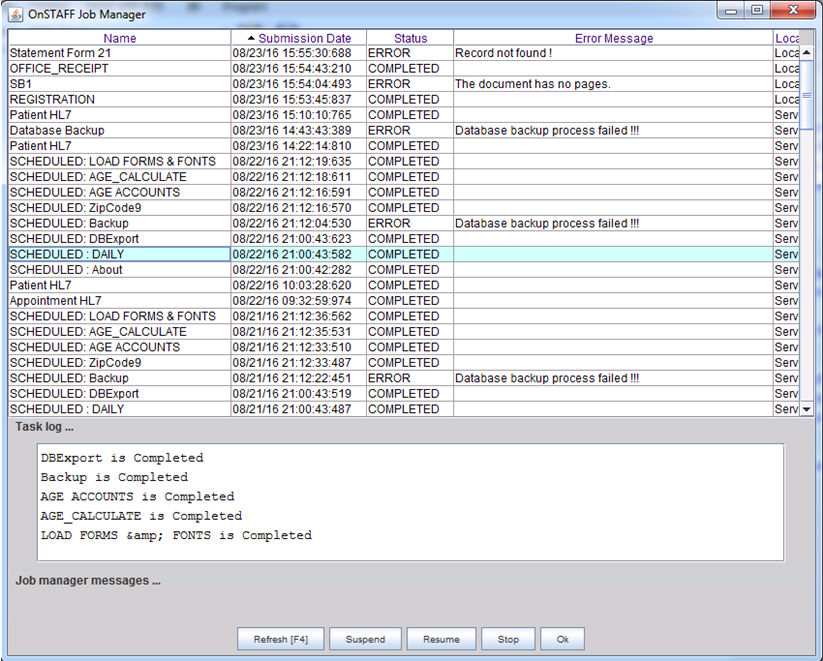
7. [Ctrl+J]: Press the [Ctrl] and [J] keys at the same time to display the OnSTAFF Job Manager screen.
o In software versions prior to 15.02.17, the OnSTAFF Job Manager displayed only jobs for the logged-in user.
o Effective version 15.02.17, the OnSTAFF Job Manager displays the logged-in user's jobs and all the automated jobs set to run at night for the logged-in clinic. This feature allows anyone in the office to verify that the nightly automation for the Backup and DBExport tasks, as well as any other scheduled tasks, indicate the status is 'COMPLETED.' Automated task names begin with 'SCHEDULED'. Highlight a job to view the 'Task log.' For example:
Intellect Spell Checker Effective version 8.11.06
After typing in a text box field (for example, <Remark> on the Registration screen), press the [Ctrl] and [D] keys at the same time to launch the Spell Checker. Intellect opens the Spell Checker window which displays the misspelled word with suggested corrections, if applicable. When the Spell Checker is launched for the first time, it starts checking the errors from where the cursor is placed.
NOTE: This feature is currently not available in all screens, but PCS plans to expand its use.
• [Replace]: Highlight one of the suggestions and then press the [Replace] button to correct the misspelled word.
• [Ignore]: Press to bypass correcting the ‘misspelled word.’
• [Close]: Press to close the Spell Checker window.
After selecting [Replace] or [Ignore], the next misspelled word appears, if applicable. When Spell Checker has reviewed the last word of the text, this message displays:
• Select [Yes] to start checking for misspelled words at the beginning of the field.
NOTE: When the Spell Checker is launched, Intellect starts from the location of your cursor, so if your cursor was at the end of the line you need to select [Yes] to check the entire text.
• Select [No] to close the Spell Checker window.
If no errors are found, this message displays:
• Select [Ok] to close the pop-up.
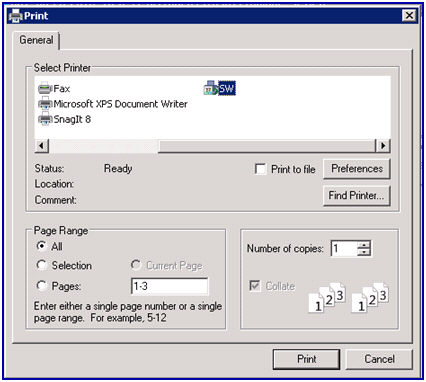
The print dialog box appears throughout Intellect for forms, reports, receipts, letters, and much more.
A dialog box displays (see sample below) with a title. The title changes according to the print job. In the example below, the title is Print Journal.
Printer properties:
1. <Printer>
1.1 When the print dialog box pops-up, the default printer set up on the Utility --►Set Up --►Printer --►Report screen displays in the <Printer> field.
To select a different printer:
• View the list of printer codes either click on the <Printer> field arrow, OR press the [→] (right arrow) on your keyboard. Click on the printer code, OR use the [ ↑] (up) and [ ↓] (down) arrows to highlight the correct code, and then press the [Enter] key to select.
- OR -
• A printer may also be selected by pressing the first letter of the printer code on your keyboard. For example, press 'V' to view.
1.2 Please note the following:
• If the report is set to a local job (Utility --► Set Up --► Printer --► Report Setup <Where> = L), then the printer you select must be connected to your workstation. If the report is set as server job (Utility --► Set Up --► Printer --► Report Setup <Where> = S), then the printer only needs to be connected to your server.
• When you print the Apply Receipt Report (Receipt Payment), you must always send it to a local printer (a printer connected to your workstation). The program always creates this job as a local job, even if the report set up has been set as a server job. You can either choose to send the report to a local printer (one connected to your system), send the report to disk, or view the report (if PDF has been set up) and then print from the view option.
• When printing (Exporting) to Excel, if this error message displays, call PCS support. "org/apache/poi/hssf/usermodel/HSSFWorkbook then some files need to be put onto the workstation. For complete instruction please call Prime Clinical System support."
Documents may be viewed before printing. See View a Document in this documentation for detailed information.
PCM users only: Any Intellect report may now be exported to PCM in .pdf format for indefinite storage. Before reports may be exported, set up is required.
• Effective version 14.08.28, selecting <Printer> 'PCM Chart ' saves the .pdf file in PCM without printing a hardcopy. In the online documentation, see Notes for PCM Users --►Misc Intellect Changes Affecting PCM --►Export Intellect Reports to PCM for additional information and set up requirements.
• Effective version 16.02.22, selecting a <Printer> where Utility --► Set Up --► Printer --► Device <Save as Chart> is set to 'Yes,' prints the report to the selected printer AND saves a copy of the document in PCM. See Notes for PCM Users --► Misc Intellect Changes Affecting PCM --► Reports saved as chart for additional information and set up requirements.
2. <Number of Copies>:
2.1 This field defaults to either 0 (zero) or 1; both print one copy. If you wish to print more than one copy, enter the number of copies.
Fax/Email:
3. <Fax Number(s)>:
3.1 If <Printer> 'FAX' was selected, enter the fax number without hyphens or parenthesis. If there are two or more fax numbers, they should be separated by a comma. See Sending Faxes for additional information.
4. <Email Address(es)>:
4.1 If <Printer> 'EMAIL' was selected, enter the email address. If there are two or more email addresses, they should be separated by a comma. Set up is required before an email may be sent. See Email for set up information.
5. <Secondary Printer>:
5.1 When the programming file is set for multiple faxes, faxes print to the Secondary Printer if the fax number field for the recipient is empty.
5.2 When the programming file is set for multiple mailings, emails print to the Secondary Printer if the email address field for the recipient is empty.
Select the [Print] button to send your request to the printer. Select [Cancel] to exit the Print Dialog Box and not print the file/report.
Note: Management Reports may be printed, exported to an Excel spreadsheet, emailed, faxed, sent to disk, or archived.
Effective Version 9.12.27: Hold down the Ctrl key and press the letter L to capture the image currently on the screen. A printer dialog box pops up allowing you to select the printer where the screen image should be sent. Select the printer and enter the number of copies to print.
The online documentation may be printed by menu option (topic) or by individual page. Depending on the version of Intellect you are using and your computer set up, your screens may vary from those shown in this documentation. For example, if you do not have Adobe Flash Player some formatting is lost and the [Print] button does not display:
Without Adobe Flash Player:
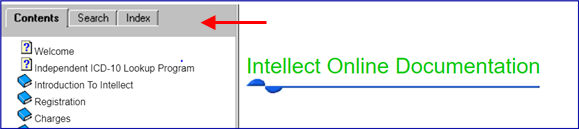
With Adobe Flash Player:

Follow the directions below which best match your computer set up.
1. Right-click on the topic you wish to print; for example, Charges --►Charge. A pop-up menu displays:
2. Click on 'Open link in new tab' to save the topic to a new tab:

3. Click on the topic's tab to open the document (see above).
4. Right-click on the document to display a pop up menu:
5. Click on the 'Print' option to open the print preview screen.
6. Select your printer, the pages you want to print, etc. and click the [Print] button.
1. Go to the menu option you wish to print; for example, Charges --►Charge.
2. Click once on the text to make sure the document is selected.
3. Click the [Print] button at the top of the documentation:
3.1 A Print screen displays:
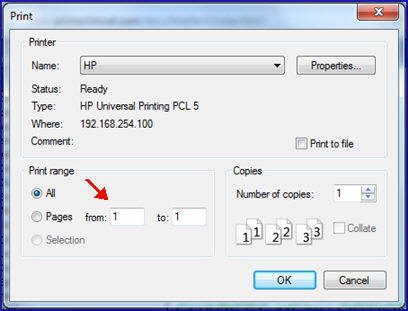
3.2 Verify that your printer is selected, or use the drop-down to select a different printer.
3.3 If you do not want to print the entire document, enter the pages you wish to print in the Print Range section of the screen (see red arrow above).
3.4 Click the [OK] button.
Format: HH:MM
1. Type the time as military (0-24 for hours, 1-60 for minutes) and press [Enter]. Intellect converts the entered time to AM or PM; e.g., 1345 displays as 1:45 PM.
- OR -
2. Type regular time (0-12 for hours) and add AM or PM.
Caution: When entering times intended to start or end at 12 noon, you must manually add 'PM.'
Examples of 'Time' fields:
• Utility --►Set Up --►Appointment --►Template <From Time> and <To Time>
• Utility --►Set Up --►Appointment --►Block <From Time> and <To Time>
• Charges --►Speciality Charges --►Anesthesiology <Time> and <Time To> for Anesthesiology posting
• Schedule --►Appointment --►Full Day CheckIn/Out tab: <Pat Wk In>, <Pat Chk In>, <Dr Ck In>, <Dr Chk Out>, <Pat Chk Out>
• Schedule --►Appointment --►Print <From Time> and <To Time>
Wherever there is a field to input a date, Intellect uses this format: MM/DD/YYYY.
1. If you enter only the month and day, Intellect assumes the date is for the current year.
2. If a 2-digit year is entered into a blank field, the 4-digit year displays as '20##'.
3. If you enter only the day, Intellect assumes the date is for the current month and year.
4. For date fields that automatically populate:
4.1 Press the [Space Bar] to clear the date field.
4.2 Press [Enter] to accept the default date which is usually the clinic date.
5. Once a date is entered in the date field, you may press the following keys to move that date forwards or backwards:
5.1 T (either upper or lower case) to insert the current calendar date.
5.2 d (lower case) or the - (minus or dash symbol) to move backwards one day (i.e., the day prior to an active date).
5.3 D (upper case) to advance one day ahead of an active date.
5.4 w (lower case) to move one week prior to an active date.
5.5 W (upper case) to advance one week ahead of an active date.
5.6 m (lower case) to move one month prior to an active date.
5.7 M (upper case) to advance one month ahead of an active date.
5.8 y (lower case) to move one year prior to an active date.
5.9 Y (upper case) to advance one year ahead of an active date.
<Zip Code> fields appear throughout Intellect. For example, the <Zip Code> field is on the Patient, Provider, Facility, Insurance, and Company screens. When the <Zip Code> field is populated with a valid zip code, the <City> and <State> automatically populate.
When completing a screen and the zip code is unknown, you have two options:
1. Leave the <Zip Code> field blank and press [Enter] through the <City> and <State> fields. NEVER enter a <City> and <State> while leaving the <Zip Code> field blank.
- OR -
2. Find the appropriate zip code. With the focus in a <Zip Code> field, enter as much of the zip code as you know (or leave the field blank) and press [F2] to display a Searching screen:
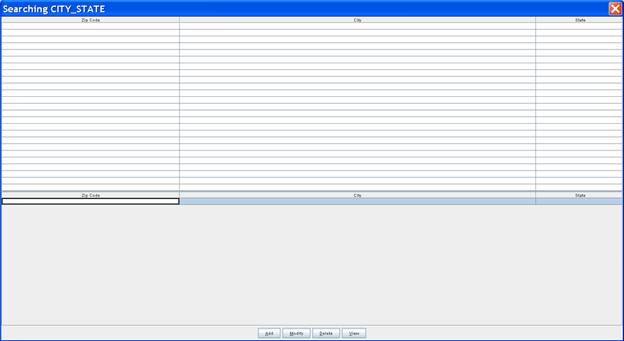
2.1 If the <Zip Code> field was partially completed before you pressed [F2], the Searching screen populates with zip codes beginning with the numbers you entered in the <Zip Code> field. Use the scroll bar to scroll through the list of zip codes and click on the applicable code.
2.2 If the <Zip Code> field was blank when you pressed [F2], the Searching screen is blank. Click on either the <City> or <State> field, enter the city/state name, and then press [F2] to display a list of zip codes in that city/state that are in the system. Use the scroll bar to scroll through the list of zip codes and click on the applicable code.
If the zip code is not in the system, you need to add it. Click the Add CITY_STATE screen. Please see the online documentation for Adding Zip Codes.

When a printer dialog box appears, in the <Printer> field select VIEW from the drop-down list to view the document on screen. Please note, some reports or forms may not be set up to view on screen.
Intellect utilizes Adobe Acrobat Reader to View reports and forms. If Adobe Acrobat Reader has never been opened on the local workstation, the first time a document is sent to View a window with the Adobe Acrobat Reader contract displays rather than sending the document to a printer. If you agree to the terms of the Adobe contract, click on the [Accept] button in the lower, right corner of the screen. When Adobe Acrobat Reader has completed loading, the report or form displays on the screen.
When done viewing the document, click on the X button in the top, right corner of the screen to close the view window.
Note: When Utility --► Tools --► Configuration <Acrobat Viewer Path> is NOT set to the full version of Adobe Acrobat Reader on the workstation, the internal report viewer included with the program varies, based on the software version.
If Utility --► Tools --► Configuration <Acrobat Viewer Path> is blank, a pop-up warning displays to indicate that Intellect is using the internal report viewer included with the program.
If you are using the OnSTAFF Report Viewer, the tool bar is as follows:

If the document is more than 1 page, you can view subsequent pages by clicking on the  button (right arrow) on the task bar. To view previous pages, use the
  button (left arrow). Hovering over the buttons displays what that item does. The [Page Up], [Page Down], [Home] and [End] keys display next page, previous page, first page, and last page of the document, if selected.
 Move
Move
 Zoom In
 Zoom Out
 First Page
 Previous Page
Next Page
 Last Page
Note: Using the printer icon from the View screen to print the document generates blank sheets of paper. Close the View window and re-select the report to print.
If Utility --► Tools --► Configuration <Acrobat Viewer Path> is blank, the new internal report viewer (JPview) included with the program allows the displayed item to be printed.
• If the document is more than 1 page, use the scroll bar at the right side of the screen to view the subsequent pages.
• If the document is wider than the screen, use the scroll bar at the bottom of the screen.
• Place the cursor on the document and right-click to display options for Rotate View, Pate Navigation, Zoom In, Zoom Out, and More.
To print the displayed document:
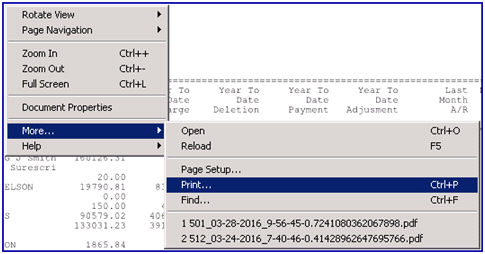
1. Place the cursor on the displayed document and right-click to access a box of menu options.
2. Click ‘More’ to display additional options.
3. Click on 'Page Setup' if the orientation of the paper needs to be changed; i.e., from portrait to landscape, or vice versa.
4. Place the curser on the document again and right-click to display the menu options. This time, click on ‘More’ and then click 'Print':
4.1 A print box displays, allowing the selection of a physical printer where the file/report should be printed:
Command Columns appear throughout Intellect displayed as either 'C' or 'CMD'.
Although available commands vary from screen-to-screen, these are standard:
Enter 'A' to add, 'M' to modify, 'D' to delete, or press [Esc] to quit.
Using the [F2] command in any command column displays a list of commands available for that table. This is an informational display only and does not accept selection.
• Social security and phone (fax) numbers are automatically formatted by Intellect.
• When using self check in, to exit from the Welcome screen, press Alt-Ctrl-Q. This key combination should not be given to patients.
• PCM users only. Effective version 16.10.11, when an Intellect client purchases PCM, a new feature called 'Create Chart' automatically creates a chart in PCM for every existing patient in Intellect. No action is required by the user.
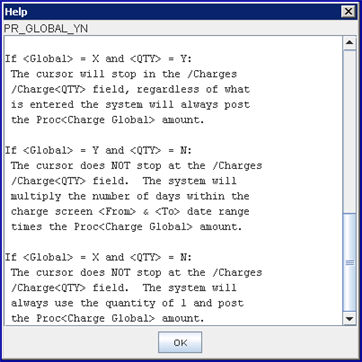
Pressing [F1] with the focus in certain fields displays help messages that contain detailed information for that particular field. Note: Some fields do not have this ability.
2.1 Drop-down List:
When the focus is in a field with a drop-down list, press [F2] to display a Searching box with a list of choices and their descriptions. The Searching pop-up also appears when pressing the [→] button (right arrow) on your keyboard. See Drop-down Lists in this documentation for additional information.
With the focus in a field that accepts a code or name, a search of an underlying table may be made to locate codes, names, and descriptions via the Searching screen. See Searching Screen in this documentation for additional information.
3. [F3] is used in fields which accept only codes which have been set up and defined in another table. Press [F3] when the code is present to display the view screen containing the completed information. For example, if the <Zip Code> field was filled with 78669, place the cursor in the <Zip Code> field and press [F3] to display what is entered in Intellect for that zip code:

NOTE: If you would like additional function keys set up for your facility, contact your trainer or Prime Clinical Systems support.
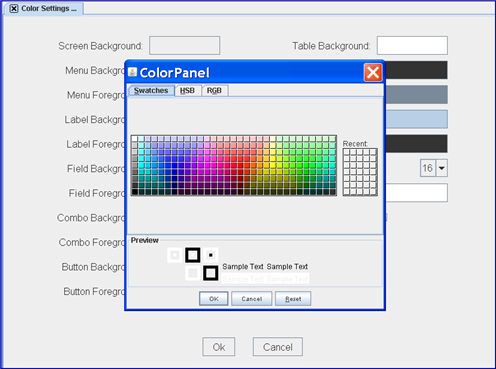
Utility --►Set Up --►User Interface
Note: Security may restrict access to the Utility --►Set Up menu. Contact PCS Support to add the User Interface to a menu with a lower security level (e.g., Misc or Utility) if all users need access.
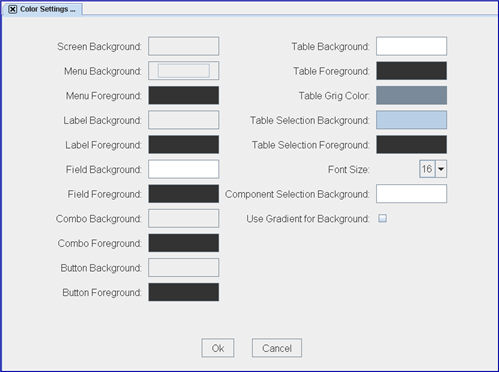
Each user may select his/her own color scheme and it may be different for each Clinic and Password combination. PCS suggests that you do NOT change the 'Foreground' colors as they control the color of the type on Menu Names, Field Descriptions, etc.
To select a color, display the Color Settings screen (shown above) and left-click on the field you wish to change; the Color Panel shown below displays. Left-click on the color you want to select and then left-click on the [OK] button.
Basic log in and error information
1. When accessing Intellect, a log-in screen displays:
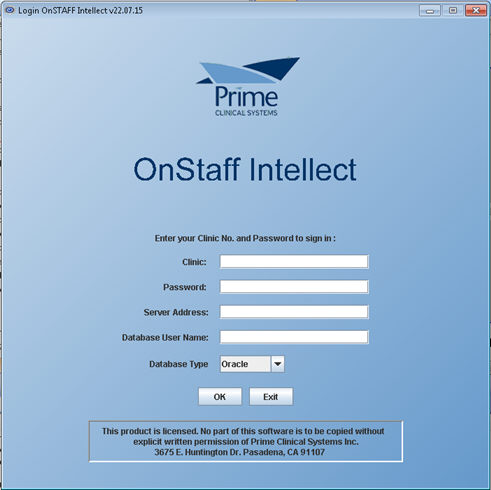
1.1 <Clinic>: Enter the number of the clinic where you are working.
1.2 <Password>: Enter your password; remember that passwords are case sensitive.
1.3 <Server Address>: Enter the address of your server. The server address is an external IP address that connects your computer to the Internet Service Provider (ISP). If you are unsure of your server address, contact your IT professional or PCS Support.
1.4 <Database User Name>: Enter the name of the database you are using. If you are unsure of your database server name, contact PCS Support.
1.5 <Database Type>: Use the drop-down menu to select the appropriate database type. If you are unsure of your database type, contact PCS Support.
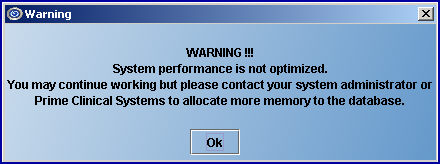
2. Intellect might display this message to indicate that the local workstation has a more current version than the Main Server. If this message is displayed on a local workstation, the system administrator/office manager should be notified. See the Utility --► Tools --► Live Update documentation for more detail.
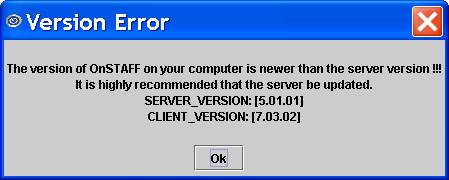
3. If these error messages display, please contact Prime Clinical Systems so we can correct your system.
4. If when logging-in, Intellect displays the error message below, you have entered an invalid password. Click [OK] to close the error message then check to see whether or not the [Caps Lock] is on as the passwords are case sensitive. Usually passwords are set up in lower case letters. If you are still unable to log in, verify with your systems administrator that you have the correct password.
Effective version 14.07.24, when neither the keyboard nor mouse have been used for the number of minutes indicated in the <Idle Time in Minutes> field on the Utility --►Set Up --►Parameter screen, this pop-up displays.
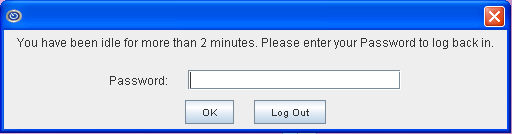
Note: Effective version 15.10.15, the [Log Out] button was added. Click [Log Out] to close down the system.
The user has three opportunities to enter the password that was originally entered to open the current Intellect session, and then click [OK]. If an invalid password is entered, this pop-up displays:
Click on [OK] to return to the first screen. If the correct password is NOT entered by the third try, after clicking [OK], this pop-up displays:
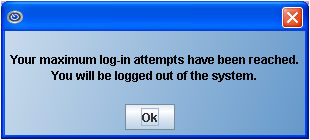
Click [OK] to shut down Intellect. Background functions still running on the server continue, however, any local jobs that were not completed before Intellect shut down are lost.
To re-start Intellect, sign-in with the password that was originally used to open Intellect.
Non-commercial email carriers have a cap on the number of emails that may be sent per day. If your current email carrier does not support the number of emails you need to send on a daily basis, you need to contract with a commercial email vendor.
Throughout Intellect's many screens there are fields which have drop-down lists. For example:

Click on the arrow
... to display a list of choices for that field:
Select by double-clicking on the correct code, OR use the ↑ (up) and ↓ (down) arrows to highlight the correct code, and then press the [Enter] key to select.
font-size: 12pt
For definitions or additional information for the choices, click on the field, OR press the [F2] key to display choice descriptions:
With the focus in a field that accepts a code or name, a search of an underlying table may be made to locate codes, names, and descriptions via the Searching screen. For example:
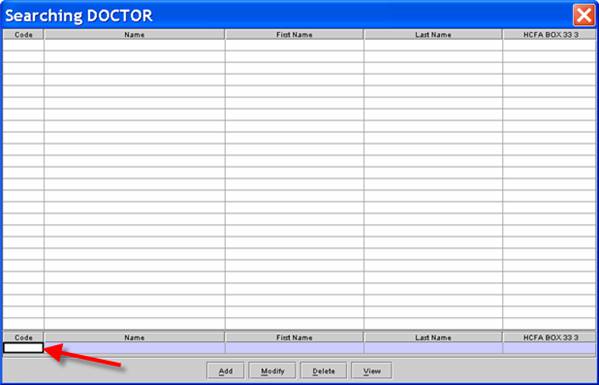
You may search using the Code field or another field such as Name. After entering the search criteria, press one of the buttons at the bottom of the screen to initiate the search.
1. With the focus in a field requiring a code, press [F2] to display the Searching screen with the focus in the Code Column.
2. On the Searching screen, click on the <Code> field (see red arrow above) and enter as much of the code as you know followed by the * (e.g., 178*). Press [Enter] to display your choices.
If you would like to see all the codes and corresponding names in the system, click on the Code or Name field and press [F2]. Use the up/down arrow keys to find the correct code/name.
3. To select the code from the list, either highlight the record and press the [Enter] key, OR double-click on the record.
4. With the focus in a field requiring a name, type up to 6 characters of the Name. Depending on the screen you are on, press either [F2] or [Enter] to display the Searching screen populated with names that fit your entered criteria. Note: The use of the wild card character (*) helps when only part of a name is known. Intellect always searches first by name or description.
If you would like to see all the names and corresponding codes in the system, click on the Name or Code field and press [F2]. Use the up/down arrow keys to find the correct name/code.
5. To select the name from the list, either highlight the record and press the [Enter] key, OR double-click on the record.
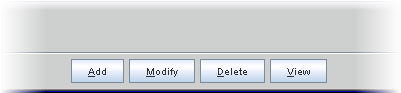
Select [Add], [Modify], [Delete], or [View] to go to the screen of the selected record in that option. For example, if you are on the Searching screen for zip codes and had highlighted the zip code 92123, press [Modify] to open the Modify CITY_STATE screen for zip code 92123, allowing you to see the information in the system for 92123 and make modifications as needed.

Email Containing Report Password
Effective version 14.02.04, Intellect has the option of sending encrypted reports to the referring provider. For set up examples, go to Utility --► Set Up --► Appointment --► Appointment Type and see fields <Email Referring for No Show>, <Email Referring for Cancelation>, <Email Patient for No Show>, or <Email Patient for Cancelation>. Encrypted reports may be sent for financial and other management reports. For additional set up information, please contact PCS Support
To open the encrypted report, a separate email is sent containing the password.
Example of password email for software before version 16.02.22:
The password for report:[Financial] file name:[/tmp/501_01-28-2016_0-53-10-0.23736389907156463.pdf] is:366576e
Example of password email for version 16.02.22 and greater:
The password for the report is: 39cd70e
[Financial] [/tmp/501_01-28-2016_1-1-4-0.22496509323096425.pdf]
See Schedule -- ►Appointment --► Full Day --► Schedule Overview & Right-Click Menu Right-Click (Context) Menu.
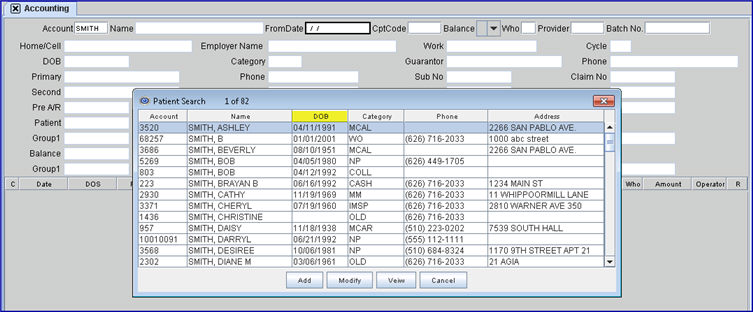
When a patient is registered, a cycle is automatically created (it can be seen in the <Cycle> field on the Ledger screens). Effective in version 19.01.25 when a log-in takes place, patients with a blank Registration <DOB> field are updated to the current cycle date via Intellect.
Effective version 19.05.01, a Date of Birth (DOB) column was added to the Patient Search window. This window pops up if a last name is typed into the <Account> field. This applies to any screen where the <Account #> field is present and a search is made by patient name. In the example below, the patient's last name was typed into the <Account> field on the Ledger --►Accounting screen:
Offices MUST 'Restart the Service' after loading the current Live Update onto the Main Server and after adding new printers to Intellect. See Restart ONSTAFF Intellect Service on Main Server for details.
Additionally, Email Reminders with Confirmation require OnStaff Web Server service. For details on starting or restarting this service, see Restart OnSTAFF Web Server Service.