
Intellect™
SCHEDULE MENU OPTIONS

Appointment
Full Day
Schedule Overview & Right-Click Menu
The Appointment Schedule is designed to manage appointment-related actions. The prerequisites for performing these actions are: creating a Provider, creating an Appointment Type, creating an Appointment Template, and adding both the provider and the template to the schedule through the Utility --►Set Up --► Appointment --►Schedule <Provider> and <Template> fields.
Once all these tasks are completed, the scheduler is ready to add and modify patient appointments.
Videos Available: Click Appointment Message, Navigating the Appointment Schedule and/or Appointment Scheduling to access the links. Depending on the system set up, the media player may need to be activated. Speakers need to be attached to the workstation to hear the instructions.
Note: To view the videos, log-in through the www.primeclinical.com website. Current support is required.
Additionally, Prime Clinical offers webinars/workshops on a variety of topics. For more information, contact PCS support.
In this Topic Hide
1. To create schedules for providers in Intellect, there are two methods to access the main screen
1.1 Go to Schedule --► Appointment --► Full Day
- OR -
1.2 Click the short cut icon ![]() located just below Intellect's main menu.
located just below Intellect's main menu.

Either of these options opens the Day view for the current calendar date, with columns for the providers configured through templates for each day.
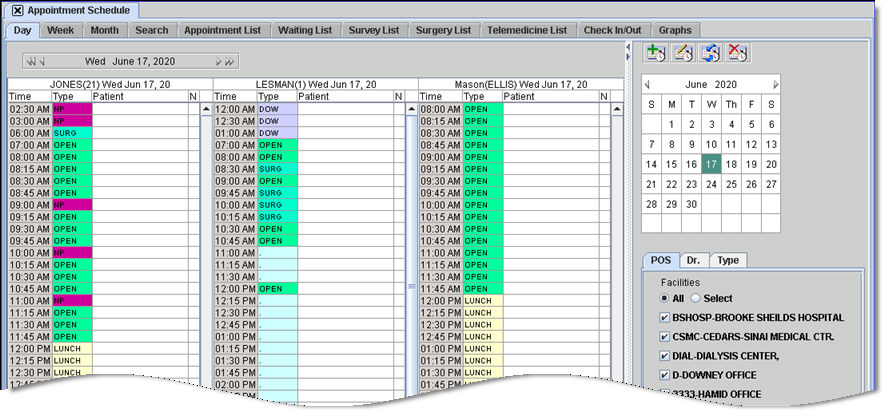
The Appointment Schedule screen has many component screens with various views and functions available through nine tabs:

Click for tab details:
Appointment List - Effective version 9.12.20
Survey List - Effective version 14.03.20
Telemedicine List - Effective version 20.06.11
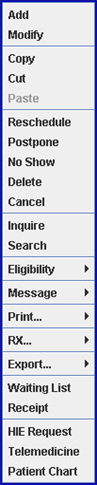
With the pointer in the Patient field, right-clicking displays the Right-click (Context) Menu as shown below. Click on the link for each option for more information.
Note: The Patient field should be empty when using the Add, Paste, and Waiting List options, and should be filled (show a patient's name) for all other menu options.
 |
1. Add: Click on Add to go to the Add Appointment screen. For additional information, see the online documentation at Schedule --►Appointment --►Full Day --►Appointment Booking and Management --►Add Appointment Dialog Box.
2. Modify: Click on Modify to go to the Modify Appointment screen. For additional information, see the online documentation at Schedule --►Appointment --►Full Day --►Appointment Booking and Management --►Modify Appointment Dialog Box.
3. Copy: Click on Copy to copy all information associated with that patient's appointment and enable the Paste option (see below).
3.1 The appointment remains on the original time slot.
3.2 An exact copy of that patient’s appointment may be added to one or more time slots using the Paste option.
3.3 When more than one patient is scheduled for a particular time slot, the Delete Appointment screen opens to allow the user to select the appropriate patient using the <Name> field drop-down list and then click the [Copy] button. For additional information, see the online documentation at Schedule --►Appointment --►Full Day --►Appointment Booking and Management --►Delete Appointment Dialog Box.
4. Cut: Click on Cut to copy the appointment information then remove the appointment from that time slot and enable the Paste option (see below).
4.1 This option performs the same function as the Reschedule option (see below).
5. Paste: This option is only enabled after selecting the Copy, Cut, Reschedule or Postpone options. Place the cursor in the Patient field for the desired time slot and click on Paste to add an appointment for the patient whose appointment information was copied/cut/rescheduled/postponed.
5.1 The Paste option remains enabled until another right-click menu option is selected, so the copied appointment may be pasted to more than one time slot.
5.2 If this option is gray and not available, nothing has been copied so there is nothing available to be pasted.
5.3 NOTE: If double-booking is not allowed on the Template setup, only select a time slot where the Patient field is empty.
6. Reschedule: Click Reschedule to copy the appointment information then remove the appointment from the time slot and enable the Paste option (see above).
6.1 After the original appointment is removed from the schedule, it still appears on the Appointment History with <Status> set to ‘Resch’.
6.2 When more than one patient is scheduled for a particular time slot, the Delete Appointment screen opens to allow the user to select the appropriate patient using the <Name> field drop-down list and then click the [Reschedule] button. For additional information, see the online documentation at Schedule --►Appointment --►Full Day --►Appointment Booking and Management --►Delete Appointment Dialog Box.
7. Postpone: Click Postpone to copy the appointment information then remove the appointment from the time slot and enable the Paste option (see above).
7.1 After the original appointment is removed from the schedule, it still appears on the Appointment History with <Status> set to ‘Pstpn’.
7.2 When more than one patient is scheduled for a particular time slot, the Delete Appointment screen opens to allow the user to select the appropriate patient using the <Name> field drop-down list and then click the [Postpone] button. For additional information, see the online documentation at Schedule --►Appointment --►Full Day --►Appointment Booking and Management --►Delete Appointment Dialog Box.
8. No Show: Results differ depending on the number of patients scheduled:
8.1 When only one patient is scheduled for a particular time slot, click on No Show to add a No Show status entry to the patient's Appointment History.
8.2 When more than one patient is scheduled for a particular time slot, click on No Show to go to the Delete Appointment screen where the appropriate patient can be selected from the <Name> field drop-down list. For additional information, see the online documentation at Schedule --►Appointment --►Full Day --►Appointment Booking and Management --►Delete Appointment Dialog Box.
8.3 Effective version 14.02.04: When an appointment is tagged using the No Show option, a notification email can be sent to the referring provider and/or patient. To use this feature:
• The email option must be set up in your system.
• The referring provider and/or patient must have an email address on file in Intellect
• The appropriate fields need to be set up on the Utility --►Set Up --►Appointment --►Appointment Type screen.
9. Delete: Results differ depending on the software version and number of patients scheduled:
9.1 In Versions less than 9.12.35
9.1.1 When only one patient is scheduled for a particular time slot, click on Delete to remove the patient's name from the schedule.
9.1.2 When more than one patient is scheduled for a particular time slot, click on Delete to go to the Delete Appointment screen where the appropriate patient can be selected from the <Name> field drop-down list. For additional information, see the online documentation at Schedule --►Appointment --►Full Day --►Appointment Booking and Management --►Delete Appointment Dialog Box.
9.2 In Version 9.12.35 and greater:
9.2.1 When only one patient is scheduled for a particular time slot, click on Delete to display this warning:
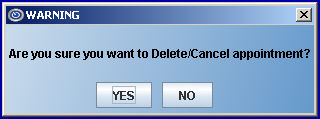
• Click [Yes] to delete the selected appointment.
• Click [No] to close the warning message and the selected appointment remains as scheduled.
9.3 When more than one patient is scheduled for a particular time slot, click on Delete to go to the Delete Appointment screen where the appropriate patient can be selected from the <Name> field drop-down list, and the [Delete] button clicked, causing the Delete/Cancel warning box to display (see above). For additional information, see the online documentation at Schedule --►Appointment --►Full Day --►Appointment Booking and Management --►Delete Appointment Dialog Box.
10. Cancel: Results differ depending on the software version and number of patients scheduled:
10.1 In Versions less than 9.12.35
10.1.1 When only one patient is scheduled for a particular time slot, click on Cancel to copy the patient's name and information and then removes the patient's name from the schedule. The patient name/information can then be pasted into another empty <Patient> field using the Paste option (see above).
10.1.2 When more than one patient is scheduled for a particular time slot, click on Cancel to go to the Delete Appointment screen where the appropriate patient can be selected from the <Name> field drop-down list. For additional information, see the online documentation at Schedule --►Appointment --►Full Day --►Appointment Booking and Management --►Delete Appointment Dialog Box.
10.2 In Version 9.12.35 and greater:
10.2.1 When only one patient is scheduled for a particular time slot, click on Cancel to display this warning:
• Click [Yes] to cancel the selected appointment.
• Click [No] to close the warning message and the selected appointment remains as scheduled.
10.3 When more than one patient is scheduled for a particular time slot, click on Cancel to go to the Delete Appointment screen where the appropriate patient can be selected from the <Name> field drop-down list, and the [Delete] button clicked, causing the Delete/Cancel warning box to display (see above). For additional information, see the online documentation at Schedule --►Appointment --►Full Day --►Appointment Booking and Management --►Delete Appointment Dialog Box.
10.4 Effective Version 14.02.04: When an appointment is tagged using the 'Cancel' option, a notification email can be sent to the referring provider and/or patient. To use this feature:
10.4.1 The email option must be set up in your system.
10.4.2 The referring provider and/or patient must have an email address on file in Intellect
10.4.3 The appropriate fields need to be set up on the Utility --►Set Up --►Appointment --►Appointment Type screen.
10.4.4 Effective version 19.12.04, if all the above criteria are met, an email is sent to the email address in the <Notification E-mail> field on the Utility --►Set Up --►Clinic screen.
The information in the email to the clinic is universal to all clinics. Any changes made to the email would be for all clinics. See sample email:
11. Inquire: Click on Inquire to go to the Inquire Appointment screen where the Inquire Appointment screen may be opened and either verify patient eligibility or send a real-time eligibility request without having to switch screens. For additional information, see the online documentation at Schedule --►Appointment --►Full Day --►Appointment Booking and Management --►Inquire Appointment Dialog Box.
12. Search: Click on Search to go to the Appointment History screen. For additional information, see the online documentation at Schedule --►Appointment --►Full Day --►Appointment Booking and Management --►Search Appointment (Appointment History Dialog Box).
13. Eligibility: When added in version 9.12.01, clicking on Eligibility took users to the Inquire Appointment screen where they could click on the [Eligibility] button and view the results on the Eligibility History tab. As of version 9.12.32, the Eligibility option has three submenus:
13.1 Selected Patient: This option requests eligibility to be checked and viewed for a qualified individual patient. Click on Selected Patient to display the Inquire Appointment screen, click on the [Eligibility] button, and view the results on the Eligibility History tab.
13.2 Doctor's Appointments: This option requests eligibility to be checked for all qualified patients for one selected doctor. To request an eligibility check for qualified patients of one doctor, click anywhere in the Patient column for that doctor, right-click to display the Right-click Menu, and then select Doctor's Appointments. *
13.3 Day's Appointments: This option requests eligibility to be checked for all qualified patients for all doctors for one selected day. With the Day tab displaying the day to check, select Day’s Appointments. *
* To view eligibility results for qualified individual patients, place the pointer on the patients’ appointment, select Inquire to display the Inquire Appointment screen, and click on the Eligibility History tab.
Inquire can be accessed from two places:
• On the Day tab, place the pointer on a patient’s appointment, right-click to display the Right-click menu, select Inquire.
• On the App. List Tab, place the pointer on a patient’s appointment, right-click to display the Context Menu, select Inquire. This option was added in version 9.12.32.
For additional information, see the online documentation at Schedule --►Appointment --►Full Day --►Appointment Booking and Management --►Inquire Appointment Dialog Box. Or, refer to the online documentation at Schedule --► Eligibility Verification Feature.
14. Message: Effective Version 13.04.10: This option allows an immediate notification message to be sent to a single patient, all patients for a particular doctor, or for all patients with appointments on the specific day. Placing the pointer on the Message option displays additional menu options. Click on the link for each option for more information.
 |
14.1 Selected Patient:Allows a message to be sent immediately to just one patient. This option is only available when an individual patient's appointment is selected. With an appointment selected, click on Message and Selected Patient to display the Patient Alert screen with the <Doctor> and <Patient> fields already completed:
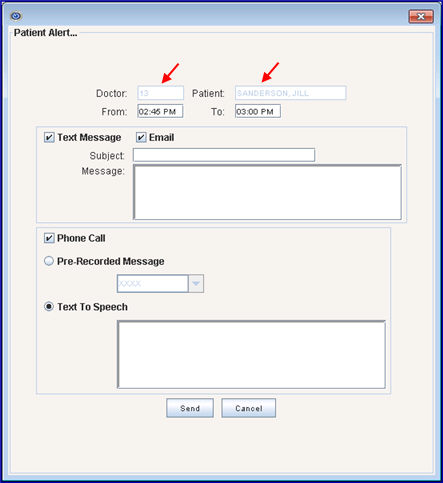
The example above shows the <Doctor> field filled with the Provider Code of the doctor with whom the appointment was scheduled, and the <Patient> field is filled with the selected patient (in this case, Jill Sanderson).
Please note:
14.1.1 
The <From> and <To> fields on the Patient Alert screen are not used when sending a message to a selected patient, as the message is sent when the [Send] button is clicked.
14.1.2 
Text Message and Email messages may only be sent for appointments that have not yet taken place (post the current time).
14.1.3 
Phone Call messages may be sent any time in regard to past, present, and future appointments. In other words, a phone call message can be sent for an appointment whether or not it has taken place.
14.1.4 Effective version 20.02.17, there are two options for sending a Text Message from the Patient Alert screen:
• SMS with Subject and Message: If the <Subject> and <Message> fields are populated, then an appointment reminder with a Subject line and additional Message is sent via SMS text message. For example:

- OR -
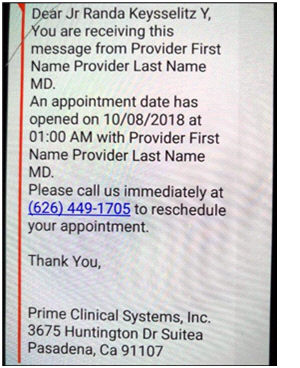
• SMS without Subject and Message: If the <Subject> field is not populated, the program sends the pre-set appointment reminder via SMS text message without a Subject or additional Message. For example:
NOTE 1: The pre-set template for both SMS text message options include the appointment provider name, patient name, appointment date, appointment time, and appointment facility name/address/phone number.
NOTE 2: Support maintains the pre-set templates for the SMS text messages on Utility --► Tools --► Formatted Text.
14.2 Doctor's Appointments: Allows a message to be sent to all patients with an appointment scheduled that day with the selected doctor. Click on an appointment slot for the doctor whose patients should be notified, then select Message and Doctor's Appointments. The Patient Alert screen displays with the selected doctor's Provider Code in the <Doctor> field. For example:
![]()
Note: The <Patient> field is blank although all patients with an appointment scheduled that day (which has not already taken place) with the selected doctor receive the notification.
14.2.1
Use the <From> and <To> fields to filter the patients as needed based on the times of their appointments. For example, if an OB/GYN doctor is delivering a baby and therefore will be late for regularly scheduled appointments, the patients whose appointments will be affected may be sent a message notifying them of the delay and giving them the option of contacting the office to reschedule their appointments. The time of the first affected appointment would be entered in the <From> field and the last affected appointment time would be entered in the <To> field.
14.2.2
Text Message and Email messages may only be sent for appointments that have not yet taken place.
14.2.3
Phone Call messages may be sent any time in regard to past, present, and future appointments. In other words, a phone call message can be sent for an appointment whether or not it has taken place.
14.3 Day's Appointments: Allows a message to be sent to all patients who have an appointment scheduled that day, regardless of the doctor with whom they are scheduled. Click on an appointment slot for any doctor, then select Message and Day's Appointments. The Patient Alert screen displays with the <Doctor> and <Patient> fields blank. Although both fields are blank, all patients with an appointment scheduled that day with any doctor receive the notification.
14.3.1
Use the <From> and <To> fields to filter the patients as needed based on the times of their appointments. For example, if an emergency maintenance issue requires the office building to be shut down for the day, the patients whose appointments will be affected may be sent a message notifying them of the situation and giving them the option of contacting the office to reschedule their appointments. The time of the first affected appointment would be entered in the <From> field and the last affected appointment time would be entered in the <To> field.
14.3.2
Text Message and Email messages may only be sent for appointments that have not yet taken place.
14.3.3
Phone Call messages may be sent any time in regard to past, present, and future appointments. In other words, a phone call message can be sent for any appointment whether or not it has taken place.
14.4 When the applicable information is completely entered, select one of these options:
![]()
Click [Send] to send the message to the requested patients via the selected method.
Click [Cancel] to close the Patient Alert screen without sending a message.
Text Message, Email, and Phone Call Information
As indicated on the Patient Alert screen (see sample in Step 14.1), notification messages may be sent as a Text Message, Email, or by Phone Call. Telephone messages are sent via a Twilio script file.
14.5.1 Before a Text Message may be sent, these fields on the Utility --►Tools --►Configuration screen must be filled:
• <SmtpServer>: Enter the smtp.server.address.
• <UserName>: Enter the user name for the smtp server.
• <Password>: Enter the password for the smtp server.
14.5.2 To send a text message, click the ☐ Text Message box, type a message in the <Message> field, and click the [Send] button.
14.5.3 Messages sent via text may only be sent to patients whose appointment has not yet taken place.
14.6.1 Before an Email may be sent, these fields on the Utility --►Tools --►Configuration screen must be filled:
• <SmtpServer>: Enter the smtp.server.address.
• <UserName>: Enter the user name for the smtp server.
• <Password>: Enter the password for the smtp server.
14.6.2 To send an email message, click the ☐ Email box, enter a subject in the <Subject> field, type a message in the <Message> field, and click the [Send] button.
Note: An email address must be entered in the Registration --►Regular --►Patient <Email Address> field to use this option.
14.6.3 Messages sent via email may only be sent to patients whose appointment has not yet taken place.
14.7 Phone Call: Phone messages are sent via a Twilio script file to the patient's home phone number. If you do not have a Twilio account, go to www.Twilio.com to set one up. For information on setting up Twilio with CallSTAFF in your clinic, refer to Using CallSTAFF with a Third-Party Internet Company.
14.7.1 To place a phone call, click the ☐ Phone Call box, and select either Pre-Recorded Message or Text To Speech:
• Pre-Recorded Message: Not yet available.
• Text To Speech: Click on the o Text to Speech radio button, type a message in the available box, and click the [Send] button. Twilio reads the message entered in the available message box.
14.7.2 When typing the message, please note:
• Include a string of commas before typing the message as commas allow a pause before the actual message begins.
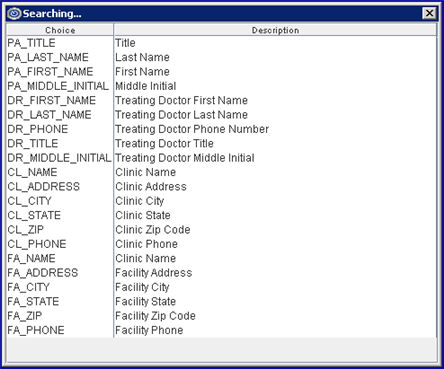
• Right-click while in the message box to display a list of database fields which can be included in the Text-to-Speech message. Highlight the field and press [Enter] to insert it into the message.
For example:
This message is for %{PA_FIRST NAME} %{PA_LAST_NAME} regarding your appointment with %{DR_FIRST_NAME} %{DR_LAST_NAME} %{DR_TITLE}…
14.7.3 Messages sent via phone call may be sent any time in regard to past, present, and future appointments. In other words, a phone call message can be sent for any appointment whether or not it has taken place.
15. Print: Place the pointer on the Print option to display these additional menu options:
15.1 Registration: Used to print a Patient Registration Form. Click on Registration to go to the Print Registration screen. Click on the [Registration] button at the bottom of the screen to print. Note: Before using this option, the printer's memory needs to be loaded using Misc --►Load Forms.
15.2 SuperBill: Used to print a patient's Super Bill. Click on Super Bill to go to the Print SuperBill screen. Click on the [Super Bill] button at the bottom of the screen to print. Note: Before using this option, the printer's memory needs to be loaded using Misc --►Load Forms.
15.3 Patient's Appointments: Used to print the current and future appointments for a patient. Click on Patient's Appointments to go to the Print Patient's Appointments screen. Click on the [Patient's Appointments] button at the bottom of the screen. Note: To have ALL of the patient's appointments to print (past, present, and future), contact support at PCS.
15.4 Patient's Instruction: Used to print instructions for a patient. Click on Patient's Instruction to go to the Print Patient's Instruction screen. Click on the [Patient's Instruction] button at the bottom of the screen to print. If there are no instructions, a report is not generated.
15.5 Selected Patient Label (formerly 'Label'; renamed in version 18.08.31): For the selected patient, this option prints one label containing a patient's name, age, DOS (date of service), DOB (date of birth), phone number, and address. The label prints up to 25 characters of the patient's name, up to 25 characters of the patient’s street address, up to 12 characters of the city, and 5 characters of the zip code. For example:
15.5.1 This feature may be used with only the Dymo Label Writer; it does not work with a dot matrix or laser printer.
15.5.2 Click on Selected Patient Label to go to the Print APP_LABEL screen. Select the Dymo printer option. If a Dymo label printer is connected, this screen displays:
15.5.3 Complete the Page Setup information as shown in the example above.
Note: Every time a label is printed, it is required to select the margin settings (landscape may be saved, but the margin settings need to be selected each time).
15.5.4 Click on the [OK] button at the bottom of the screen.
15.6 All Patient Labels: Effective version 18.08.31. This option prints labels for all of the providers and all of their patients on the Full Days Schedule. The type of label used depends on the printer being used to print the label. This label uses the same label format as the Patient Label in Registration --► Label --► Patient, i.e., the patient name and address print on the label. For example:

15.7 Doctor's Labels: Effective version 18.08.31. This option prints labels ONLY for those patients scheduled under the selected Doctor. The type of label used depends on the printer being used to print the label. This label uses the same label format as the Patient Label in Registration --► Label --► Patient, i.e., the patient name and address print on the label. For example:
15.8 Doctor's Appointments: Used to print the appointments for one doctor. With the pointer in the Patient field of any of the doctor's patients, click on Doctor's Appointments. When the Print App_List_Doctor screen displays, click on the [Print] button at the bottom of the screen after selecting your output.
16. RX: Effective version 9.12.01 - New menu option - This option may only be used if Intellect is not used in conjunction with PCM. For offices with PCM, RX must be used in PCM only.
Place the pointer on the RX option to display this additional menu:

16.1 Compose: Click on the Compose option to display the Compose ComposeRX screen. For more information on this option, see the online documentation at Clinical --►Compose RX.
16.2 Data Entry: Click on the Data Entry option to display the Admin AdminRX screen. For more information on this option, see the online documentation at Clinical --►RX Data Entry.
16.3 Status: Click on the Status option to display the Status StatusRX screen. For more information on this option, see the online documentation at Clinical --►Check RX Status.
17. Export: Place the pointer on the Export option to display this additional menu:
17.1 HL7: Creates a file in HL7 format, based on selection criteria, for file transmission.
17.2 XML: Creates a file in XML format, based on selection criteria, for file transmission.
17.3 Doctor Schedule: Place the pointer on the Doctor Schedule option to display this additional menu. Click on the link for each option for more information.
17.3.1 Send Email: An email is sent for that day's schedule to the doctor's email address set up in Utility --►Provider <Email Address>. When the doctor opens his email and clicks on the attachment (which is the file with appointment info) the calendar program on the device opens and the appointments are displayed. This can be used on workstations, laptops, cell phone, etc. A copy of the file is saved on the device under /home/staff/ DOCTOR_SCHEDULE_EXPORT. The email Subject includes: Your schedule from MM/DD/YYYY TO MM/DD/YYYY.
17.3.1.1 When the calendar is opened, double-click on the record to display more information regarding the appointment, include the patient's name, appointment type, facility description, scheduled length of appointment, and comments, if any. See example below:
17.3.1.2 In the schedule, the record displays the Type of Appointment Code and the Utility --►Facility name.
17.3.1.3 The file is imported in VCalendar format. Any program which can read this format can be used.
17.3.2 Save to Disk: A file is created on the workstation where the program was selected, and is located in /home/staff/ DOCTOR_SCHEDULE_EXPORT. The file is named with the provider's code and the date range of the file. When the file is opened (double-click on file), the calendar program used on that workstation opens and the appointments are displayed. A shortcut can be placed on the desktop for the DOCTOR_SCHEDULE_EXPORT folder.
17.3.2.1 When the calendar is opened, double-click on the record to display more information regarding the appointment, including the patient's name, appointment type, facility description, scheduled length of appointment, and the comments, if any. See an example above in Send Email, step 17.3.1.1.
17.3.2.2 In the schedule, the record displays the Type of Appointment Code and Utility --►Facility name.
17.3.2.3 The file is imported in VCalendar format. Any program which can read this format can be used. See an example above in Send Email, step 17.3.1.3.
18. Waiting List: If there is a Waiting List for the provider whose schedule you were in when accessing the right-click menu, the provider's Waiting List opens. If there are no patients on that provider's Waiting List, this message displays:

For additional information, see Waiting List Features and Schedule --►Appointment --►Full Day --►Appointment Booking and Management--►Scheduling From the Waiting List.
18.1 Effective version 15.08.06, the waiting list opens with the display sorted by the date the appointment was scheduled. However, each column on the waiting list is now sortable; i.e., click on a column heading to toggle the information from first to last, or last to first. Information in the Name field can be sorted from A-Z or Z-A.
18.2 Effective version 18.10.30, when an appointment is cancelled, rescheduled, or deleted, the program now has the capability to send a text message to a patient on the waiting list. Before a text message may be sent, complete steps 1. and 2.
Sample Text:
The program checks for which provider the appointment was cancelled/rescheduled/deleted and sends to the first patient on the list for that providers schedule, based on the appointment date of the patient. Once the appointment is scheduled, that patient no longer appears on the waiting list.
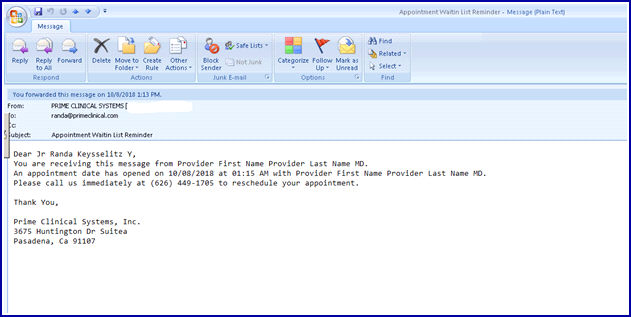
Sample E-mail:
19. Receipt: Results differ depending on the number of patients scheduled:
19.1 When only one patient is scheduled for a particular time slot, click on Receipt to go to the Add Receipt screen. For additional information, see the online documentation at Schedule --►Appointment --►Receipt --►Add Receipt. Note: Effective version 17.08.24, Office Receipts may now include the doctor’s name and code, pulled from the <Last Name>, <First Name>, and <Provider Code> fields on the Add DOCTOR screen.
19.2 When more than one patient is scheduled for a particular time slot, click on Receipt to display the Appointment Print Receipt screen where the appropriate patient can be selected from the Name field drop-down list. After selecting the desired patient, click on the [Receipt] button to display the Add Receipt screen. For additional information, see the online documentation at Schedule --►Appointment --►Receipt --►Add Receipt.
Note: Highlighting the patient for whom a receipt is desired and then typing 'R' gives the same results as discussed above for the Receipt right-click option.
20. HIE Request: PCM users only. Effective version 16.10.11, clinics can access hospital database systems to obtain patient reports via HIE (Health Information Exchange) communication. Intellect queries the hospital database to pull any information on a given patient, displays the information, and saves the file to PCM's inbox.
Set up is required before using this feature. For set up information, see Utility --► Facility --►HIE Endpoint.
20.1 Click on HIE Request to display a list of participating hospitals (including facility code).
20.2 Click on a hospital, and then on [OK] to display all available reports.
20.3 Click on the desired report and then click on [OK] to send the report to PCM's inbox. For additional information on using the HIE Request option, see Schedule --►Appointment --►Full Day --►Special Features --►HIE Request.
21. Telemedicine: Effective version 20.04.20. Click on Telemedicine to display the Telemedicine screen which allows the provider to conduct appointments via video chat with the patient. For additional information, see the online documentation at Schedule --►Appointment --►Full Day --►Special Features --► Telemedicine.
22. Patient Chart: PCM users only. Effective version 18.05.24, Intellects' Full Day Appointment Schedule and Appointment List Tab allows users to view the current days' progress notes entered into PCM for the current days' appointment.
Click on ‘Patient Chart’ to display the patients' current documents attached to the appointment from PCM.
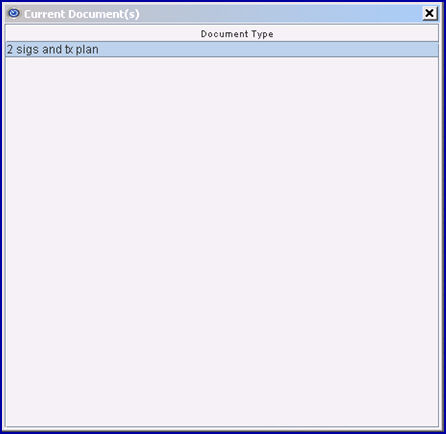
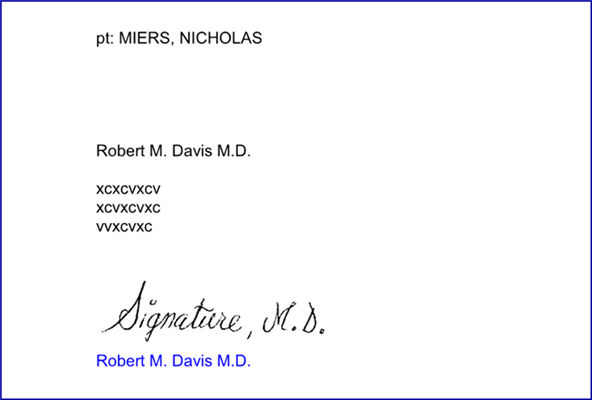
Click on a ‘Document Type’ to display all documents as they are in PCM for the current appointment. For example, clicking on the '2 sigs and tx plan' document shown above opens:
This option is also available via the Appointment List tab.