
Intellect™
SCHEDULE MENU OPTIONS
![]()
Appointment
Full Day
Special Features
Telemedicine
Effective version 20.04.20
The Telemedicine option enables HIPAA compliant real-time video telecommunications between a patient, their provider, and an optional third party through the appointment schedule. This option allows sending of a secure URL invite for the appointment to all attendees (Patient, Provider and Other) via text and/or email. The optional functions on the Telemedicine window include entry of a patient credit card payment during the session and onscreen posting of charges by the provider after the session has ended.
For PCM users only: Effective version 20.05.08 when Provider and Other join the meeting, the web browser displays a split screen with the video on the left side and access to documents in the patient’s chart on the right side. These changes allow a Provider or Other without access to the PCM server to view chart documents and add a visit note during the telemedicine visit. Effective version 20.05.12, an option was added to the Telemedicine window that allows users to limit the Other’s access to viewing chart documents and/or adding a visit note before sending the invitation.
In this Topic Hide
II - Open the Telemedicine Window
A - From Text Message or Email Link
1. Intellect server must be updated to version 20.04.20 or greater.
1.1 Effective version 20.04.23, the security level for the Telemedicine feature defaults to 800, so access is blocked from clinics that have not completed the required setup. NOTE: Only users with a security level greater than the security level for the menu option will have access. Contact support to request changes to the Telemedicine feature security level.
2. Contact your IT to assist with the following:
2.1 Web Domain Name registration with a current subscription.
2.2 Basic SSL certification for IIS with 2048-bit encryption.
2.3 Open port 8443 on the server.
3. Email setup must be completed on the Utility --►Tools --►Configuration screen. See online documentation (sections A and B) for email setup.
4. An account must be opened or already exist through Twilio, a third-party vendor.
4.1 Offices who do not have an account should see the documentation for Schedule --► Appointment Reminder --► Twilio --► Twilio – User Set Up for details on setting up an account.
4.2 After signing up for an account OR if an office already has an account with Twilio, please contact support@primeclinical.com to complete setting up the video API connection.
5. The <Auth. Token Expiration(mins)> field on the Utility --►Set Up --► Parameter screen must be set to at least 1440 or left blank since the authentication tokens generated through Twilio expire in 24 hours (or 1440 minutes).
6. For each appointment provider: (if fields are blank)
6.1 In the <Cell Phone No.> field on the Utility --►Provider --►Provider screen, enter the cell phone number where the provider wishes to receive the text message with secure link to the video session.
6.2 In the <Email Address> field on the Utility --►Provider --►Provider screen, enter the email address where the provider wishes to receive the secure link to the video session.
7. All video session attendees (Patient, Provider, Other) must connect via a high-speed internet connection from a device that is capable of both audio (i.e., built-in microphone/speakers or a connected headset) AND video (i.e., built-in camera or a connected webcam) communication, such as a smartphone, tablet, or computer.
8. For PCM users only, prior to using the Schedule an Appointment tab on the split screen during the Telemedicine video session:
8.1 Effective version 20.07.27, Utility --►Set Up --►Appointment --►Appointment Type <WebStaff Access> must be set to ‘Yes’ for Appointment Types to appear in selection drop-down for the new appointment. (See IV - Join the Meeting, C - Options for PCM User, 5.1.3 below for details.)
8.2 Utility --►Set Up --►Appointment --►Appointment Type <Self Sched Description> must NOT be blank for Appointment Types assigned to time slots on the Utility --►Set Up --►Appointment --►Appointment Template which are available for scheduling patient appointments. For example, complete the <Self Sched Description> field for ‘OPEN’ (or any appointment types used to reserve time slots for scheduled visits, such as ‘NP’ for new patient) but leave the field blank to exclude time slots designated as ‘LUNCH’ or ‘CLOSED.’
8.3 IMPORTANT NOTE: If not using the Schedule Appointments tab on the split screen, the Utility --►Set Up --►Appointment --►Appointment Type <WebStaff Access> and <Self Sched Description> fields must be populated for at least one Appointment Type. It is strongly recommended that the Appointment Type used for telemedicine visits is set to 'Yes' in the <WebStaff Access> field and <Self Sched Description> is populated.
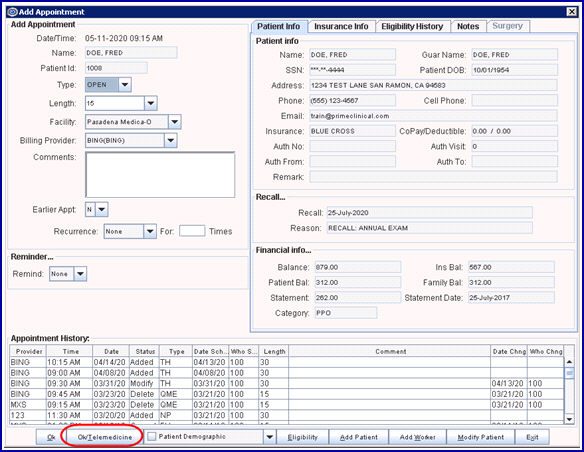
1. An appointment must be scheduled for the patient in the Full Day Schedule.
1.1 NOTE: By default, the patient invitation is sent to the <Cell Phone> and/or <Email> displayed on the Add Appointment window under the Patient Info tab. When scheduling an appointment, click [Modify Patient] to update these fields, if needed.

1.2 Effective version 20.05.11, [Ok/Telemedicine] opens the Telemedicine window after adding the appointment and closing the Add Appointment window:
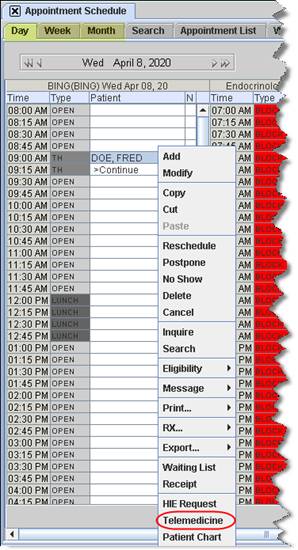
2. Right-click on the appointment, then select {Telemedicine}.
2.1 Right-click menu options available from Day, Week and Month tabs:
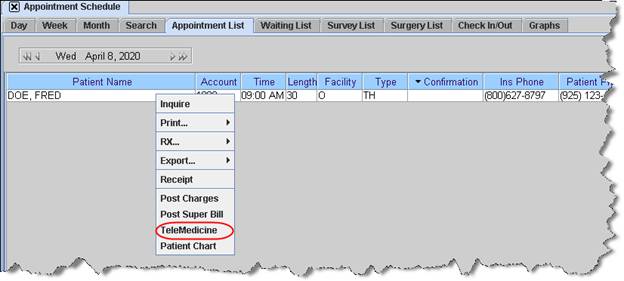
2.2 Right-click menu options available from the Appointment List tab:
3. The Telemedicine window displays:
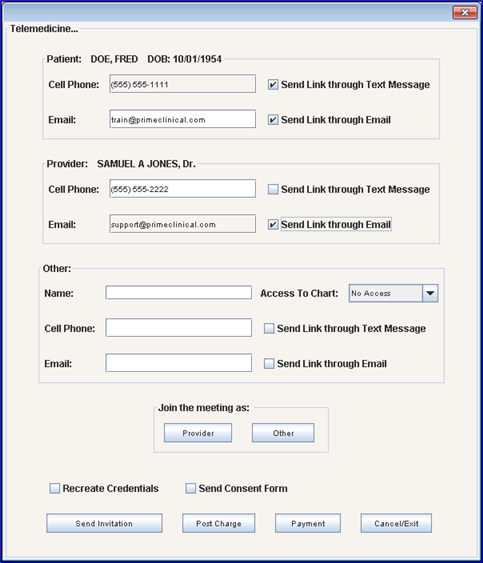
3.1 The Patient, Provider and Other sections may be updated at any time after scheduling the appointment. See III - Send Invitations below for details.
3.2 '☐ Recreate Credentials,' '☐ Send Consent Form' (effective version 20.07.27), and the [Send Invitation] button should only be used no more than 23 hours before the scheduled appointment time. See III - Send Invitations below.
3.3 For details on the ‘Join the meeting as’ [Provider] and [Other] buttons, see IV - Join the Meeting below.
3.4 For details on the [Post Charge] button, see V - Post Charge below.
3.5 For details on the [Payment] button, see VI - Payment below.
3.6 For details on the [Cancel] button, see VII - Close the Window below.
1. When the invitation is sent for the scheduled appointment, a unique secure ID and token are created for the video session.
1.1 The token for the link is only valid for 24 hours, so the invitation must be sent no more than 24 hours before the end time of the scheduled appointment.
1.2 The invitation MUST be sent to the patient via text message and/or email.
1.3 If optional ‘Other’ person is NOT an Intellect user (e.g., a family member, an outside physician, or someone in your clinic without an Intellect login), an invitation must be sent. See 4 below for more details.
1.4 The sending invitations for ‘Provider’ and ‘Other’ is optional IF using the ‘Join the meeting as’ buttons to connect. See IV - Join the Meeting below for more details.
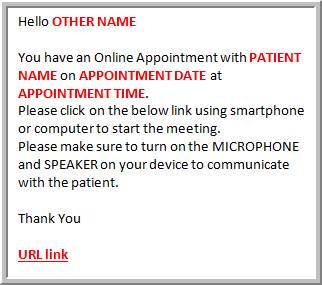
1.5 The text messages and emails contain the appointment date/time and a URL to click to join the secure video session from a device with a camera (e.g., smartphone, tablet, or computer).
2. Patient: The patient name and date of birth for the selected appointment are displayed.
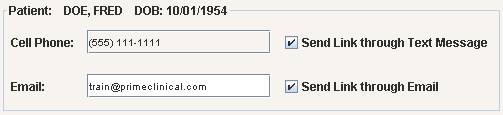
2.1 Cell Phone: Defaults to the <Cell Phone No.> on the patient’s registration screen (Registration --► Regular --► Patient or Registration --► Worker --► Worker).
2.1.1 To send the patient invitation to a different cell phone number, press the [Spacebar] or [Delete] key to clear the field and type the new number. NOTE: Changing the <Cell Phone> does not update the patient’s registration screen.
2.2 Check '☐ Send Link through Text Message' to send the invitation to the patient’s <Cell Phone> via text message. NOTE: At least one of the ‘Send Link’ options must be checked; this option must be checked if {Send Link through Email} is unchecked.
2.2.1 Sample content for Patient Text Message:
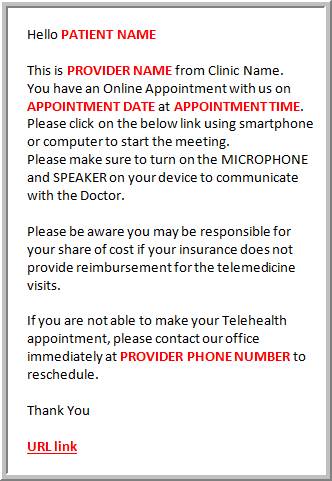
NOTE: When the actual text message is sent to the patient, the auto populated fields are not red as shown above.
2.2.2 Contact support to request changes to the patient text message content.
2.3 Email: Defaults to the <Email Address> on the patient’s registration screen (Registration --► Regular --► Patient or Registration --► Worker --► Worker).
2.3.1 To send the patient invitation to a different email address, press the [Spacebar] or [Delete] key to clear the field and type the new email address. NOTE: Changing the <Email> does not update the patient’s registration screen.
2.4 Check '☐ Send Link through Email' to send the invitation to the patient’s <Email> via email. NOTE: At least one of the ‘Send Link’ options must be checked; this option must be checked if {Send Link through Text Message} is unchecked.
2.4.1 Effective version 20.05.11, the email subject line includes the appointment date and time, for example:
Subject: Telemedicine Appointment on 04/20/2020 at 9:00 AM
2.4.2 Sample content for Patient Email:
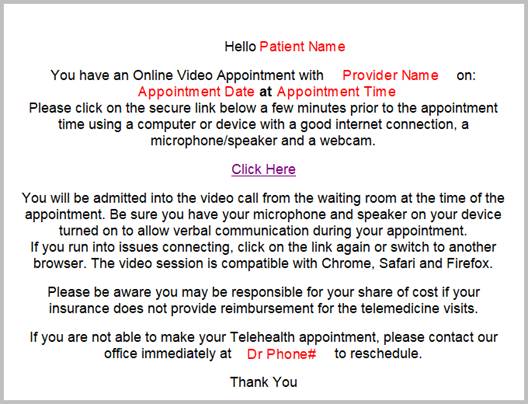
NOTE: When the actual email is sent to the patient, the auto populated fields are not red as shown above.
2.4.3 Contact support to request changes to the patient email content.
3. Provider: The appointment provider’s name is displayed.
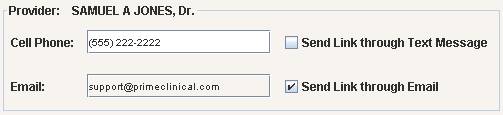
3.1 Cell Phone: Defaults to the Utility --► Provider --► Provider <Cell Phone No.> for the appointment provider.
3.1.1 To send the provider invitation to a different cell phone number, press the [Spacebar] or [Delete] key to clear the field and type the new number.
3.2 Check '☐ Send Link through Text Message' to send the invitation to the appointment provider’s <Cell Phone> via text message.
3.2.1 Sample content for Provider Text Message:
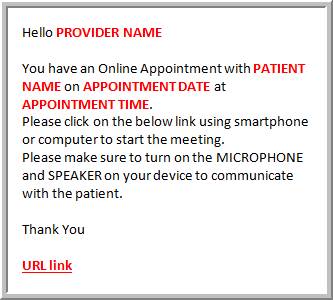
NOTE: When the actual text message is sent to the provider, the auto populated fields are not red as shown above.
3.2.2 Contact support to request changes to the provider text message content.
3.3 Email: Defaults to the Utility --► Provider --► Provider <Email Address> for the appointment provider.
3.3.1 To send the provider invitation to a different email address, press the [Spacebar] or [Delete] key to clear the field and type the new email address.
3.4 Check '☐ Send Link through Email' to send the invitation to the appointment provider’s <Email> address via email.
3.4.1 Effective version 20.05.11, the email subject line includes the appointment date, appointment time and patient name, for example:
Subject: Telemedicine Appointment on 04/20/2020 at 9:00 AM with Doe, Fred
3.4.2 Sample content for Provider Email:
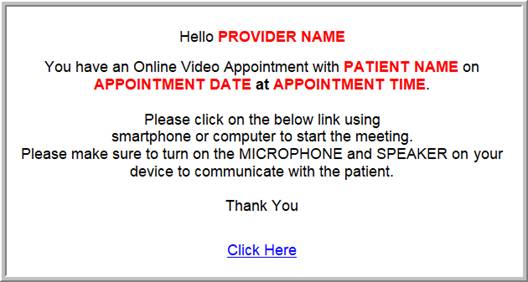
NOTE: When the actual email is sent to the provider, the auto populated fields are not red as shown above.
3.4.3 Contact support to request changes to the provider email content.
3.5 For Hosted clients and users who connect remotely to the server, it is recommended that the provider is sent the link via text and/or email since the provider must launch the meeting from a smartphone, tablet, or local workstation NOT the server.
4. Other: This section is blank by default but, if completed, an optional third person (e.g., an outside consultant/specialist, another provider or staff member from your clinic, the patient’s family member, etc.) is invited to join the meeting.
4.1 Name: The name of the ‘Other’ person must be completed. If left blank, an invitation is not sent.
4.2 Access To Chart: New Field - Effective version 20.05.12 For PCM users only, prior to sending the invitation, Other may be granted access to viewing all documents in the patient’ chart or adding a visit note. Click the arrow to make a selection from the drop-down menu.
4.2.1 No Access: The default selection displays video only when Other joins the meeting. This option is recommended when Other is not another provider or someone from your clinic. NOTE: Intellect only users should leave the default.

4.2.2 All Access: This selection displays a split screen with access to viewing all documents from the patient’s chart and adding a visit note to the patient’s chart. After joining the meeting, the live video is displayed on the left side and the right side displays tabs for Documents and Visit’s Note.

4.2.3 View Only Access: This selection displays a split screen with access to viewing all documents from the patient’s chart but disables adding a visit note. After joining the meeting, the live video is displayed on the left side and the right side displays the chart documents.
4.2.4 See IV - Join the Meeting, C - Options for PCM Users below for details on the split screen options available during the Telemedicine appointment.
4.3 Cell Phone: The Other’s cell phone number must be entered to receive a text message invitation.
4.4 Check '☐ Send Link through Text Message' to send the invitation to the Other <Cell Phone> via text message. NOTE: At least one ‘Send Link’ option must be selected if Other is NOT an Intellect user connecting via the ‘Join the meeting as’ [Other] button.
4.4.1 Sample content for Other Text Message:
NOTE: When the actual text is sent to ‘Other,’ the auto populated fields are not red as shown above.
4.4.2 Contact support to request changes to the other text message content.
4.5 Email: The Other’s email address must be entered to receive an email invitation.
4.6 Check '☐ Send Link through Email' to send the invitation to the Other <Email> address via email. NOTE: At least one ‘Send Link’ option must be selected if Other is NOT an Intellect user connecting via the ‘Join the meeting as’ [Other] button.
4.6.1 Effective version 20.05.11, the email subject line includes the appointment date, appointment time and patient name, for example:
Subject: Telemedicine Appointment on 04/20/2020 at 9:00 AM with Doe, Fred
4.6.2 Sample content for Other Email:

NOTE: When the actual email is sent to ‘Other,’ the auto populated fields are not red as shown above.
4.6.3 Contact support to request changes to the other email content.
4.7 For Hosted clients and users who connect remotely to the server, if the OTHER is also an Intellect user, it is recommended that the Other is sent the link via text and/or email since the Other must launch the meeting from a smartphone, tablet, or local workstation NOT the server.
5. ![]()
5.1 Leave unchecked when the invitation is sent for the first time.
5.2 This option is used to expire the previous tokens and create new credentials for the appointment when the [Send Invitation] button is clicked.
5.2.1 When ‘Recreate Credentials’ is selected, attendees are only able to join the video session using the new credentials as the previously sent credentials are expired.
5.2.2 ALL parties must be sent a new invitation when this box is checked.
6.  (Effective version 20.07.27)
6.1 If this box is checked when the [Send Invitation] button is clicked, Intellect immediately sends an email to the patient for access to an interactive consent form.
Sample email:
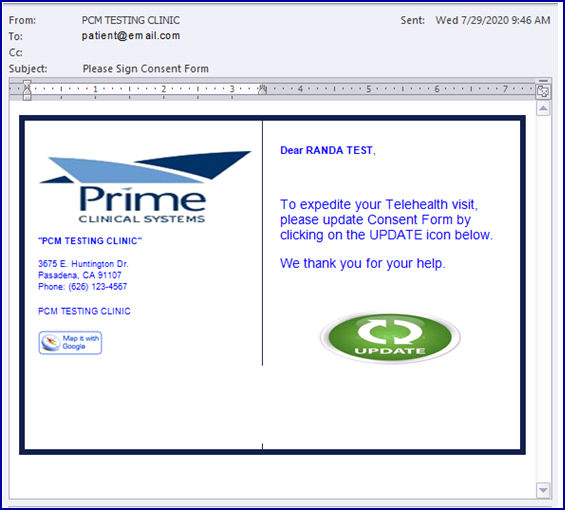
NOTE: The email recipient is the <Email> address populated in the Patient section of the Telemedicine window.
6.2 After opening the email, the patient clicks on the UPDATE icon to open the online interactive form in their default browser. See sample Consent Form (sample may be slightly different than actual form).
6.3 Compatible smartphones, tablets, laptops, and desktop computers may allow the patient to add an electronic signature via touchscreen or stylus.
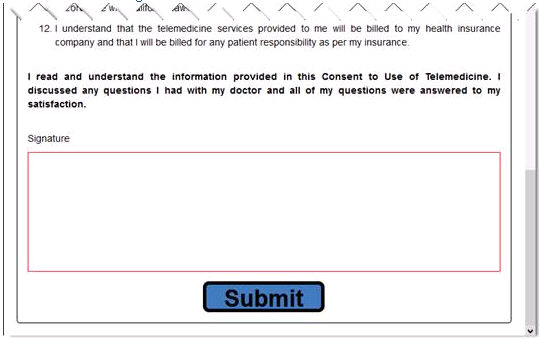
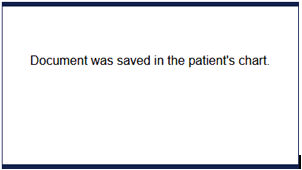
6.4 After clicking [Submit] to return the signed consent form, a confirmation message appears in the browser and the document is filed in Patient Chart Manager.
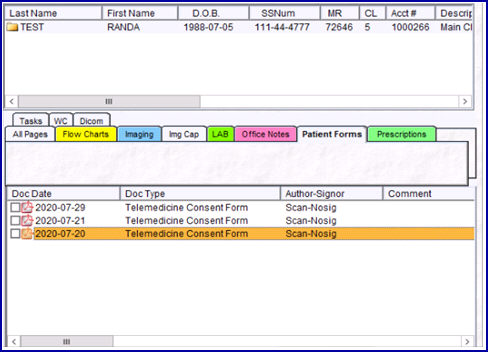
6.5 The submitted ‘Telemedicine Consent Form’ is filed in the patient’s chart under the tab designated in the <PCM Tab> field on the Utility --► Set Up --► Parameter screen. NOTE: The <PCM Tab> field is also used for filing documents sent via email using the [Patient Demographic] drop-down list on the Add Appointment dialog box.
7. [Send Invitation]: Click the button to send the link via text message and/or email based on completion of the fields in Patient, Provider and Other sections.
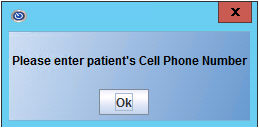
7.1 If required information is missing, the invitation is not sent and a message is displayed. Click [Ok] to close the pop up box, complete the required information, and click [Send Invitation] again.
7.1.1 This message displays when the <Cell Phone> field blank AND ‘Send Link through Text Message’ is checked in the Patient section.
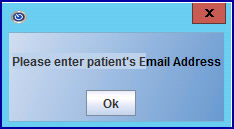
7.1.2 This message displays when the <Email> field is blank AND ‘Send Link through Email’ is checked in the Patient section.
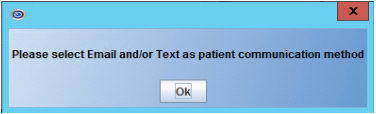
7.1.3 This message displays when both 'Send Link' boxes are left unchecked under the Patient section.
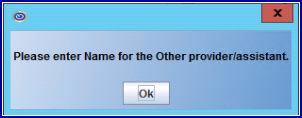
7.1.4 This message displays when <Name> is blank AND at least one 'Send Link' box is checked under the Other section.
7.2 NOTE: If any cell phone and/or email address field is changed and the invites need to be resent, check the ‘Recreate Credentials’ box and verify the appropriate ‘Send Link’ boxes are checked for ALL parties.
8. When a pop up appears confirming the message was sent, click [OK].
8.1 A record is added to Misc --► Sent Items.
![]()
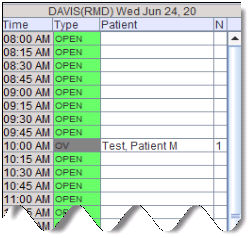
8.2 The appointment is highlighted in pink on the Appointment List tab of the Schedule --► Appointment --► Full Day screen to indicate that the Telemedicine invitation was sent.

When the Patient, Provider, or Other receives a text message or email invitation, clicking the URL link within the message allows the attendee to join the meeting through the browser on their device. If Provider or Other is logged into Intellect AND not connected to the server remotely, the user is able to join the meeting from the Telemedicine Window. IMPORTANT NOTE: Microsoft Edge is not compatible with this feature; the recommended browsers are Chrome, Safari, and Firefox.
1. Open the text message or email invitation from a device with high speed internet connection.
1.1 Turn on the built-in microphone/speaker or connected headset for the audio portion.
1.2 Turn on the built-in camera or connected webcam for the video portion.
1.3 See III - Send Invitation above for samples of the text messages and emails sent to Patient, Provider, and Other.
2. Click on the link to open your browser.
2.1 If your default browser is Microsoft Edge, copy and paste the URL into another browser such as Chrome, Safari or Firefox.
2.2 If the token ID is invalid or expired, this message appears:
![]()
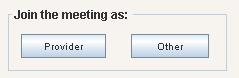
3. When successfully connected to the link, click the 'Join as' button:
3.1  is displayed for the link sent to the patient.
3.2  is displayed for the link send to the provider.
3.3  is displayed for the link sent to Other.
4. After joining, Patient, Provider, and Other appear on the video chat screen.
4.1 The browser displays the following when the first person joins the session:
![]()
4.2 The patient’s DOB is shown at the top of the video chat screen to allow the provider to confirm the connected patient’s DOB.
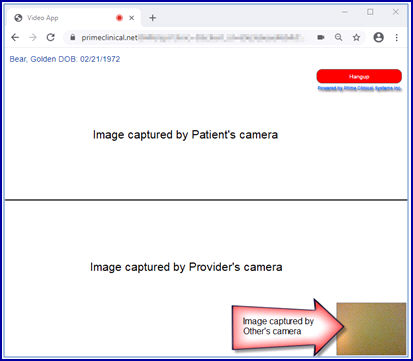
4.3 When two parties (Patient and Provider) join the session, the video captured by the viewer’s camera is displayed in a small window and the other party is shown in full screen.
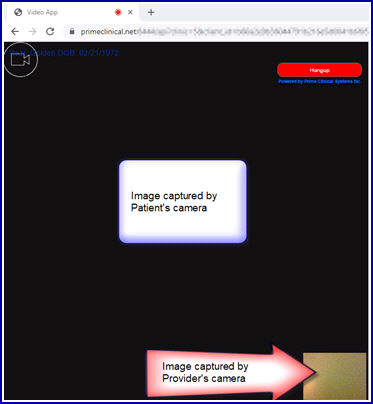
4.4 When all three parties (Patient, Provider, and Other) join the session, the video captured by the viewer’s camera is displayed in a small window and the other two parties are shown in a split screen. For example, the patient’s screen displays the Provider and Other in split screen with their own image in a small window.
4.5 PCM users only: Effective version 20.05.08, the Provider and Other view a split screen with the video on the left side and access to documents in the patient’s chart on the right side. For additional details, see C - Options for PCM Users below.
5. Click the  button displayed in the browser to disconnect from the video chat session.
5.1 When the session ends, the browser displays:
![]()
6. After all parties disconnect from a video chat session that included the patient:
6.1 Effective version 20.04.23, the appointment is highlighted in yellow on the Appointment List tab of the Schedule --► Appointment --► Full Day screen if the patient joined the video chat for at least 60 seconds.
6.2 Effective version 20.06.11, the completed Telemedicine appointment appears on the Telemedicine List tab of the Schedule --► Appointment --► Full Day screen.

IMPORTANT NOTE: For Hosted clients and users connecting remotely to the server, open the link in a browser on a cell phone, tablet, or local workstation; these buttons should NOT be used to join the meeting.
1. This option is available for a Provider or Other with an Intellect login if their desktop computer, laptop, or tablet:
1.1 Is NOT connected to the server remotely.
1.2 Has a built-in microphone/speaker or a connected headset.
1.3 Has a built-in camera or a connected webcam.
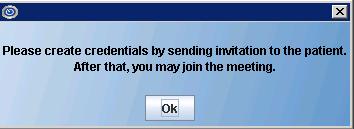
2. Click [Provider] to join the meeting as the appointment Provider.
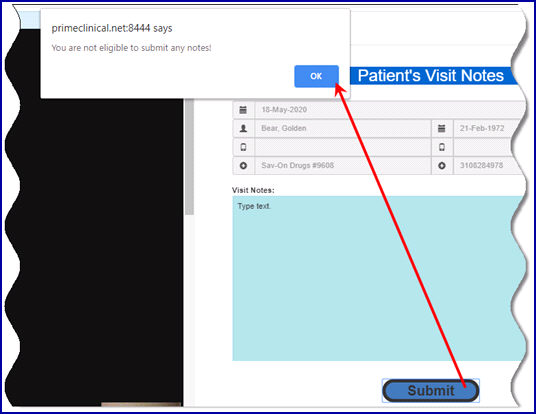
2.1 If the [Provider] button is clicked before sending the invitation, this warning appears:
2.2. When the provider’s default browser opens to the meeting link, click 
2.2.1 The browser displays the following when the provider is the first person to join:
![]()
2.2.2 The patient’s DOB is shown at the top of the video chat screen to allow the provider to confirm the connected patient’s DOB.
2.2.3 When two parties (Patient and Provider) join the session, the video captured by the provider’s camera is displayed in a small window and the patient is shown in full screen.

2.2.4 When all three parties (Patient, Provider and Other) join the session, the video captured by the provider’s camera is displayed in a small window and the Patient and Other are shown in a split screen.
2.2.5 PCM users only: Effective version 20.05.08, a split screen is displayed with the video on the left side and access to documents in the patient’s chart on the right side. For additional details, see C - Options for PCM Users below.
2.3 Click the button displayed in the browser to disconnect from the video chat session.
2.3.1 When the session ends, the browser displays:
![]()
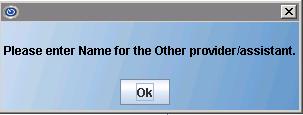
3. Click [Other] to join the meeting is only available if the ‘Other’ has an Intellect login (e.g., another provider in the clinic, a nurse, or MA).
3.1 If the ‘Other’ <Name> is blank, this warning appears:
3.2 When the default browser opens to the meeting link, click 
3.2.1 The browser displays the following when ‘Other’ is the first person to join:
![]()
3.2.2 When all three parties (Patient, Provider and Other) join the session, the video captured by ‘Other’ person’s camera is displayed in a small window and the Patient and Provider are shown in a split screen.
3.2.3 PCM users only: Effective version 20.05.08, a split screen is displayed with the video on the left side and access to documents in the patient’s chart on the right side when the <Access to Chart> field on the Telemedicine window is set to 'All Access' or 'View Only Access'. For additional details, see C - Options for PCM Users below.
3.3 Click the button displayed in the browser to disconnect from the video chat session.
3.3.1 When the session ends, the browser displays:
![]()
4. After all parties disconnect from a video chat session that included the patient:
4.1 Effective version 20.04.23, the appointment is highlighted in yellow on the Appointment List tab of the Schedule --► Appointment --► Full Day screen if the patient joined the video chat for at least 60 seconds.
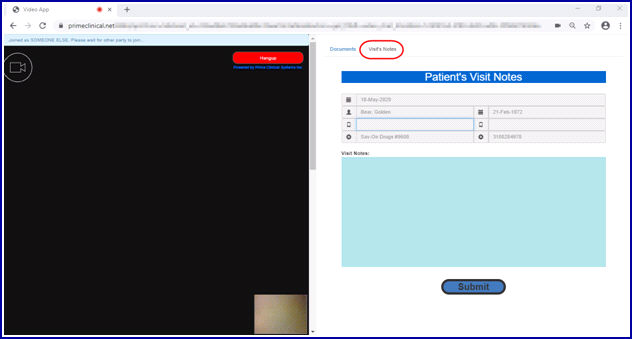
4.2 Effective version 20.06.11, the completed Telemedicine appointment appears on the Telemedicine List tab of the Schedule --► Appointment --► Full Day screen.

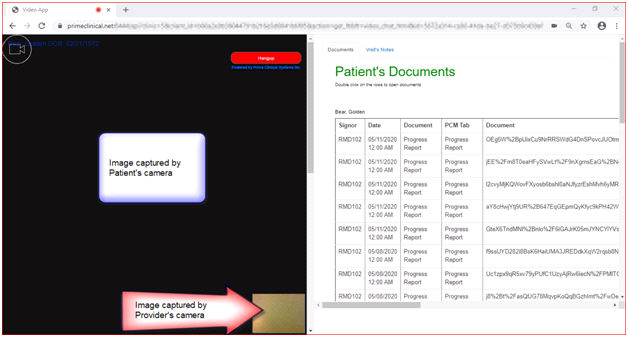
1. PCM users only: Effective version 20.05.08, when a Provider or Other joins the meeting, a split screen is displayed with the video on the left side with access with viewing chart documents and adding a visit note on the right side of the screen. For example:
1.1 Effective version 20.05.12, a split screen is NOT displayed for Other if the <Access To Chart> field on the Telemedicine window is set to default ‘No Access’ prior to sending the invitation.
1.2 IMPORTANT NOTE: For optimal viewing of the split screen, it is strongly recommended that providers connect using a tablet, laptop, or computer with a camera instead of a smartphone.
2. The right side of the split screen contains these tabs:
Schedule an Appointment (Effective version 20.06.11)
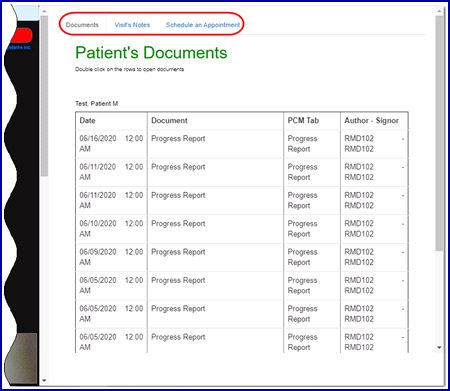
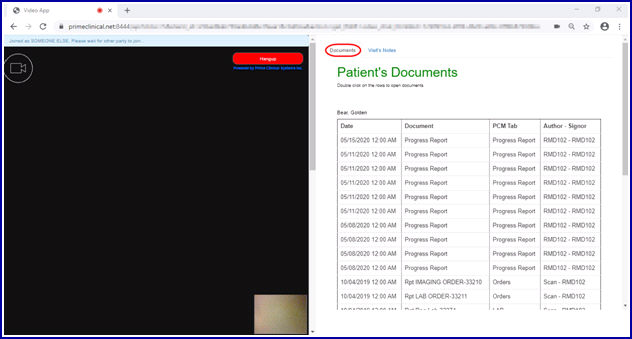
3. Documents tab: The split screen opens with this tab displaying ALL documents from the patient’s chart in date order, from most recent to oldest. NOTE: Access to this tab is disabled after submitting the Visit Note (see 4 below).
3.1 Click a line to open the document.

3.2 Use the scroll bars at the bottom and right side to move around the image.

3.3 Click the X in the red box to close the document and return to the list.

3.4 NOTE: The split view is only visible to Other if the <Access To Chart> field on the Telemedicine window is NOT set to ‘No Access’ when the invitation is sent.
4. The Visit’s Note tab: This tab allows the Provider or Other granted ‘All Access’ to add a note to the patient’s chart. See section III - Send Invitations, 4 above for details on granting Other access to adding visit notes. NOTE: Clicking the [Submit] button on this tab disables all function on the right side of the split screen.
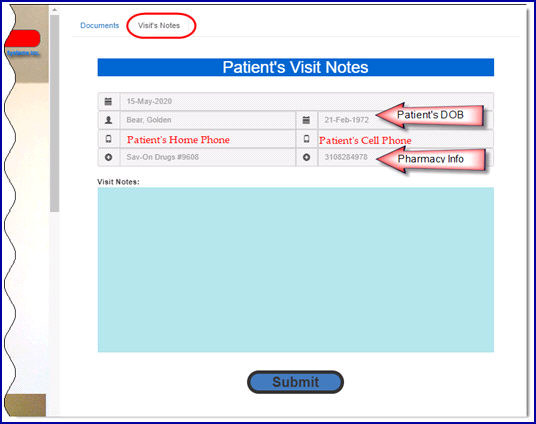
4.1 The header is populated with the appointment date and demographic information from the patient’s Registration screen including name, date of birth, home phone, cell phone, and preferred pharmacy name/phone.
4.2 Type visit notes in the blue text box. NOTE: PCM formatting options for macros, shortcuts, pick list and database fields are not available.
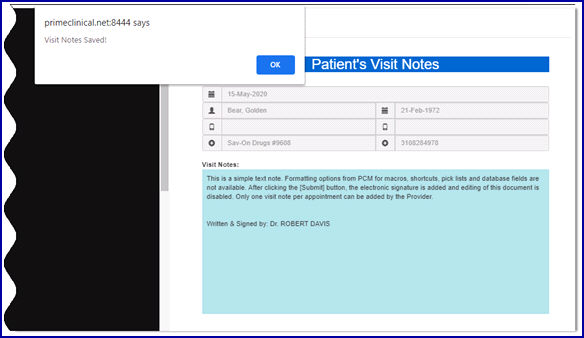
4.3 Click [Submit] to save the note in the patient’s chart, and then click [OK] when the confirmation box appears.
4.3.1 ‘Written and signed by: Dr.’ is added with the provider’s name and a date/time stamp are added to the end of the note. Prior to version 20.06.11, the date/time stamp was not included.
4.3.2 NOTE: When the <Access To Chart> field on the Telemedicine window is set to ‘View Only Access’ prior to sending the invitation, a warning appears if Other clicks [Submit] and the visit note is not saved.
4.4 The right side of the screen goes blank, the tabs are no longer available, and this message appears:
4.5 The visit note is automatically filed to the patient's chart as a PDF document.
Example of document filed in patient's chart:
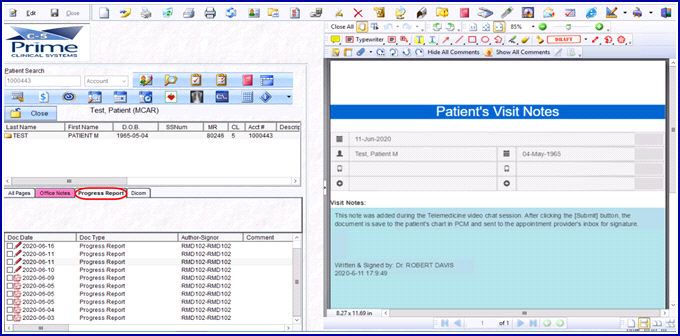
4.5.1 The default document name is ‘Progress Report.’ Contact support to request a different document name for the visit notes.
4.5.2 The chart tab is designated by the <PCM tab> field on Utility --► Set Up --►Appointment --► Appointment Type.
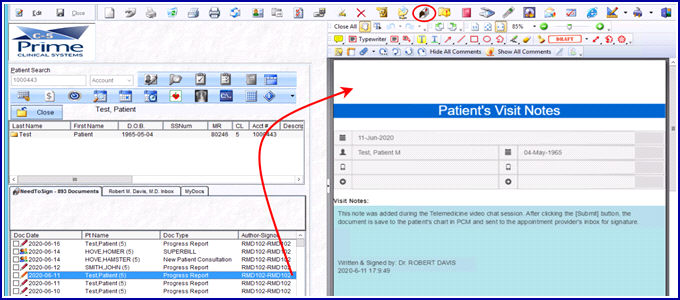
4.5.3 Effective version 20.06.11, the document is also sent to the appointment provider's inbox pending an authenticated electronic signature to meet CMS requirements for medical records. For details on managing and signing documents in the appointment provider's inbox, see online document for Patient Chart Manager under Charts; Chapter: Inboxes, Logs, and Mailboxes; Section: User Inbox; Document: User Name Tab.
Example of document in appointment provider's inbox:
4.6 Tips for providers who prefer using PCM templates to document the visit:
4.6.1 Providers may open both the video session through a supported browser and PCM, then toggle between the two icons on the taskbar. For example:

NOTE: When PCM is open full screen, the provider is unable to see video of the patient but the camera remains on.
4.6.2 Providers may use a workstation connected to two monitors to display the video session and PCM on different monitors.
4.6.3 Providers may use one device for the video session, such as a tablet with a camera, and open PCM on another device, such as a desktop computer.
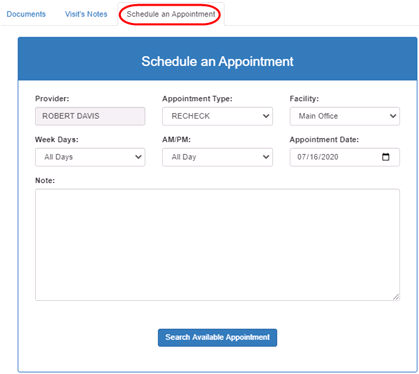
5. Schedule an Appointment tab: Effective version 20.06.11, this tab allows the provider to schedule the patient's next appointment while connected to the video chat session. NOTE: Access to this tab is disabled after submitting the Visit Note (see 4 above).
Effective version 20.07.27:
Prior versions:

5.1 The provider sets the search criteria to check availability on their schedule by leaving the default values or clicking on the boxes to change the selection.
5.1.1 <Provider>: New field effective version 20.07.27. The appointment provider’s name is automatically displayed in the view only field.
5.1.2 <Appointment Type>: The drop-down displays, in alphabetical order, and the Utility --► Set Up --►Appointment --► Appointment Type <WebStaff Access> is 'Yes.' Select the Appointment type to schedule for the patient's next visit.
5.1.3 <Search Type> Field removed effective version 20.07.27.
5.1.3.1 Prior to version 20.07.27, the drop-down displays, in alphabetical order, the Utility --►Set Up --►Appointment --► Appointment Type <Self Sched Description> for all Appointment Types where the field is NOT blank. Select the description associated with the Appointment Type displayed on the Schedule --► Appointment --► Full Day screen when an appointment is NOT scheduled in the time slot.
For example, before an appointment is added to the time slot, the <Type> column may display 'OPEN,' 'LUNCH,' 'CLOSED,' or a specific appointment type such as 'NP' for a new patient appointment.

5.1.3.2 Effective version 20.07.27, the program automatically searches ALL time slots where the Utility --► Set Up --► Appointment --► Appointment Type <Self Sched Description> is NOT blank for the Appointment Type associated with the template.
5.1.4 <Facility>: The drop-down displays, in alphabetical order, the Utility --► Facility <Name> for all Facility Codes where the <Webstaff> is set to 'Y.' Select the facility associated with the <Place of Service> field on the Utility --► Set Up --►Appointment --► Template screen.
NOTE: Hover the cursor over the <Type> column on the Schedule --► Appointment --► Full Day screen to display the Facility Name associated with the time slot on the Template.

5.1.5 <Week Days>: Leave the default 'All Days' OR make a selection for a specific day of the week.

5.1.6 <AM/PM>: Leave the default OR make a selection from the drop-down list.
5.1.7 <Appointment Date>: To select a starting date for the search, either type the date formatted as MM/DD/YYYY OR click the  icon to open the calendar. For example, if the patient is due for a follow up in 6 weeks, use the calendar to select the date for 6 weeks from today's date.
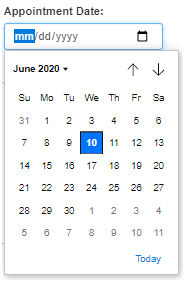
5.1.7.1 The calendar opens with the blue box on today's date.
5.1.7.2 Click on a date to make a selection.
5.1.7.3 Click the down arrow next to the month/year to display the year/month selection window.

5.1.7.4 Click  to move to the previous month or
  to move to the next month.
5.1.7.5 Click  to return the selection to today's date.
5.1.8 <Note>: Type notes to appear in the appointment <Comment> field, if needed.
5.1.9 Click the [Search Available Appointment] button.
5.2 After searching, this displays:
5.2.1 Click [Search again] to return to the previous screen and enter new search criteria (see step 5.1 above).
- OR -
5.2.2 Click <Choose Available Dates> to display the dates where this provider has available time slots.
5.3 After clicking the date, all available times are displayed.
Effective version 20.07.27, the search results display the appointment type associated with the time slot on the Utility --► Set Up --► Appointment --► Template screen.
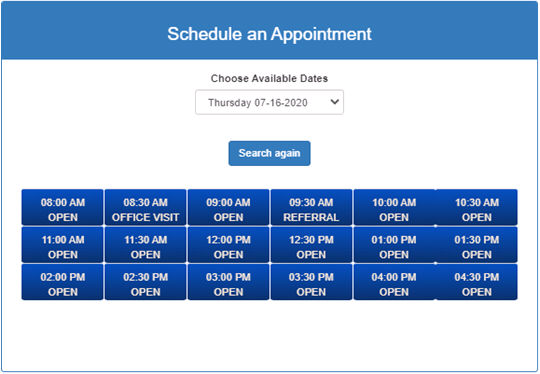
Prior to version 20.07.27:
5.3.1 Click the drop-down for <Choose Available Dates> to select another date.
- OR -
5.3.2 Click [Search again] to enter new search criteria (see step 5.1 above).
- OR -
5.3.3 Click the time to schedule the appointment and wait for the confirmation message to appear.
NOTE: The appointment is automatically added to the Full Day Schedule in Intellect for the same Provider as the Telemedicine video session and the <Appointment Type> entered with the search criteria.
1. Verify the devices (smartphone, tablet, laptop, or desktop computer) used by ALL parties meet the following requirements:
1.1 High-speed internet connection.
1.1.1 NOTE 1: Some smartphone users may experience connectivity issues due to their network service area coverage, so they may need to switch to a Wi-Fi connection.
1.1.2 NOTE 2: If the default browser is Microsoft Edge or Internet Explorer, switch to a supported browser such as Chrome, Safari or Firefox. Copy/paste the URL from the default browser to the supported browser.
1.2 Integrated microphone/speaker or connected headset turned on.
1.2.1 NOTE: When an external microphone is connected to a laptop or desktop computer, the component must be installed and configured.
1.3 Integrated camera or connected webcam turned on.
1.3.1 NOTE 1: When an external webcam is connected to a laptop or desktop computer, the component must be installed and configured.
1.3.2 NOTE 2: When the browser connects to the video chat room, a prompt may appear onscreen to enable video.
2. IMPORTANT NOTE: For Hosted clients and users connecting remotely to the server, open the link in a browser on a cell phone, tablet, or local workstation NOT the server.
2.1 It is recommended that the provider is sent the link via text and/or email so the provider is able to open the link directly from their device, NOT the server.
2.2 If an Intellect user selects the Join Meeting as: [Provider] or [Other] button on the Telemedicine window, then they must copy/paste the URL from the browser on the server to the browser on the local workstation.
3. Common Issues/Solutions:
|
ISSUES |
SOLUTIONS |
|
Clicking the link launches the browser but nothing happens. |
· Refresh the browser · Switch to a supported browser · Resend the invitation |
|
Token errors |
Refresh the browser |
|
Token expired or expiration date invalid |
‘Recreate Credentials’ and send invitation to all parties. |
|
Token not valid |
Resend invitation. |
3.1 NOTE 1: Tokens are only valid for a 24 period, so the invitations must be sent less than 24 hours before the appointment.
3.2 NOTE 2: When ‘Recreate Credentials’ is selected, previously sent tokens are expired and invitations with the new tokens must be sent to ALL parties.
For clinics billing through Intellect, this optional function allows providers to post charges for the visit using an onscreen superbill with a custom list of diagnosis and procedure codes. NOTE: The set up requirements and workflow are the same as the context menu option for Post Super Bill on the Appointment List tab of the Schedule --► Appointment --► Full Day screen.
1. After the video chat session is completed, the provider may post the charges for the visit.
![]()
2. Before utilizing the [Post Charge] button, complete the setup:
2.1 Populate the superbill code in the <Super Bill (Super)> field on the Utility --►Provider --►Provider screen for the appointment provider.
2.2 Add the diagnosis and procedure codes for the Superbill Post screen via Utility --►Procedure --► Charge Post Fields --►Add (or Modify) option where the <Group Code> matches the Utility --►Provider --►Provider <Super Bill (Super)> field.
3. Click [Post Charge] to open the Superbill Post screen.
3.1 The Demographics section at the top of the screen automatically displays the patient’s detailed information.
3.2 The Diagnosis tab displays the diagnosis codes added through Utility --►Procedure --► Charge Post Fields.
3.2.1 Check the box(es) to select the diagnosis code(s) related to the visit.
3.2.2 Click the blank ‘Extra Diagnosis’ field to search for an unlisted diagnosis code, if needed.
3.3 The Procedure tab displays the procedure codes added through Utility --►Procedure --► Charge Post Fields.
3.3.1 Check the box to select the procedure code OR click the blank ‘Extra Procedure’ field to search for an unlisted procedure code.
3.3.2 Click the [D] button to check boxes for diagnosis code(s) related to the procedure code.
3.3.3 Click the [M] button to check the box to add a modifier, if appropriate.
3.3.4 Repeat steps for each procedure code related to the visit.
3.4 Click [Post] when ready to complete and save the entered charges.
3.5 When the Superbill Post screen closes, the focus returns to the Telemedicine window.
1. The [Payment] button allows the provider to collect credit card payments from patients during their appointment.
![]()
2. Before utilizing this feature, setup is required through a third-party vendor. See documentation for Third Party Vendor Options --► Credit Card Authorization for details.
3. Click [Payment] to open the Credit Card Payment window.
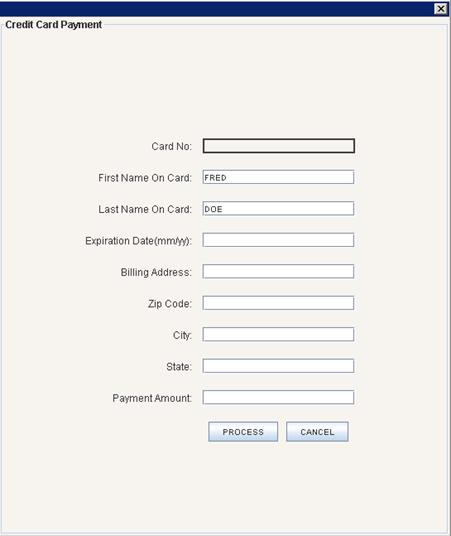
3.1 Card No: Enter the credit card number.
3.2 First Name On Card: Automatically defaults to the <First Name> on the patient’s registration screen (Registration --► Regular --► Patient or Registration --► Worker --► Worker). If the patient is not the cardholder, press the [Spacebar] or [Delete] to clear the field and enter the cardholder’s first name.
3.3 Last Name On Card: Automatically defaults to the <Last Name> on the patient’s registration screen (Registration --► Regular --► Patient or Registration --► Worker --► Worker). If the cardholder has a different last name, press the [Spacebar] or [Delete] key to clear the field and enter the cardholder’s last name.
3.4 Expiration Date (mm/yy): Enter the credit card expiration month and year formatted as MM/YY.
3.5 Billing Address: Automatically defaults to the patient’s home <Address> on the registration screen (Registration --► Regular --► Patient or Registration --► Worker --► Worker). If the billing address for the credit card is different, press the [Spacebar] or [Delete] key to clear to the field and enter the billing address.
3.6 Zip Code: Automatically defaults to the patient’s home address <Zip Code> on the registration screen (Registration --► Regular --► Patient or Registration --► Worker --► Worker). If the billing address has a different zip code, press the [Spacebar] or [Delete] key to clear to the field and enter the zip code.
3.7 City: Automatically displays the city associated with the <Zip Code>.
3.8 State: Automatically displays the state associated with the <Zip Code>.
3.9 Payment Amount: Enter the payment amount to be processed.
3.10 Click [PROCESS] to save the information and close the window.
3.11 Click [CANCEL] to close the window without saving.
4. After clicking [PROCESS], the focus returns to the Telemedicine window.
4.1 The third-party vendor processes the credit card payment.
4.2 A receipt is automatically emailed to the patient.
4.3 A record of the processed payment is included on the Schedule --► Appointment --► Receipt --► Print Report Receipt with the payment method ‘CREDIT CARD’.
5. NOTE: This option processes the credit card payment, but does not post the payment to the patient’s account. The payments must be posted through Payment --► Open Item or Payment --► Apply Receipt.
![]()
1. Click [Cancel] to close the Telemedicine window.
1.1 NOTE: Any changes made to the cell phones, emails, checked/unchecked ‘Send Link to’ boxes, or the Other name are saved when the window is closed.
2. The focus returns to the Appointment Schedule.