
Intellect™
UTILITY MENU OPTIONS

Set Up
Appointment
Block - Add
Use this option to block all or part of a provider's schedule as needed.
Video Available: Click Appointment Block to access the link. Depending on the system set up, the media player may need to be activated. Speakers need to be attached to the workstation to hear the instructions.
Note: To view the videos, log-in through the www.primeclinical.com website. Current support is required.
1. To add an appointment block in Intellect, go to Utility --► Set Up --► Appointment --► Block --► Add
The Add BLOCKING screen displays:
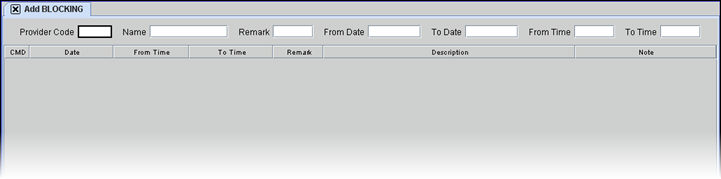
2.1 Type the Utility --► Provider --► Provider <Provider Code> for the doctor for whom to add a block to the schedule.
2.2 Enter the <Provider Code>, OR type up to 6 characters of the LAST name and press the [F2] key to display the Searching screen. To select the code from the list, either highlight the record and press the [Enter] key, OR double-click on the record. Or, after clearing the field, press the [F2] key twice to view the entire list of codes. For more information on the Searching screen, see Introduction to Intellect --► Intellect Characteristics and Features -- Searching.
2.3 The field is mandatory and must be completed. If left blank, Intellect displays an error message:
Press the [OK] button to return the focus to the <Provider Code> field.
3. Name 
3.1 The name of the provider displays. This is a read-only field and may not be modified. The name is displayed First, Last.
4.1 Enter a <Remark Code> as set up in Utility --► Messages --►Remark with a <Remark Type> = 'B.' A description for the reason for this block is pulled from the <Description> field of this <Remark Code>. See example.
4.2 Alternately, either type up to 6 characters of the description and press the [F2] key to display the Searching screen, OR, after clearing the <Remark> field, press the [F2] key twice to view the entire list of codes. To select the code from the list, either highlight the record and press the [Enter] key, OR double-click on the record. For more information on the Searching screen, see Introduction to Intellect --► Intellect Characteristics and Features -- Searching.
4.3 This field displays the description of the block in the multi-line display. See example below.
4.4 This field is mandatory and must be completed. If left blank, Intellect displays an error message:
5.1 Type the first scheduling day’s date that this block will affect.
5.2 The field is mandatory and must be completed. If left blank, Intellect displays an error message:
6.1 Type the last contiguous scheduling day’s date that this block will affect.
6.2 If this is a one day block, enter the same date as the starting date. A separate entry must be created If there is a break between days.
6.3 Multiple days show on multiple lines. See example below.
6.4 The field is mandatory and must be completed. If left blank, Intellect displays an error message:
7.1 Type the start time of the first schedule time slot to be affected by this block.
7.2 Use either military time 00:00-23:59 OR designate AM or PM after the number. Intellect converts all to standard time designation. When entering morning times, be sure to enter the zero before the number (09 :).
7.3 Caution: When entering times intended to start or end at 12 noon, 'PM' must be manually added.
7.4 For blocks extending over multiple days with different Start/End times, manually adjust each day’s block.
7.5 The field is mandatory and must be completed. If left blank, Intellect displays an error message:
8.1 Type the start time of the last schedule time slot to be effected by this block.
8.2 For blocks extending over multiple days with different Start/End times, manually adjust each day’s block.
8.3 Use either military time 00:00-23:59 OR designate AM or PM after the number. Intellect converts all to standard time designation. When entering morning times be sure to enter the zero before the number (09 :).
8.4 Caution: When entering times intended to start or end at 12 noon, 'PM' must be manually added.
8.5 The field is mandatory and must be completed. If left blank an error message displays:
8.6 After completing this field, press [Enter] to send the focus to the line in CMD with the date farthest in the future.

9. CMD ![]()
9.1 Type 'M' (modify) to send the focus to the <From Time> field.
9.2 Type 'A' (add) to send the focus back to the <Remark> field to add another block.
9.3 Type 'D' (delete) to give the option of deleting the current block line.
9.4 Press the [Esc] key either to end the current modification, returning the focus to the command column, or clear all entries.
10. Date ![]()
10.1 This is pulled from the <From Date> entered above. It cannot be modified, only deleted with the entire line.
11. From Time ![]()
11.1 This is pulled from the <From Time> entered above. It may be modified.
12. To Time ![]()
12.1 This is pulled from the <To Time> entered above. It may be modified.
13. Remark ![]()
13.1 This is pulled from the <Remark> entered above. It may be modified.
14. Description ![]()
14.1 The description of the <Remark> displays.
14.2 The <Remark> description also displays on the Schedule for a provider with a Block:
15. Note ![]()
15.1 If a note has been entered, it displays here.
16. All entries are automatically saved.


