
Intellect™
UTILITY MENU OPTIONS

Set Up
Appointment
Resource Group
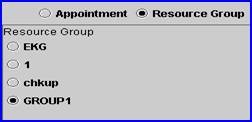
This option is used to associate and define the relationship between appointment types that must be scheduled with a definite sequence and purpose, generally with certain related time restraints. Access a Resource Group through the Appointment Schedule Search screen, Resource Group option.
NOTE: For this option to work, first create an Utility --►Set Up --►Appointment Type with the same type code as the one planned to be used for a group.
1. To create a schedule Resource Group for a provider in Intellect, go to Utility --► Set Up --► Appointment --► Resource Group --► Add
The Add Resource Group screen displays:
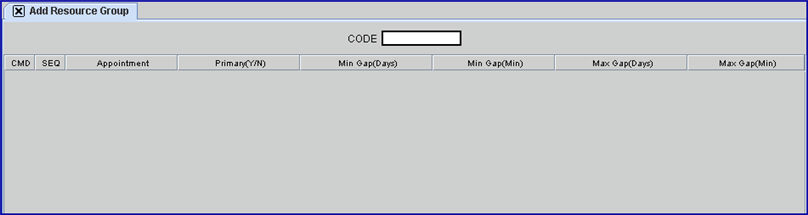
2. Code 
2.1 Type a user-defined code name for this group up to 6 characters in length.
NOTE: For this option to work, first create an Utility --► Set Up --► Appointment Type with the same type code as the one planned to be used for a group.
2.2 This code, or name, appears in the Schedule --► Search --► Resource Group pane.
2.3 The field is mandatory and must be completed. If left blank, Intellect displays an error message:
Press the [OK] button to return the focus to the <Code> field.
2.4 After typing the code, press [Enter].
3. CMD 
3.1 The focus moves past the CMD (Command) column, setting a default of 'A' (add).
3.2 If desired, these commands may be used in the Command column for editing:
M: Modify
D: Delete
F: First line
L: Last line
Esc: Quit or clear
4. SEQ 
4.1 Assign a sequence number that defines the relative order of appointment types to be scheduled in this group.
4.2 This field is mandatory and must be completed. If left blank, Intellect displays an error message:

Press the [OK] button to return the focus to the <SEQ> field.
5. Appointment 
5.1 Type an appropriate Utility --► Set Up --► Appointment --► Appointment Type <Appointment Type> for an appointment to be added to the group.
5.2 It is the association of <Appointment Type>s that are bound together for scheduling and, consequently, this field is mandatory and must be completed. If left blank, one of these error messages display:
- OR - 
Press the [OK] button to return the focus to the <Appointment> field.
6. Primary(Y/N) 
6.1 Designates the main appointment of the group.
6.2 Type 'Y' to make this type primary, OR 'N' for any other.
6.3 Each group should have only one primary.
6.4 The time slots in the schedule representing the primary appointment in this group show a colored square in the 'N' column.
![]()
7. Min Gap (Days) 
7.1 Set the minimum amount of schedule days between this appointment and the next one in the sequence.
7.2 If there is no minimum, type a '0' zero.
7.3 The schedule automatically shows only available appointments after this gap.
8. Min Gap (Min) 
8.1 Set the minimum amount of schedule minutes between this appointment and the next one in the sequence.
8.2 Use multiples of the defined time for each slot (i.e., 15, 30, 45, 60). If there is no minimum, type a '0' zero.
8.3 The schedule automatically shows only available appointments after this gap.
9. Max Gap (Days) 
9.1 Set the maximum amount of schedule days between this appointment and the next one in the sequence.
9.2 If there is no maximum, type a '0' zero.
9.3 The schedule automatically shows only available appointments within the defined range.
10. Max Gap (Min) 
10.1 Set the maximum amount of schedule minutes between this appointment and the next one in the sequence.
10.2 Use multiples of the defined time for each slot (i.e., 15, 30, 45, 60).
10.3 If there is no maximum, type a '0' zero.
10.4 The schedule automatically shows only available appointments within the defined range.