
Intellect™
REGISTRATION MENU OPTIONS

Worker
Worker
Add Worker
Warning: Only one Add Worker screen may be open on a workstation.
This option allow the addition of a new workers’ compensation patient and the addition of new insurance coverage for the worker. The information entered when a patient account is created is vital since it affects how Intellect handles registration, billing functions, workers’ comp forms, collections, and reports.
This screen is designed primarily for registering Workers’ Compensation patients, but may also be used for other types of injury (Personal Injury, Auto Accident, and Attorney Lien) patients where services are billed on the CMS 1500 form and/or statements to insurances, referring sources, or attorneys. Effective version 9.12.09, it is possible to produce Tracer HCFA forms for workers’ comp patients. For more information, please refer to Billing --► Worker --► HCFA Form --► Batch of Patients or Group of Patients.
This option enables tracking of multiple injury dates, continuous trauma dates, claim numbers, Adjudication (ADJ) numbers, and body parts for a single patient record.
When a retired name or referring code (i.e., the <Code Retired> field = Y on the Utility --►Referring screen for that code) is entered in a field that allows referring codes, Intellect displays:
Video Available: Click Worker Registration to access the link. Depending on the system set up, the media player may need to be activated. Speakers need to be attached to the workstation to hear the instructions.
Note: To view the videos, log-in through the www.primeclinical.com website. Current support is required.
Updates:
Effective version 17.06.09, an [Additional Demographics] button was added to the bottom of the WORKER screen to accommodate adding extra patient demographic information needed to meet Meaningful Use requirements. See [Additional Demographics] for details.
PCM users only. Effective version 16.10.11, when an Intellect client purchases PCM, a new feature called 'Create Chart' automatically creates a chart in PCM for every existing patient in Intellect. No action is required.
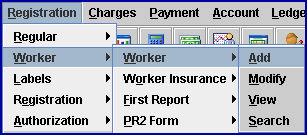
1. To add a Workers Compensation Patient in Intellect, go to Registration --► Worker --► Worker --► Add.
Note: A workstation may only have one Add WORKER screen open at a time.
The Add WORKER screen displays:
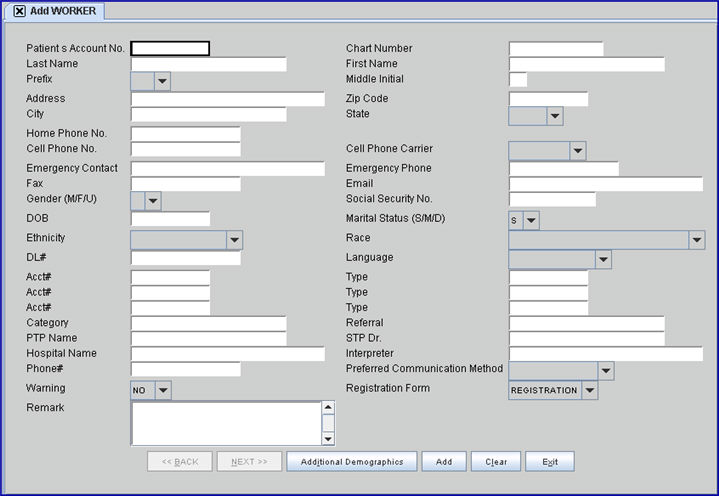
This screen, like many in Intellect has several optional fields, and the graphics in this documentation may vary slightly clinic to clinic. See the optional fields at the bottom of this document and/or the documentation on adding/removing fields.
Note: When adding a new worker, the <Patient Account No>, <Last Name>, <First Name>, and <Category> fields are mandatory and MUST be filled-in.
2. Patient's Account No 
2.1. The focus automatically starts here.
2.1.1 If the system is set to assign numbers automatically (see Utility --►Set Up --►Parameter <Auto Patient No>), Intellect displays the next available account number.
2.1.2 When the account number is not automatic, assign a unique number (up to 10-digits).
2.1.3 Trying to assign a number when the system is set to automatically provide an account number displays an error message:
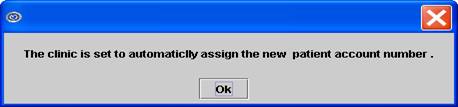
Select [OK] to return to the <Patient Account No> field.
2.1.4 This field is mandatory and must be completed. The system does not continue without a unique patient number. If left blank, an error message displays:
2.2 If Utility --►Set Up --►Parameter <Check Duplicate Pt> = 'Y,' the system checks for duplicate accounts (which is highly recommended). A search screen appears when [Enter] is pressed in the <Patient Account No> field:
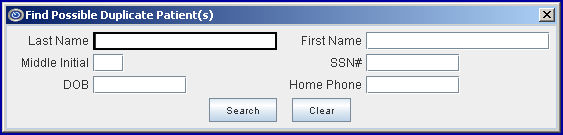
Press [ESC] to bypass this search.
See more on Duplicate Patient.
2.3 NOTE: In some instances, it may be permissible to create multiple accounts for a single patient after searching for duplicates. Discuss these options with a trainer since the decision affects scheduling, billing, and, for PCM users, chart creation.
Some examples of patients with multiple accounts:
• Patient has multiple injury cases and a separate account is created for EACH claim to keep the appointments history and financial data separated.
• Patient is being treated for a workers’ comp injury and visits billed to regular medical insurance, so one account is added for workers’ comp injury under Worker and another account is added for the patient’s medical insurance under Regular.
• Patient has separate accounts for auto accident injury and regular medical insurance.
3. Chart Number 
(versions prior to version 13.10.29 are labeled Chart)
3.1 This is an optional field and may be left blank.
3.2 The field accepts up to12 alphanumeric characters.
3.3 The Chart Number may be printed on custom Superbill or Registration forms.
Chart Number examples:
• Account number from a previous system.
• For group practices, the initials of the physician this patient sees.
• For worker's comp patients, their date of injury.
• The language of the patient.
• The name or initials of the lab covered by this patient's insurance
4. Last Name 
4.1 Type the patient's last name.
Effective Version 13.01.11
As of October 1, 2012, Medicare contractors reject any claim with ANSI reason codes MA130 and MA61 when the beneficiary name and Health Claim Number do not match the information listed in the Common Working File record for the beneficiary (i.e., as shown on the Medicare card). Because of this, Intellect now accommodates suffixes for beneficiary last names. Examples of suffixes are: I, II, III,1, 11, 111, i, ii, iii, 1v, 1V, IV, iv, JR, JR., Jr, Jr., SR, SR., Sr., or Sr. If suffixes are used that are not listed here, send them to PCS Support to have them added to the program.
If a patient/beneficiary has a suffix, it must be added to the patient <Last Name>; the name should be entered into Intellect exactly as it is shown on the Medicare card.
For example, if a patient has the name of John Jones, Jr., then enter Jones, Jr. in the <Last Name> field. If a comma is entered after the suffix (Jones, Jr.,), the suffix of Jr. is not included. It is OK to have a comma between the last name and the suffix.
If a hyphen is included between the last name and the suffix Jones-Jr), Intellect includes the suffix.
4.2 This field is mandatory and must be completed. If left blank, an error message displays:
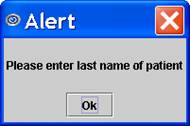
Select [OK] to return the focus to the <Last Name> field.
4.3 Note: The combined character length of the names entered in the <Last Name> and <First Name> fields should not exceed 70 characters. If the 70-character length is exceeded, the patient name displays on the appointment schedule, but the right-click menu may not be accessed.
5. First Name 
5.1 Type the patient's first name.
5.2 This field is mandatory and must be completed. If left blank, an error message displays:
Select [OK] to return the focus to the <First Name> field.
5.3 Note: The combined character length of the names entered in the <Last Name> and <First Name> fields should not exceed 70 characters. If the 70-character length is exceeded, the patient name displays on the appointment schedule, but the right-click menu may not be accessed.
6. Prefix (previously Title) 
(versions prior to version13.10.29 are labeled Title)
6.1 Accept the default ' blank' to not list a prefix for the patient, OR use the drop-down list to make an alternate selection:

7. Middle Initial 
7.1 Type the patient's middle initial.
7.2 Optional, but recommended.
7.3 Effective Version 13.12.12, on the HCFA 1500 form, the name appears separated by commas; i.e., last name, first name, and middle initial. A hyphen may be used for hyphenated names. Periods are not used within the name.
8. Address 
8.1 Enter the patient’s complete home street address (or mailing address) including apartment number.
9. Zip Code 
9.1 Enter the zip code for the <Address>.
9.2 If the Zip Code is unknown:
9.2.1 Press [F2] to search by city and/or state. For more information, see Adding Zip Codes.
9.2.2 If left blank, press [Enter] through <City> and <State>. IMPORTANT NOTE: NEVER enter <City> and/or <State> when the <Zip Code> field is blank.
9.3 Effective version 9.12.24, a task named 'ZipCode9' runs every night and can update any zip code fields with a 9-digit value using the current 5-digit zip code value and its' address field. As of December 2011 it only updates the patient zip code, but in the future it can be expanded to other fields as well. It does not update the field if the source from which it fetches the data (www.usps.com) does not recognize the combination of zip code and address as a legitimate one.
10. City 
10.1 The city name displays from the Zip Code, if it is known to Intellect.
10.2 Otherwise, type the city attached to the Zip Code.
10.3 NEVER enter a city and state while leaving the Zip Code field blank.
10.4 For more information, see Adding Zip Codes.
11. State 
11.1 The State name displays from the Zip Code, if it is known to Intellect.
11.2 Otherwise, select the state code from the drop-down list.
11.3 NEVER enter a city and state while leaving the Zip Code field blank.
11.4 For more information, see Adding Zip Codes.
12. Home Phone No 
12.1 Type the patient's home phone number -- it is not necessary to enter the parenthesis or hyphen.
Note to CallSTAFF users: If the patient's area code is not the same as the <Default Phone Area> field in Utility --►Set Up --►Parameter, Intellect dials the 1 and area code. If the patient's area code DOES match the <Default Phone Area> field, it does NOT dial 1 and area code.
13. Cell Phone 
13.1 Enter the patient's cell phone number. This is a required field to send this patient text message appointment reminders.
14. Cell Phone Carrier 
14.1 Effective version 13.10.29, this field is used to send text message appointment reminders to patients' cell phones.
14.2 Use the drop-down list to select the cell phone carrier.
14.3 For additional set up information for text message appointment reminders, click here.
15. Emergency Contact 
15.1 Type the name of a person who may be contacted in case of an emergency for the patient.
16. Emergency Phone 
16.1 Type the phone number for the patient's <Emergency Contact>.
Note for PCM Users: Changing <Emergency Contact> information in Intellect updates the fields in PCM. However, changing the <Emergency Contact> information in PCM does NOT update the <Emergency Contact> information in Intellect.
17. Fax 
17.1 If completed, Intellect can fax the information to the patient rather than print it when generating Patient Statements, Follow Up Letters, Recall Letters, or Forms.
17.2 For more information on faxing from Intellect, refer to the section on Faxing.
18. Email Address 
18.1 Type the email address of the patient.
18.2 If this field is completed, Intellect can email the patient rather than print for various forms and letters.
19.1 Use the drop-down list to make the appropriate selection.
19.2 Effective version 9.12.16: Decide which option to have as a default for the <Gender> field; i.e., either 'M' (male), 'F' (female), 'U' (unknown), or to have it default to 'Blank,' as shown above.
Selecting 'Blank' as the default has some items to consider:
1 - Because claims billed without a valid gender may be rejected, PCS suggests setting up the <Gender> field as a required field. Meaning, if it is left blank when either [Add] or [Modify] are selected, an error message displays.
The operator must select a gender before exiting the screen and saving the record.
To set this field as a required field, please contact PCS Support.
2 - To schedule an appointment, a patient must have an account. For new patients, the scheduler needs to add the patient account record, which means they need to select a gender before they can save the new patient account record.
20.1 Enter the patient's social security number in ######### format. Intellect inserts the dashes in the correct locations (###-##-####).
20.1.1 Effective version 16.11.10, the SSN only displays the very last 4 digits and the rest are represented with asterisks (***-**-1234), unless the data in the database is malformed or incomplete.
20.1.2 Effective version 16.12.02: Options of masking the SSN (displaying only the last 4 digits) or not masking the SSN were added. For additional information, see Utility --►Set Up --►Screen Fields Mask/Unmask the Social Security Number (SSN).
20.2 Use the [Spacebar] or [Backspace] to remove values from the field, OR change the social security number by simply typing over the existing number.
20.3 Use the [Spacebar] or [Backspace] to remove values from the field OR change the social security number by simply typing over the existing number.
20.3.1 Effective 9.12.29 (March 2012), the SSN entered in this field can print in Box 8a on the UB04 form. To have the SSN print, call PCS and ask Support to add it to the form; it is not automatically inserted.
21.1 Type the patient's birth date.
IMPORTANT: The birth date must be correct for OSHPD reports and CHDP billing.
21.1.1 Type the patient's date of birth in MMDDYYYY format. Intellect inserts the slashes in the correct locations (MM/DD/YYYY).
IMPORTANT: The patient's birth date must be correct for OSHPD reports and insurance billing.
22.1 Accept the default 'S' (single) OR use the drop-down list to make an alternate selection.
22.2 To view the list of codes with descriptions, press the [F2] key. To view the list of only the codes, either click on the arrow OR press the → (right arrow) on the keyboard. To select, double-click on the correct code OR use the ↑ (up) and ↓ (down) arrows to highlight the correct code, and then press the [Enter] key to select.
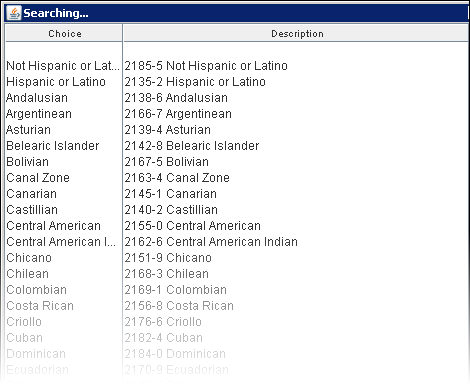
23. Ethnicity 
23.1 PCM users: This field is mandatory to meet the requirements for the EHR Incentive Program (aka Meaningful Use) and/or MIPS under the Quality Payment Program. Note: Selecting 'Declined to Specify' satisfies the requirement to complete this field.
23.2 If not applicable, press [Enter] to leave blank.
23.3 Effective version 9.12.14, this field was expanded to 26-characters and a numeric code was added to the description to match the ethnicity options for certified EHR technology (CEHRT) required for PCM users.
23.4 To view the list in alphabetical order:
23.4.1 Click on the field, press the [--►] right key OR press the [F2] key with the cursor in the field to display the code and description. To select, double-click on the correct code OR use the up or down arrows to highlight the correct code, and then press the [Enter] key to select.
Effective version 17.10.20 - In prior software versions, the Intellect <Ethnicity> field choices did not match those of PCM and Patient Portal. As of this update, the drop-down options were changed in Intellect to correlate with PCM and Patient Portal:
Software versions prior to 17.10.20
23.4.2 Click on the arrow to display only the codes. Use the scroll bar, up or down arrow keys, OR press the first letter of the patient's race to highlight the correct code and then press the [Enter] key to select.
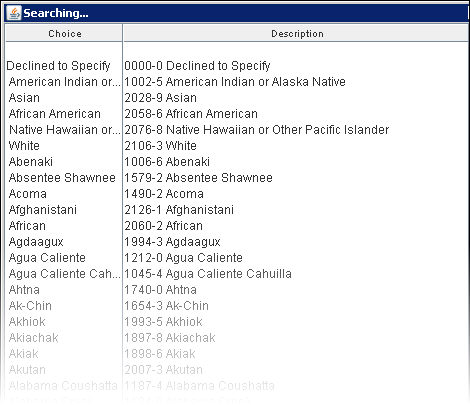
24. Race 
24.1 Effective version 9.12.14 - Available as an optional field.
24.2 Effective version 12.12.06 - Added as a standard. This field is always on the screen and is no longer optional.
24.3 PCM users: This field is mandatory to meet the requirements for the EHR Incentive Program (aka Meaningful Use) and/or MIPS under the Quality Payment Program. Note: Selecting ‘Declined to Specify’ satisfies the requirement to complete this field.
24.4 The field displays the code selected for the race of the patient in the drop-down menu, which is 41 characters or less. Leave blank, if not applicable.
24.5 To view the list sorted in alphabetical order (except for the first 6 options which appeared in versions prior to 9.12.14):
24.5.1 Click on the field, press [--►] arrow key OR press the [F2] key with the cursor in the field to display the code and description. To select, double-click on the correct code OR use the up or down arrows to highlight the correct code, and then press the [Enter] key to select.
Note: Effective version 9.12.15, the numeric code was added to the description to match the race options for certified EHR technology (CEHRT) required by PCM users.
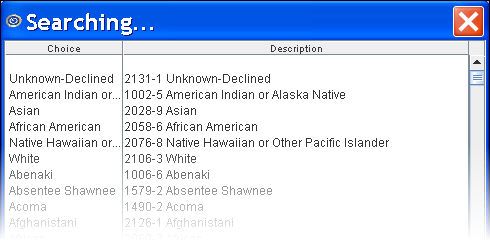
24.5.2 Click on the arrow to display only the codes. Use the scroll bar, up, or down arrow keys, OR press the first letter of the patient's race to highlight the correct code and then press the [Enter] key to select.
24.6 The <Race> field maps to the Race field in PCM.
25. DL # 
25.1 Enter the driver's license number of the patient (this is an optional field).
26. Acct# 
26.1 Informational fields to hold multiple accounts for the patient, if they exist.
For example, if they were originally a PPO patient and now they are also a Worker's Comp patient with a separate account, the PPO account could be entered in this field.
27. Type 
27.1 Informational fields to hold the type for Acct#. In the example for the <Acct#> field above, where a patient already had a PPO account prior to having a Worker's Comp account, PPO could be entered in this field as a description of the account number entered in <Acct#> above.
28.1 This field is mandatory and must be completed.
28.2 Category is the financial classification of the patient and determines many aspects of how the account is handled, including whether or not follow up letters should be generated, if the patient should receive statements, how the account balance should be aged, whether or not finance charges are applied to overdue balances, and if the Doctor's First Report screen should appear after adding the Worker Insurance screen.
28.2.1 For a Workers' Comp-type category, Utility --►Category <Type (C/P/W/O/F/G)> field = ‘W’ or ‘F.’
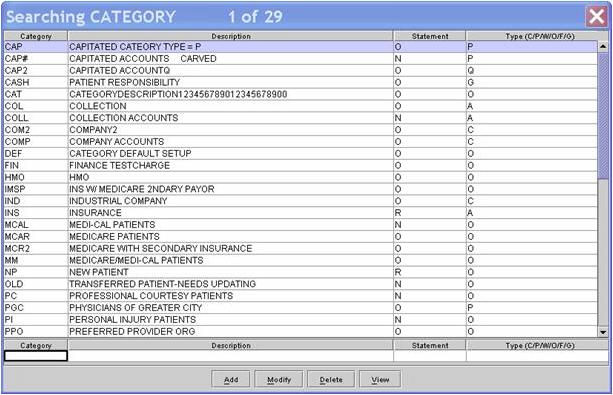
28.3 Effective version 13.12.12: Enter a Category (or a portion of a category) and press [Enter]. Intellect displays a record search screen. The record search screen (similar to the [F2] screen) lists all the available options from which to choose.
28.3.1 Effective version 14.03.20, the display was changed for ease of use. In the prior version, only the name displayed. As of this update, both the code and name display, separated by a '/'.
28.3.2 Effective version 14.03.20, this field may be set to search either by Utility --►Category <Description> or <Category Code>. To search by code, please contact PCS support to request this change.
Note1: The default search is set to the Utility --►Category <Description> field, not the Utility --►Category <Category Code> field. For example, if the <Category Code> is WC and the <Description> is WORKER COMPENSATION, entering WC in the <Category> field to perform a search displays a warning: 'Match Not Found!'.
Note2: The <Category> field on the Regular Patient screen is set to the same search criteria.
28.4 To select the code from the displayed list either highlight the record and press the [Enter] key, OR double-click on the record.
28.5 To select the code from the displayed list, either highlight the record and press the [Enter] key, OR double-click on the record.
28.6 When a new or invalid Category is entered, Intellect displays:
28.6.1 Click on [OK] to display the record search screen.
28.6.2 If this is a new Category, click [Add]. Intellect opens the Utility --►Category --►Add screen where the appropriate information may be entered and saved.
29.1 Effective version 13.12.12: Enter the LAST name (or a portion of the LAST name) of the patient's referral source (for workers’ comp patients it may be an outside physician, insurance adjuster or attorney) and press [Enter]. Intellect displays a record search screen. The record search screen (similar to the [F2] screen) lists all the available options from which to choose.
29.1.1 Effective version 14.03.20, the display was changed for ease of use. In the prior version, only the name displayed. As of this update, both the code and name display, separated by a '/'.
29.1.2 Effective version 14.03.20, this field may be set to search either by Utility --►Referring <Last Name> or <Referring Code>. To search by code, please contact PCS support to request this change.
Note: The <Referring Name>, <PCP Name>, and <STP Dr> fields on the Regular Patient screen and the <PTP Name> and <STP Dr> fields on the Worker screen are set to the same search criteria.
29.2 To select the code from the displayed list, either highlight the record and press the [Enter] key, OR double-click on the record.

29.3 When a new or invalid referring name is entered, Intellect displays:

29.3.1 Click [OK] to display the record search screen.
29.3.2 If this is a new Referral, click [Add]. Intellect displays the Utility --►Referring --►Add screen where the appropriate information may be entered and saved.
29.4 When a retired name or referring code is entered (i.e., the <Code Retired> field = Y on the Utility --►Referring screen for that code), Intellect displays:
29.4.1 Click [OK] to return the focus to the <Referral> field so a valid name or code may be entered.
29.5 If there is no referral source, press the [Enter] key to leave blank.
NOTE: The order Intellect uses to determine the source of the referring doctor's (a.k.a. ordering physician's) information for billing and referral reports is controlled by Utility --►Set Up --►Parameter <Referring>.
30. PTP Name 
(Prior to version 14.02.04, this field was titled 'PCP')
30.1 PTP is the patient’s primary treating physician for the injury.
30.2 Effective version 13.12.12: Enter the LAST name (or a portion of the LAST name) of the patient's primary treating physician (PTP), and press [Enter]. Intellect displays a record search screen. The record search screen (similar to the [F2] screen) lists all the available options from which to choose.
30.2.1 Effective version 14.03.20 , the display was changed for ease of use. In the prior version, only the name displayed. As of this update, both the code and name display, separated by a '/'.
30.2.2 Effective version 14.03.20, this field may be set to search either by Utility --►Referring <Last Name> or <Referring Code>. To search by code, please notify PCS support to request this change.
Note: The <Referring Name>, <PCP Name>, and <STP Dr> fields on the Regular Patient screen and the <Referral> and <STP Dr> fields on the Worker screen are set to the same search criteria.
30.3 To select the code from the displayed list, either highlight the record and press the [Enter] key, OR double-click on the record.
30.4 When a new or invalid PTP name is entered, Intellect displays:

30.4.1 Click on [OK] to display the record search screen.
30.4.2 If this is a new PTP Name, click [Add]. Intellect displays the Utility --►Referring --►Add screen where the appropriate information may be entered and saved.
30.4.3 PTP records are entered into the same table as the referral sources.
30.5 If the patient does not have a PTP, press the [Enter] key to leave this field blank.
30.6 For clinics sharing patient demographics with other clinics, this field is clinic-specific.
31. STP Dr. 
31.1 STP is the patient’s secondary treating physician for the injury
31.2 Effective version 13.12.12, after entering a LAST name of the patient's STP doctor (or a portion of a LAST name) in this field, press [Enter] to display a record search screen. The record search screen (similar to the [F2] screen) lists all the available options from which to choose.
31.2.1 Effective version 14.03.20, the display was changed for ease of use. In the prior version, only the name displayed. As of this update, both the code and name display, separated by a '/'.
31.2.2 Effective version 14.03.20, this field may be set to search either by Utility --► Referring <Last Name> or <Referring Code>. To search by code, please contact PCS support to request this change.
Note: The <Referring Name>, <PCP Name>, and <STP Dr> fields on the Regular Patient screen and the <Referral> and <PTP Name> fields on the Worker screen are set to the same search criteria.
31.3 To select the code from the displayed list, either highlight the record and press the [Enter] key, OR double-click on the record.
31.4 When a new or invalid STP name is entered, Intellect displays:
31.4.1 Click on [OK] to display the record search screen.
31.4.2 If this is a new Referring Name, click [Add]. Intellect displays the Utility --►Referring --►Add screen where the appropriate information may be entered and saved.
31.5 If there is no referral source, press the [Enter] key to leave blank.
31.6 Effective Version 12.12.06: When a Worker record is added or modified, Intellect updates the <STP Dr> in the account balance table.
32. Hospital Name 
32.1 This field is used to record which facility the patient should be referred to for non-emergency treatment or to indicate their preference of facilities.
32.2 Effective version 14.02.04: Enter a name (or a portion of a name) and press [Enter]. Intellect displays a record search screen. The record search screen (similar to the [F2] screen) lists all the available options from which to choose.
32.2.1 Effective version 14.03.20, the display was changed for ease of use. In the prior version, only the name displayed. As of this update, both the code and name display, separated by a '/'.
32.2.2 Effective version 14.03.20, this field may be set to search either by Utility --►Facility <Name> or <Facility Code>. To search by code, please contact PCS support to request this change.
Note: The <Hospital Name> field on the Regular Patient screen is set to the same search criteria.
32.3 To select the code from the displayed list, either highlight the record and press the [Enter] key, OR double-click on the record.
32.4 When a new or invalid hospital name is entered, Intellect displays:
32.4.1 Click on [OK] to display the record search screen.
32.4.2 If this is a new Hospital Name, click [Add]. Intellect displays the Utility --►Facility --►Add screen where the appropriate information may be entered and saved.
32.5 If the patient does not have a facility where they need to be treated, or does not have a preference, press the [Enter] key to leave blank.
32.6 For clinics sharing patient demographics with other clinics, this field is clinic-specific.
33. Interpreter 
33.1 Type the name of the interpreter, if needed.
33.2 For information only.
34. Phone# 
34.1 Type the phone number of the interpreter, if needed.
34.2 For information only.
35. Preferred Communication Method 
35.1 For PCM users only: New field - effective version 09.12.18.
35.2 This field allows clinics to identify the method by which patients prefer to be contacted. The options for this field are shown below:
Note: 'Declined to Provide' and 'Declined to Receive' are not available at this time.
35.2.1 Version 13.04.10: Options of E-mail/Cell and E-mail/Home were added.
NOTE: Due to the certification requirements for Promoting Interoperability in PCM, the Intellect options for {E-mail/Cell} and {E-mail/Home} are not available for use in PCM. However, if either of these options is selected in Intellect, the corresponding field is populated in PCM on the Patient Data Editor window.
• E-mail/Cell: If a patient chooses Email/Cell, it means he/she would prefer to be contacted via email, but if the clinic needs to call the patient, then the patient should be called on his/her cell phone number.
•E-mail/Home: If a patient chooses Email/Home, it means he/she would prefer to be contacted via email, but if the clinic needs to call the patient, then the patient should be called on his/her home phone number.
35.3 Select the preferred method to use when contacting the patient to meet the Meaningful Use objective for Patient Reminders.
35.4 Changing the Preferred Communication Method in Intellect affects the default in PCM.
Note: At this time, this field is not used in Intellect for those that do not have PCM.
36. Warning 
36.1 This field is used in conjunction with the <Remark> field.
36.2 Select 'YES' to display a pop-up box with the text entered in <Remark> with this entire patient's records in all screens.
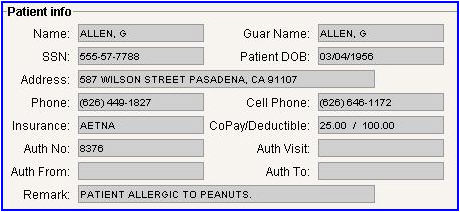
36.3 Regardless of the setting selected, the Remark always displays in the Add/Modify Appointment Scheduling dialog box under Patient Info, as shown below:
37. Registration Form 
37.1 Intellect defaults to the first option in the drop-down list, which is usually REGISTRATION.
37.2 Offices with multiple forms may select the correct form by either clicking on the arrow in the field and then clicking on the appropriate item, OR press the → (right arrow) key, use the up and down arrows to highlight the appropriate item, and then press [Enter].
37.3 Multiple registration forms may be chosen for different languages, multi-specialties, or types of patients such as Regular and Worker Compensation.
38. Remark 
38.1 Intellect provides space for a 1000-character message to enter miscellaneous information about the patient.
38.1.1 If the <Warning>field on this screen = 'Yes,' a popup message box occurs for every screen that involves this patient.
38.1.2 These fields may be programmed to print on super bills.
38.2 Various entries may be made in these fields in order to assist or alert the scheduler.
38.2.1 During the scheduling process, these fields are always displayed at the time an appointment is scheduled.
38.3 To exit the field, either use the [Control] [Tab] keyboard combination two times OR click on another field.
39. When the WORKER screen is completed, select one of the Action Buttons:

39.1 [Additional Demographics]: Effective version 17.06.09, the [Additional Demographics] button was added to accommodate adding extra patient demographic information shared with PCM to meet certified EHR technology (CEHRT) requirements. Click this button to pop up a window with extra fields. The screen below shows the default fields for this window.
Note: This screen contains optional fields and which may not be applicable for all patients. Please skip to 39.2 [Add] for an explanation of the other buttons.
In addition to Meaningful Use information, this option may be used to add family members such as grandparents, or other information applicable to each clinic. Go to Utility --►Set Up --►Screen Fields--►Add, enter Additional Demographics in the <Screen name> field, enter the name of the field to add in <Field Name>, and complete the screen as needed. Contact PCS Support with any questions.
Note: The additional demographic information is not sent to PCM.
39.1.1 Sexual Orientation 
Accept the default OR use the drop-down list to make an alternate selection:
Note: If 'Other (describe)' is selected in the <Sexual Orientation Description> field (above), enter a description of the patient's sexual orientation in this free-form field.
39.1.2 Sexual Orientation Description 
If 'Other (describe)' is selected in the <Sexual Orientation > field (above), enter a description of the patient's sexual orientation in this free-form field.
39.1.3 Gender Identity 
Accept the default OR use the drop-down list to make an alternate selection:
39.1.4 Secondary Race 
If the patient has a secondary race, use the drop-down list to select the secondary race.
39.1.5 Secondary Ethnicity 
If the patient has a secondary ethnicity, use the drop-down list to select the secondary ethnicity.
39.1.6 Height 
Enter the height of the patient as feet.inches; i.e., enter 5.11 for 5 foot 11 inches.
39.1.7 Birth Weight 
Enter the birth weight of the patient as pounds.ounces; i.e., enter 7.8 for 7 pounds 8 ounces.
39.1.8 Current Weight 
Enter the weight of the patient as pounds.ounces; i.e., enter 175.13 for 175 pounds 13 ounces.
39.1.9 Veteran 
Use the drop-down list to select 'Y' (patient is a veteran) or 'N' (patient is not a veteran):
39.1.10 Birthplace City 
Enter the city where the patient was born. This is a free-form text-entry field so the city may be entered as determined by the office; i.e., in all caps (GLENDALE), or with a beginning capital letter (Glendale).
39.1.11 Birthplace State 
Enter the state where the patient was born. This is a free-form text-entry field so the state may be entered as determined by the office; i.e., in all caps (ARIZONA), with a beginning capital letter (Arizona), or the abbreviation used by the postal service (AZ).
39.1.12 Birthplace Country 
Enter the country where the patient was born. This is a free-form text-entry field so the country may be entered as determined by the office; i.e., in all caps (UNITED STATES OF AMERICA), with a beginning capital letter (United States of America), or abbreviated (USA).
39.1.13 Population Type 
Use the drop-down list to make a selection:
39.1.14 Principal Insurance Type 
Use the drop-down list to make a selection:
39.1.15 Date of Death 
Type in the date of the patient's death.
39.1.16 Multiple Birth 
PCM users only. Effective version 17.08.16. This field was added for the purpose of reporting for the National Center for Health Statistics https://www.cdc.gov/nchs/nvss/dvs_data_release.htm.
The default for this field is 'No.' Use the drop-down list to select 'Yes' if the patient was part of a multiple birth delivery.

39.1.17 Birth Order  >
>
PCM users only. Effective version 17.08.16. This field was added for the purpose of reporting for the National Center for Health Statistics https://www.cdc.gov/nchs/nvss/dvs_data_release.htm.
Use the drop-down list to select the birth order for multiple birth deliveries:
--  --
--
39.1.18 [Apply]: Click the [Apply] button to save the information added to the Apply Additional Demographics screen.
39.1.19 [Clear]: Click the [Clear] button to clear the fields on the Apply Additional Demographics screen.
39.1.20 [Exit]: Click the [Exit] button to close the Apply Additional Demographics screen.
39.2 [Add]: Click the [Add] button to save the information. Additionally, depending on the set up of the system, the following may occur:
39.2.1 If any fields have been customized in the system as mandatory fields, the following type of message is displayed. In our example, the patient's <DOB> has been designated as a mandatory field:
39.2.1.1 Click the [Ok] button to return the focus to the designated field, i.e.: <DOB>.
39.2.2 If the patient’s Category is set up as a category for patients without any insurance (Utility --►Category <Type (C/P/W/O/F/G> = G), such as ‘CASH,’ the focus returns to the <Patient Account No> field. There is NOT a prompt to enter insurance information.
39.2.3 If the patient’s Utility --►Category <Type (C/P/W/O/F/G)> is NOT set to ‘G’ (patients without any insurance), a prompt displays:
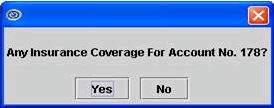
39.2.3.1 Click the [Yes] button to open the Add WORKER_INSURANCE screen.
39.2.3.2 If the [NO] button is clicked:
39.2.3.2.1 When patient’s category Utility --►Category <Type (C/P/W/O/F/G)> is NOT set to ‘F,’ Intellect returns the focus to the <Patient Account No> field. The screen is cleared and ready to add another account.
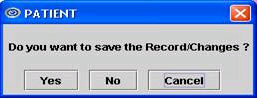
39.2.3.2.2 When patient’s category Utility --►Category <Type (C/P/W/O/F/G)> is set to ‘F,' a prompt displays to add the Doctor’s First Report for this account.
39.2.3.2.2.1 Click [Yes] to open the Add PATIENT_FIRST_REPORT screen.
39.2.3.2.2.2 Click [No] to return the focus to the <Patient Account No> field.
39.2.3.2.2.3 Click [Cancel] to return the focus to the <Patient Account No> field.
39.3 [Clear]: Clicking the [Clear] button displays:
39.3.1 Click the [Yes] button to save the information. The system prompts to either complete mandatory data fields, add insurance information, and/or add Doctor’s First Report. For additional instructions, see 39.2.
39.3.2 Click the [No] button to NOT save the information. The focus returns to the <Patient Account No> field.
39.3.3 Click the [Cancel] button to return the focus to the [Clear] button.
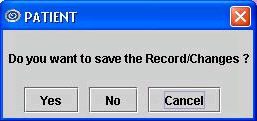
39.4 [Exit]: Click the [Exit] button to display:
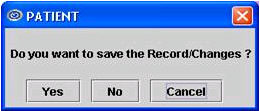
39.4.1 Click the [Yes] button to save the information. The system prompts to complete mandatory data fields, add insurance information, and/or add Doctor’s First Report. For additional instructions, see 39.2.
39.4.2 Click the [No] button to NOT save the information. The focus returns to the <Patient Account No> field.
39.4.3 Click the [Cancel] button to return the focus to the [Exit] button.
39.5 Clicking on the X  in the screen's tab prompts:
39.5.1 Click the [Yes] button to save the information. The system prompts to either complete mandatory data fields, add insurance information, and/or add Doctor’s First Report. (For additional instructions, see 39.2).
39.5.2 Click the [No] button to NOT save the information. The focus returns to the <Patient Account No> field.
39.5.3 Click the [Cancel] button to return the focus to the field where the X was clicked.
Contact Support to add/hide any of these fields:
Patient screen:
1. Active 
1.1 Effective version 13.10.29.
1.2 Indicate whether or not the patient is currently an active patient, OR inactive at this time.
2. Emergency Contact
3. Emergency Phone
4. Ethnicity*
5. First Exam (NEW FIELD Version 9.12.10)
5.1 Enter the date of the first exam.
6. Hospital Name
7. *Language ![]()
8. Order Date ![]()
8.1 This field is used to record the next Court Appearance Date and is informational only.
8.2 Contact support to request a quote to add this field to Workers Compensation forms in Intellect.
9. Patient Statement Override
10. Preferred Communication Method 
11. *Race
*Note: These fields are required for those using Patient Chart Manager.
Apply Additional Demographics screen:
1. Hispanic
1.1 Effective version 9.12.1 - New field.
1.2 The <Hispanic> field accommodates a UDS report.
1.3 Select [Yes] if the patient considers himself/herself to be Hispanic.
1.4 Select [No] if the patient does not consider himself/herself to be Hispanic.
2. Residing At
2.1 A <Residing At> field is available for the Patient screen. It is an optional field and may or may not display on the screen.
2.2 It is used in conjunction with UDS Reports. The UDS Reports option is available from the Management menu.
2.3 Press [F2] in this field to display this list:
Not applicable - leave blank
1 House/Apartment
2 Homeless Shelter
3 Doubling Up
4 Street
5 Substance Abuse Program
6 Transitional Housing Program
7 Other
3. Status
3.1 This field is used with UDS reports. The UDS Reports option is available from the Management menu. For more information, contact PCS support.>
Fields Removed from the Screen:
1. Description 
1.1 Removed from the screen effective version 13.12.12. Information was incorporated into <Category>.
2. Doctor’s Name 
2.1 Removed field for referring code from the screen effective version 13.12.12. Information was incorporated into <Referral>.
3. Doctor’s Name ![]()
3.1 Removed from the screen effective version 13.12.12. Information was incorporated into <PTP Name>.
4. Doctor’s Name ![]()
4.1 Removed field for Doctor's Name from the screen effective version 13.12.12. Information was incorporated into <STP Dr.>
5. Hospital ![]()
5.1 Removed from the screen effective version 13.12.12. Information was incorporated into <Hospital Name>.
NOTE: When posting charges or payments, the Patient Registration (Worker or Regular) Add or Modify screens must be closed or an error occurs.
![]()


