Intellect™
SCHEDULE MENU OPTIONS

Appointment
Full Day
Special Features
Schedule Print Options
Effective version 9.12.01, clinics may have a referring phone number and/or a fax number on the appointment report. To have this option, please contact Prime Clinical.
Appointment schedules may be printed for doctors or patients.
When printing from the Appointment Schedule, only single-day appointments for a selected provider can be printed, as described below. To print multiple days and/or multiple providers, use Schedule --► Appointment --► Print.
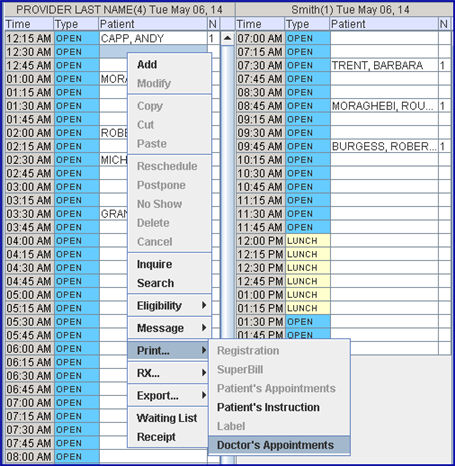
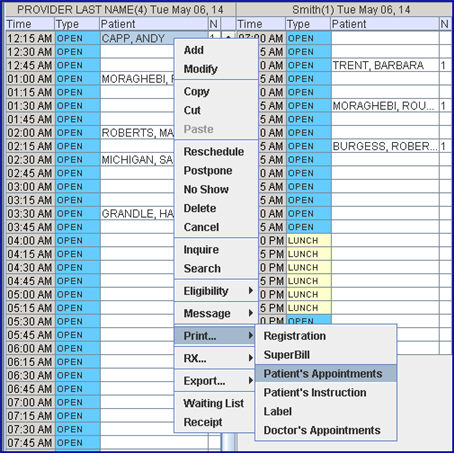
1.1 Using the mouse, right click on a Doctor’s schedule to open the context menu.
1.2 Select 'Print,' and then 'Doctor's Appointments':
1.3 Selecting Doctor's Appointments opens the Print APP_LIST_DOCTOR dialog box:
1.3.1 Printer Properties
1.3.1.1 Printer: The default printer for the logged-in clinic and password is selected. To select a different printer, either click on the arrow, OR press the → (right arrow) on the keyboard to view the list of printer codes. In our example, the defaulted Printer is HP. This is just an example of a printer name and may or may not be set up on the system.
To select the printer type, click on the code, OR use the ↑ (up) and ↓ (down) arrows to highlight the correct code; then press the [Enter] key to select.
Note: If DISK is selected from the drop-down list and the schedule will not open on an iPhone, click here for troubleshooting information.
1.3.1.2 Number of Copies: This field defaults to either 0 (zero) or 1. Both print 1 copy. To print more than one copy, enter the number of copies.
1.3.2 Fax/Email:
In addition to printing reports, Intellect provides the capability to export reports to an Excel spreadsheet, Email, Fax, Disk, or Archive. A secondary printer may also be selected, if one is set up, by clicking on the arrow to display the drop-down list.
1.3.3 Select the [Print] button to send the request to the printer (or as a Fax or email).
1.3.4 Select the [Cancel] button to clear the screen and return to the Appointment Schedule without saving or printing.
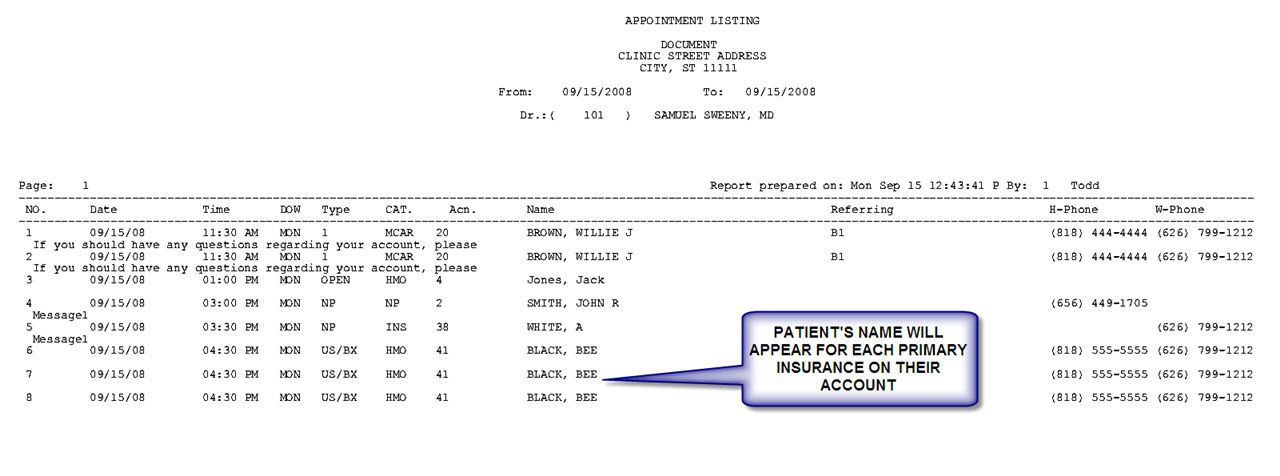
When printing from the Appointment Schedule, only single patient appointments may be selected. This, however, prints the entire patient appointment history.
2.1 Using the mouse, right click on a patient’s appointment to open the context menu.
2.2 Select 'Print,' and then 'Patient's Appointments':
2.3 Select Patient's Appointments to open the Print Patient's Appointment dialog box:

2.3.1 To see the printer options, press the [Space Bar] to display the printer destinations. At this point, select the desired printer and press [Print].