
Intellect™
SCHEDULE MENU OPTIONS

Recall
Batch of Patients
This option is for printing individual recall letters, a small batch of recall letters, or a list of selected recalls. Intellect has a library of letters. Options include advising the patient that it is time to schedule an appointment for the indicated care, notifying the patient his/her lab test was normal/abnormal, etc. Additional letters may be added or existing letters modified through Utility --► Messages --► Message.
This option may also be used to send a voice or text message to patients, in lieu of a recall letter, to remind them of a missed appointment, the results of lab tests, the need to schedule an annual physical, etc.
Note: The second address field on the Patient Registration screen is now available, if requested, to print on Recall letters. To have the second address added to your Recall letters, call our support department for assistance.
Effective version 18.08.31, the Recall letters printed the 'Address (CL_ADDRESS) and no option was available to add the Physical Address (CL_PHYSICAL_ADDRESS). In this release, an 'alias' 'Physical Address' was added to allow the (CL_PHYSICAL_ADDRESS) to print when populated in the Report Designer for the form 'FORM_RECALL'.
1. To print a Recall letter or list for a patient in Intellect, go to Schedule --►Recall --►Print --►Batch of Patients:
The Print BOP_Recall screen displays:
2.1 Type the applicable patient account number. This field is required; if an account number is not entered in this field, this error message displays:
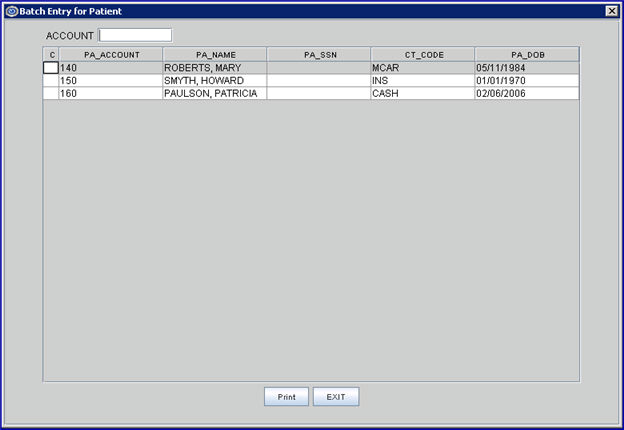
2.2 Press [Enter] to open the Batch Entry dialog screen, allowing more accounts to be added individually to process as a single batch.
2.2.1 Type any additional account numbers (one at a time) and press [Enter] to add.
3. From Date 
3.1 Type the beginning date to include in this printing.
3.2 If left blank, it defaults to the current calendar date.
4. To Date 
4.1 Type the latest date to include in this printing.
4.2 The default is always the current calendar date.
5.1 Bypass this field to accept the default 'List.'
5.2 Accept the default, OR use the drop-down list to make an alternate selection.
5.3 To view the list of codes with descriptions, press the [F2] key. To view the list of only the codes, either click on the arrow OR press the → (right arrow) on the keyboard.
To select, double-click on the correct code, OR use the ↑ (up) and ↓ (down) arrows to highlight the correct code and then press the [Enter] key to select.
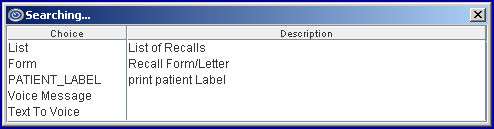
5.3.1 List: Creates a recall list of patients based on the account numbers entered in the <Account No> field. See Sample Recall List.
5.3.2 Form: Generates recall forms or letters, as selected in the <Remark Code> field below, for patients as indicated in the <Account No> field. See Sample Recall Letters.
5.3.3 PATIENT_LABEL: Generates address labels for patients selected in the <Account No> field. The patient name is listed in last name/first name order.
NOTE: These labels may be printed on a Dymo Label Writer.
5.3.4 Voice Message: (Effective version 13.06.24) Sends a voice message, generated from a pre-recorded MP3-format file, to the patient(s) entered in the <Account No> field. See MP3 File Set Up for additional information. Voice Messages are sent based on selected criteria; if the criteria are not met, the message is not sent.
5.3.5 Text To Voice: (Effective version 13.06.24) Sends a voice message to patient(s) selected in the <Account No> field. Twilio reads the voice message indicated in the <Remark Code> field below. Text to Voice messages are sent based on selected criteria; if the criteria are not met, the message is not sent. Messages may be in any language that Twilio supports. As of 06/2013, English, Spanish, French, and German are supported. To send a message in a language Twilio does not support, the message needs to be recorded in MP3 file format and, as a result, the 'Voice Message' option should be selected.
Note: For the 'Text to Voice' option to work, clinics must have a Twilio account, and Twilio must be set up in Intellect. To open a Twilio account, go to www.twilio.com. See Voice Message Set Up (sections A and B) for additional information.
Note: Text to Voice messages may be used in automation too. To have messages automated, please contact Prime Clinical Support.
6.1 Use this field when either 'Form' or 'Text to Voice' (effective version13.06.24) are selected for the <Print Type> field (above).
6.2 Enter a remark code, as previously set up in Utility --►Messages --►Remark and entered in Utility --►Messages --►Message. See also Text to Voice.
6.3 To view the list of codes with descriptions, press the [F2] key to display the Searching screen. To view the list of only the codes, either click on the arrow OR press the → (right arrow) on the keyboard.
To select, double-click on the correct code, OR use the ↑ (up) and ↓ (down) arrows to highlight the correct code, and then press the [Enter] key to select. For more information on Searching screens, see Introduction to Intellect --►Intellect Characteristics and Features -- Searching.
7. When the information is completely entered, select one of these options:

7.1 Select [Print] to display a printer dialog box:
7.1.1 Printer Properties:
7.1.1.1 Printer: The default printer for the logged-in clinic and password is selected. To select a different printer, either click on the arrow, OR press the → (right arrow) on the keyboard to view the list of printer codes. In our example, the defaulted Printer is HP. This is just an example of a printer name and may or may not be set up on the system.
To select the printer type, click on the code, OR use the ↑ (up) and ↓ (down) arrows to highlight the correct code; then press the [Enter] key to select.
7.1.1.2 Number of Copies: This field defaults to either 0 (zero) or 1. Both print 1 copy. To print more than one copy, enter the number of copies.
7.1.2 Fax/Email:
In addition to printing reports, Intellect provides the capability to export reports to an Excel spreadsheet, Email, Fax, Disk, or Archive.
NOTE: Non-commercial email carriers have a cap on the number of emails that may be sent per day. If a clinics current email carrier does not support the number of emails needed to be sent on a daily basis, the clinic needs to contract with a commercial email vendor.
A secondary printer may also be selected, if one is set up, by clicking on the arrow to display the drop-down list.
7.1.3 Select the [Print] button to send the request to the printer (or as a Fax or email).
7.1.4 Select the [Cancel] button to clear the screen and return to the Print BOP_RECALL screen without saving or printing.
7.2 Click [Clear] to clear all information and return the focus to the <Account> field without saving.
7.3 Click [Exit] to clear the screen and return the focus to the main Intellect screen without saving.


