Home > Utility > Procedure > Surgery Items
Intellect™
UTILITY MENU OPTIONS

Procedure
Surgery Items
This option is used to create an inventory and a printed list of items used in a particular surgery.
An additional feature allows the reduction of listed stock on hand.
Before creating a Surgery Item List in Intellect:
a. Set up all applicable vendors: Utility --► Procedure --► Inventory --► Vendor Company --►Add
b. Create surgery items: Utility --► Procedure --► Inventory --► Vendor Items --►Add.
After being entered in Intellect, these items may be used to creating a surgery item list.
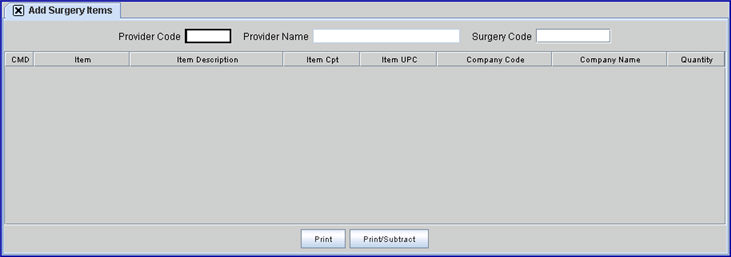
1. To create a Surgery Item List in Intellect, go to Utility --► Procedure --► Surgery Items --► Add

The Add Surgery Items screen opens:
2. Provider Code 
2.1 Type the Utility --► Provider <Provider Code> to associate with this list.
3. Provider Name 
3.1 The provider’s name is displayed. This is a read-only field.
4.1 For a new list, type a unique surgery code.
4.2 To add to an existing list, enter the Surgery Code, OR type up to 6 characters of the description and press the [F2] key to display the Searching screen. To select the code from the list, either highlight the record and press the [Enter] key, OR double-click on the record. Alternately, after clearing the field, press the [F2] key twice to view the entire list of codes. See Introduction to Intellect --►Intellect Characteristics and Features -- Searching for more information on the Searching screen.
5. CMD 
5.1 This field accepts 'A' to add, 'M' to modify, 'D' to delete, or [ESC] to quit or clear.
6. Item 
6.1 Enter the Utility --► Procedure --► Inventory --► Vendor Items <Item Code>, OR type up to 6 characters of the description and press the [F2] key to display the Searching screen. To select the code from the list, either highlight the record and press the [Enter] key, OR double-click on the record. Alternately, after clearing the field, press the [F2] key twice to view the entire list of codes. See Introduction to Intellect --►Intellect Characteristics and Features -- Searching for more information on the Searching screen.
7. Item Description 
7.1 The item's description is displayed. This is a read-only field.
8. Item Cpt 
8.1 The item's CPT, if available, is displayed. This is a read-only field.
9. Item UPC 
9.1 The Item's UPC, if available, is displayed. This is a read-only field.
10. Company Code 
10.1 The Vendor Code is displayed. This is a read-only field.
11. Company Name 
11.1 The Vendor Name is displayed. This is a read-only field.
12. Quantity 
12.1 Enter the quantity of this item to be used for this surgery.
12.2 The field is mandatory and must be completed. If left blank, an error message displays:
13. When the information is completely entered, select one of these options:

13.1 Select the [Print] button OR press [Enter] to display the printer dialog box:
13.1.1 Printer Properties:
13.1.1.1 Printer: The default printer for the logged-in clinic and password is selected. To select a different printer, either click on the arrow, OR press the → (right arrow) on the keyboard to view the list of printer codes. In our example, the defaulted Printer is HP. This is just an example of a printer name and may or may not be set up on the system.
To select the printer type, click on the code, OR use the ↑ (up) and ↓ (down) arrows to highlight the correct code; then press the [Enter] key to select.
13.1.1.2 Number of Copies: This field defaults to either 0 (zero) or 1. Both print 1 copy. To print more than one copy, enter the number of copies.
13.1.2 Fax/Email:
In addition to printing reports, Intellect provides the capability to export reports to an Excel spreadsheet, Email, Fax, Disk, or Archive. A secondary printer may also be selected, if one is set up, by clicking on the arrow to display the drop-down list.
13.1.3 Select the [Print] button to send a request to the printer (or as a Fax or email).
13.1.4 Select the [Cancel] button to clear the screen and return to the Add Surgery Items screen without saving or printing.
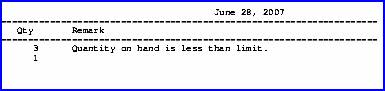
13.2 Select [Print/Subtract] to display the print dialog as above; however, when the list is printed, each item on the list has its' <Quantity On Hand> field on the Utility --► Procedure --► Inventory --► Vendor Items screen reduced by the <Quantity> entered on this screen. Any individual item’s quantity that subsequently falls below the value entered in Utility --► Procedure --► Inventory --► Vendor Items <Quantity Limit To Order> results in a message in the Remark column on the printed list.