
Intellect™
IMPORTANT PROGRAM MODIFICATIONS
Complete Release Notes
The following Release Notes include the features and modifications made in the current update. PCS suggests you provide each department a copy of the Release Notes so they are aware of the changes which may affect their department.
In order to be aware of ALL changes in the software, please read all release notes from the version you are currently on through to the version to which you are updating.
The update may include items labeled: ATTENTION. These will IMMEDIATELY affect Billing and other daily tasks. Please be sure to notify all departments which will be affected.
Intellect Update Authorization Form:
If you do NOT have support, please contact accounting@primeclinical.com as your office MUST have a current Intellect support maintenance contract before being updated.
If you have a current Intellect support maintenance contract, please print, complete, sign, and return the Update Authorization Form to PCS prior to your update. Even if updating your system yourself, PCS requests you send us this completed form so we can update your Client Record with the version number to which you are updating. Knowing your version number is necessary if we find a critical error in the program and need to update clients with specific versions.
If your version is less than 9.12.35, click here.
If your version is 9.12.35 or greater, click here.
If your office runs Live Update yourself:
If you do NOT have support, please contact accounting@primeclinical.com as your office MUST have a current Intellect support maintenance contract before being updated.
If you have a current Intellect support maintenance contract, and are updating your server yourself, refer to the instructions for updating your server, restarting Services, and updating workstations.
If your version is less than 9.12.35, click here.
If your version is 9.12.35 or greater, click here.
This update may include new features labeled: BETA TEST. These are new features which require additional testing in a real, live environment. If you are interested in being a Beta Test site, please contact Prime Clinical System for additional information and set up.
This Complete Release Note is arranged by main menu option with the most current information at the top of each section:
Attention: Updating to version 14.07.24 requires special procedures. Click here for details.
Version 14.02.04
DOWNLOAD ICD-10 Codes
As part of this release, the Intellect program includes all 90,000+ ICD-10 codes. When clients systems are updated, the codes will be loaded at the same time the update is done.
Prime Clinical was informed by Medicare that the ICD-10 codes found on the CMS website were available to the public. The ICD-10 codes which will be loaded during the update will include the ICD-10 codes and their short description (up to 60 characters).
Please note:
1. Due to the volume of ICD-10 codes being loaded to your system, the update will take more than the normal amount of time to complete.
2. In previous versions of Intellect, PCS included the ICD-10 codes in the Crosswalk. While the ICD-10 update includes 90,000+ codes, the Crosswalk remains with the same amount of 70,000+. Any additional ICD-10 codes not already part of the Crosswalk will need to be added by your office.
3. When the ICD-10 codes are loaded, no periods or characters will be used anywhere in the file.
For future reference, video tutorials are available on the PCS website with information on downloading ICD-10 codes. There are three phases to the ICD10 Video Tutorials:
• For clients who want to load their own ICD-10 codes, please watch phase 1, 2, and 3.
• For clients who will use the ICD-10 codes Prime Clinical loads, you may begin the video tutorials from phase 2, Activating ICD-10 Codes, and finish with Phase 3.
Version 14.12.30
FIX Registration--►Regular or Worker – Add Insurance
When adding a new patient, Intellect asks if you want to add insurance for the patient. In prior software, if you selected ‘Yes’ and added the insurance, when you went back to the patient screen the <Patient Account Number> was not populated with the next account, and was left blank. This problem has been corrected in this update.
FIX Registration--►Registration – Print Registration
In prior software, when trying to print registration for patients by using the [F2] key to search and choose a patient, the following occurs:
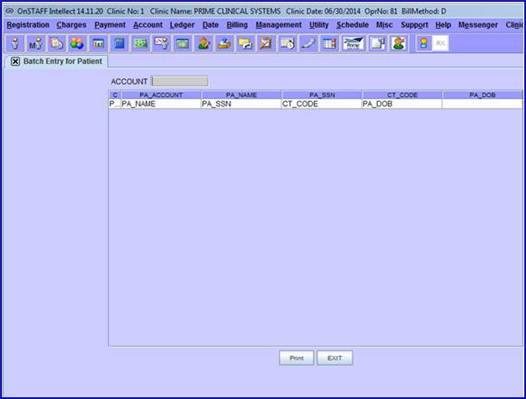
This screen displays by going to Registration--►Registration--►Batch or Group and then using the [F2] key to search for a patient. After highlighting the patient for whom to print a registration, the above screen is created. If the patient’s last name is entered and then the patient is selected, there are no issues.
As a work-around, clients were asked to use the [Enter] key instead of the [F2] key to search for and select patients. As of this update, this problem has been corrected.
Version 14.11.10
FIX Registration--►Worker--►Worker
When adding a new worker account in prior software, the city and state did not populate the screen when adding an employer. This problem has been corrected in this update.
MODIFICATION Registration--►Worker--►First Report--►Add
As of this update, by default, the <Date of Injury> field is filled with the <DOI> field from the patient's P1 insurance on the Worker Insurance screen, and the <Diagnosis Code> field is filled with the <Diagnosis Code> from the last charge entry on the Charge screen.
MODIFICATION Registration--►Worker--►PR2 Form, PR3 Form, and PR4 Form--►Add
Effective this update, by default, the <Injury Date>/<Date of Injury> field is filled with the <DOI> field from the patient's P1 insurance on the Worker Insurance screen, and the <Diagnoses> fields are filled with the <Diagnosis Code> from the last charge entry on the Charge screen.
For the Pr2 Form and Pr3 Form screens, Intellect verifies that the P1 insurance is valid for the <Date of Exam> shown on that screen.
Version 14.10.08
FIX Registration--►Patient--►Search
In a previous software version, different results were received when searching for patients using different methods as one method did not recognize patients whose address fields were blank. Since the search result was adversely affected when there was a patient with no address, the address field was removed from the search criteria when it was left blank by the user.
Version 14.09.29
FIX Registration--►Regular--►Patient and Registration--►Worker--►Worker
In prior software, there were some problems with the [Exit] button from both Registration--►Regular--►Patient and Registration--►Worker--►Worker. In the past, if a user forgot to enter a First Name or Last Name, Intellect displayed a message such as: "Please enter first name of patient", and, after the message, the user could not exit from the screen.
Additionally, when a user pressed [Exit] before pressing [Add] or [Modify], Intellect asked if you would like to save the changes, but then if the user pressed [Cancel] to re-access the Add or Modify screen, the [Exit] button no longer worked.
These problems have been corrected in this update.
NEW FIELD/SCREEN Registration--►Regular--►Patient - Pediatrics
As of this update, for clinics serving pediatric patients, an additional screen is available for entering guardian and/or parent information. If you would like to use this option, please contact PCS Support.
FIX Registration--►Regular--►Patient – Patient Phone Number
For PCM users only. Because PCM has eRx requirements that strip the format of the phone number, when one made changes to the patient demographics in PCM and had an earlier version of Intellect, the phone number format was also stripped in Intellect. This problem has been corrected in this version.
Version 14.08.25
MODIFICATION Registration--►Worker--►Worker Insurance - <BOX 1A/CLAIM#>
Per this update when adding a new insurance: When the <BOX 1A/CLAIM#> field is auto-filled with the social security number (SSN) from the <Social Security No.> field on the Registration--►Worker screen, the SSN displays without the '-'. I.e., it displays as xxxxxxxxx instead of xxx-xx-xxxx.
MODIFICATION Registration--►Worker--►Worker Insurance - <Body Parts>
As of this release, it is no longer possible to type directly into the three <Body Parts> fields on this screen. All additions or changes to the displayed body parts must be made via the [Enter] key and selection screen. As in prior versions, once the [Enter] key is pressed, users may select or deselect body parts, and then press [Add] to save their changes.
Version 14.07.01
FIELD MODIFICATION Registration--►Worker--►PR2 Form
Effective this release, instead of having to type the diagnosis code(s) into the <Diagnosis 1-3> fields, Intellect now pulls the first three diagnoses posted to the patient record to fill the <Diagnosis> fields. With the diagnoses from the treatment being pulled over to the PR2 screen, Intellect now also prints the same diagnoses on the PR2 form.
Additionally, the three <ICD9> fields were removed from the screen in this version.
COLUMNS ADDED Registration--►Worker--►Workers Comp Lien – Lien Tab
As of this update, Lien, DOR, and Amount columns were added to the ADJ list table on the Lien tab screen. If a Lien or DOR request has ever been sent for the selected ADJ, regardless of it being successful or not, the request date displays in the Lien or DOR column. Additionally, the amount of the Lien/DOR is displayed in the Amount column.

MODIFICATION Registration--►Worker--►Workers Comp Lien – Lien Tab
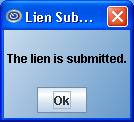
Per this release, when either the [Submit Lien] button on the New Lien pop-up window or the [Submit DOR] button on the New DOR pop-up window is pressed, the button stays ‘depressed’ until the server returns the result to Intellect. Once Intellect has received the results, the button ‘pops up’ and displays a message letting the user know that the Lien/DOR was submitted.
For example, when the ![]() button is clicked, the button changes color to indicate it has been selected:
button is clicked, the button changes color to indicate it has been selected:![]() . Then, when Intellect has been notified that the lien has been successfully submitted, the following message displays and the button returns to its’ original color.
. Then, when Intellect has been notified that the lien has been successfully submitted, the following message displays and the button returns to its’ original color.
NEW FEATURE Registration--►Worker--►Workers Comp Lien - Lien Tab
For tasks which need to contact a third party, the following notices now display at the bottom of the screen indicating the status of the selected task. The notice displays until the task is completed.
![]() : Displays after entering a patient account number in the <Patient Account> field and pressing [Enter]. The search takes place in two phases:
: Displays after entering a patient account number in the <Patient Account> field and pressing [Enter]. The search takes place in two phases:
1. It searches for any ADJs assigned to the patient in Intellect’s database and lists them, if any.
2. It searches the states’ database as well and adds any new ADJs it receives.
Users might see the table populated in two steps because of the two-phase search. The search is complete when the status message at the bottom of the screens disappears.
If the state search returns no results, Intellect display the message: “ADJ search from the search database did not return any records!”.
Note that this message doesn’t necessarily mean the ADJ is empty as there might be records coming from Intellect’s database.
![]() : Displays after highlighting an ADJ on the ADJ table and selecting the ADJ Detail option from the right-click menu.
: Displays after highlighting an ADJ on the ADJ table and selecting the ADJ Detail option from the right-click menu.
![]() : Displays after highlighting an ADJ on the ADJ table and selecting the Track ADJ option from the right-click menu.
: Displays after highlighting an ADJ on the ADJ table and selecting the Track ADJ option from the right-click menu.
![]() : Displays after requesting that tracking should be stopped for an ADJ on the Active Trackings tab screen.
: Displays after requesting that tracking should be stopped for an ADJ on the Active Trackings tab screen.
![]() : Displays after filling the <Date From> and <Date To> fields on the Search Hearings tab screen, and then pressing [Enter].
: Displays after filling the <Date From> and <Date To> fields on the Search Hearings tab screen, and then pressing [Enter].
![]() : Displays after filling the <Date From> and <Date To> fields on the Search Events tab screen, and then pressing [Enter].
: Displays after filling the <Date From> and <Date To> fields on the Search Events tab screen, and then pressing [Enter].
It is highly recommended that users wait for one task to finish before another task is requested, if it is in the same tab.
NEW TAB Registration--►Worker--►Workers Comp Lien – Search Status Tab
Effective this version, a Search Status tab was added to the Workers Comp Lien screen:

This tab allows the user to query a batch of submitted liens and DORs to check the status of each ADJ.
Unlike the Lien tab, which starts with the patient account number, here the user enters a date range to list all the liens and DORs which were submitted within that date range. Selecting each row populates the right-hand side text area with the details of the selected ADJ, the notifications received from QuickEAMS, and any step the ADJ has gone through.
NEW FEATURE Registration--►Worker--►Workers Comp Lien - Search Hearings/Search Events Tabs
As of this update, an ![]() button has been added to the bottom of the screens for the Search Hearings and Search Events tabs. Clicking this button generates an Excel file, and displays a pop-up window for naming the file and selecting where it should be saved. The column headings on the saved Excel file match those on the Search Hearings and Search Events screens.
button has been added to the bottom of the screens for the Search Hearings and Search Events tabs. Clicking this button generates an Excel file, and displays a pop-up window for naming the file and selecting where it should be saved. The column headings on the saved Excel file match those on the Search Hearings and Search Events screens.
Version 14.05.14
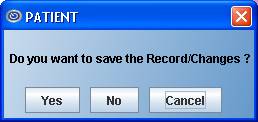
MODIFICATION Registration--►Regular--►Patient--►Modify
As of this update, when pressing [Exit] after having already saved data changes/additions by pressing [Modify], Intellect closes the Modify PATIENT screen and returns the user to the main menu without displaying the following unnecessary message:
NEW FIELD Registration--►Worker--►Worker Insurance andRegistration--►Worker--►View All Claims
For PCM users, a Comment field was added to the <Body Parts> field selection list:
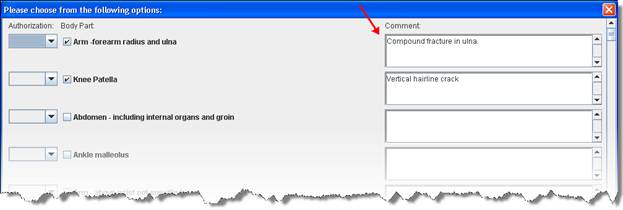
Users may type specific information and/or notes associated with the selected body part into the Comment field. Up to 4,000 characters may be entered in each comment field, which can be scrolled up and down, and left and right. Use of this field is optional.
Intellect users may also view comments in the Comment field on the View All Claims screen accessed via Registration--►Worker--►View All Claims:

PCM users will be able to view this information in a future PCM update.
Version 14.03.20
NEW OPTION Registration--►Regular--►Patient
For the following fields, the display has been changed for ease of use. In version 14.02.04 only the name displayed. As of this update, both the code and name display separated by a '/'.
<Employer Name>
<Category>
<Referring Name>
<Hospital Name>
<PCP Name>
<Treating Provider Name>
<Insurance Company Name> (in Registration--►Regular--►Patient Insurance)
Additionally, users may now search either by name or code for the fields shown above. Please note that the sort method must be the same for all of the fields. If you would like to search by code, please notify PCS support personnel to set this up for you.
NEW OPTION Registration--►Worker--►Worker
For the following fields, the display has been changed for ease of use. In version 14.02.04 only the name displayed. As of this update, both the code and name display separated by a '/'.
<Category>
<Referral>
<PTP Name>
<STP Dr>
<Hospital Name>
Additionally, users may now search either by name or code for the fields shown above. Please note that the sort method must be the same for all of the fields. If you would like to search by code, please notify PCS support personnel to set this up for you.
Both of these modifications also apply to the following fields on the Registration--►Worker--►Worker Insurance screen:
<Employer>
<Insurance Company Name>
NEW OPTION Registration--►Labels--►Chart Labels--►Batch of Chart Labels
In prior software versions, labels were sorted alphabetically. As of this update, the sort order is now based on entry.
Version 14.02.04
NEW OPTION Registration--►Credit Card
As of this update, this option is available to enable patient credit card information to be added to and used by Intellect. In regard to this option, please note:
• To use this option, the clinic and/or providers must be registered with authorize.net.
• If only some of the providers in a clinic are registered with authorize.net, credit card payments will only be made for the providers who are registered.
• When adding credit card information for an exiting account, after entering the patient account number and pressing [Enter], Intellect fills-in the <Zip Code>, <City>, and <State> fields with information from the Registration--►Regular--►Patient--►Add patient screen.
• After entering the credit card number and pressing [Enter], Intellect changes all the digits, except the last 4 digits, to * on the screen.
• If a credit card number with less than 10 digits is entered, an alert displays:
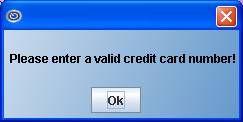
• Once the credit card information is entered, Intellect pulls the data when posting payments using the ‘☐ Credit Card Payment’ option at the bottom of the Payment--►Open Item screen. ‘☐ Credit Card Payment’ may be selected while posting a payment from the payer, but ONLY when the <Who> column = ‘G’. Intellect will apply the payment to the ‘entire’ balance of the displayed charges where <Who> = ‘G’.
• When in Ledger--►Accounting, and there were payments made from the payer at the same time as the CC payment option was also chosen, and the balance on the charges were to multiple providers, Intellect NOW displays the payments as a separate entry for each provider.
• Family accounts require the credit card information to be added separately for each individual family member.
For additional information, please see the online documentation.
MODIFICATION Registration--►Regular--►Patient Insurance
In the previous software version, users were only able to enter an employer that already existed in Intellect. As of this update, when users enter an employer in the <Employer Name> field that does not have a matching record in Intellect, Intellect displays:

Clicking [OK] or pressing [Enter] displays the search window.
Pressing [Esc] in the search window returns the user to the PATIENT_INSURANCE screen where the user can continue entering the employer name, and then press [Enter].
Additionally, the <Insurance Company Code> and <Insured Employer> fields have been removed from the screen.
NEW FIELD Registration--►Worker
Effective this update, a <Hospital Name> field was added to the Add_WORKER screen. This field is used to record which facility the patient should be referred to for non-emergency treatment or to indicate their preference of facilities.
After entering a name (or a portion of a name) and pressing [Enter], Intellect displays a record search screen. The record search screen (similar to the [F2] screen) lists all the available options from which to choose.
Users can select the code from the displayed list by either highlighting the record and pressing the [Enter] key, or double-clicking on the record. When a new or invalid hospital name is entered, Intellect displays:
Clicking on [OK] displays the record search screen.
If this is a new Hospital Name, click [Add]. Intellect displays the Utility--►Facility --►Add screen where the appropriate information may be entered and saved.
If the patient does not have a facility where they need to be treated, or doesn't
have a preference, press the [Enter] key to leave blank.
For clinics sharing patient demographics with other clinics, this field is clinic specific.
NEW/MODIFIED FIELDS Registration--►Worker--►Worker Insurance
Per this update, the following changes have been made on this screen:
1. ![]()
A new <Adjuster Email> field was added, allowing the email address of the Adjuster to be entered.
2. ![]()
The <Case Status> field has been removed and replaced with a <Status> field for each <Claim No #> field.
3. ![]()
A new <UR Company> field was added, allowing the name of the Utilization Review Company to be entered.
a) Utilization review (UR) is the process used by employers or claims administrators to review treatment to determine if it is medically necessary. All employers or their workers' compensation claims administrators are required by law to have a UR program. This program is used to decide whether or not to approve medical treatment recommended by a physician which must be based on the medical treatment guidelines.
b) The UR process is governed by Labor Code section 4610 and regulations written by the CA Division of Workers' Compensation (DWC), which lay out timeframes and other rules for conducting UR. The rules, contained in Title 8, California Code of Regulations, sections 9792.6 et seq, also require UR plans to be filed with the DWC administrative director.
Additionally, the DWC has promulgated regulations that provide for penalties to apply when claims administrators and UR companies don't follow UR rules. The UR penalty regulations, found in Title 8, California Code of Regulations, sections 9792.11 - 9792.15, provide an enforcement mechanism to ensure utilization reviews are conducted in compliance with UR regulations.
4. The <Employer Code>, <Nature of Business>, <Insurance Code>, and <Case Type> fields have been removed.
5. The input properties of the <Employer> field have changed. After a user enters a name (or portion of a name) in the <Employer> field and then presses [Enter], Intellect displays a record search screen. The record search screen (similar to the [F2] screen) lists all the available options from which to choose. Select the employer from the displayed list either by highlighting the record and pressing the [Enter] key, or by double-clicking on the record.
Additionally, when users enter an employer in the <Employer Name> field that does not have a matching record in Intellect, Intellect displays:
Clicking [OK] or pressing [Enter] displays the search window.
Pressing [Esc] in the search window returns the user to the PATIENT_INSURANCE screen where the user can continue entering the employer name, and then press [Enter].
6. In version 13.10.29 a selection list was added to the <Body Parts> field. As of this version, the Authorization Status section on the selection list has been changed:
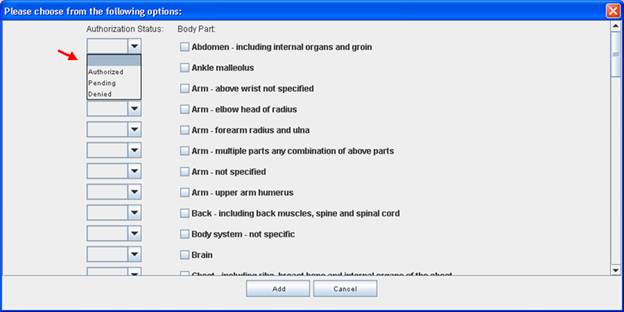
Users may now leave the Authorization Status blank, or select ‘Authorized’, ‘Pending’, or ‘Denied’.
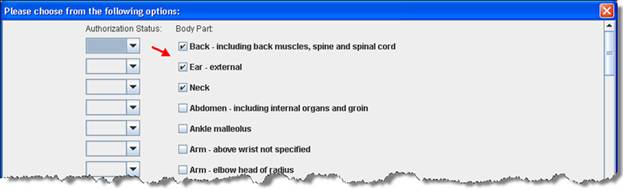
Additionally, when the <Body Parts> field is modified, the selected body parts display at the top of the selection list:
7. The fields on the screen have been organized by function:
• Fields from <Employer> to <Occupation> display employer information.
• Fields from <Insurance Company Name> to <Coverage From> display insurance information.
• Fields from <Adjuster> to <Adjuster Fax> display ADJ information.
NEW OPTION Registration--►Worker--►Workers Comp Lien
As of this update, an interface for Worker’s Compensation Lien filing has been added. This option allows several areas to be managed. For example:
• It allows users to file liens to the State and attach any supporting documentation
• It allows users to track information, such as hearings/events
• It allows for the filing of the DOR (Declaration of Readiness), with the ability to attach the ‘final’ statement for the ADJ (the claim number assigned to the case).
For details on using this option, please see the online documentation.
Note: To use this option, you must be registered with a supported vendor.
NEW OPTION Registration--►Worker--►View All Claims
Selecting this option displays the View All Claims screen where all the claims for a specified patient may be seen on one screen. Each claim is shown on one line, including the affected body part(s) and authorization status. Information shown on the View All Claims screen is pulled from fields on the Worker Insurance screen.
Users may enter the account number in the <Account> field, or users may enter the last name (or portion of the last name) in the <Account> field. When the last name is entered, pressing [Enter] displays a record search screen. The record search screen (similar to the [F2] screen) lists all the available options from which to choose. Select the patient from the displayed list either by highlighting the record and pressing the [Enter] key, or by double-clicking on the record.
For additional information, please see the online documentation.
Version 14.11.10
MODIFICATION Charges--►CHDP and Billing--►Tele Com--►Submit Claim
Effective December 22, 2014, the Child Health and Disability Prevention (CHDP) program's proprietary electronic claim transaction format will be modified to accommodate a billed amount field expansion. The billed amount field for tests and immunization will be expanded from four positions (99v99) to five positions (999v99) and the total fees billed amount will be expanded from five positions (999v99) to six positions (9999v99) in the new format.
To accommodate the expanded CHDP amounts, the Intellect program has been updated accordingly. Note: This change is virtually invisible to users as normal program functions remain unaffected.
Version 14.09.29
Modification Charges--►Encounter
As of this version, Intellect now first pulls the employment and date of injury (DOI) information used for paper claims and electronic billing from Registration --►Worker --►Worker Insurance <Employment> and <DOI> fields, and then from the <Employment (Y/N)> and <Injury Date> fields on the Charges--►Encounter screen if fields are blank on the Worker Insurance screen. This simplifies data entry for users, as the user no longer needs to enter the <DOI> or <Employment (Y/N)> on the Encounter screen if it is already entered on the Worker Insurance screen.
Version 14.07.11
FIX Charges--►Charge
In Intellect version 14.07.01, there was a problem with posting charges for cash patients. This has been corrected.
NEW FEATURE Charges--►Encounter
For PCM users only, for electronic billing, it is now possible to have the <Identification Code> field automatically filled with appropriate PCM documents, as long as criteria for the documents and set up for Intellect has been met.
Note: Anything that may already be in the <Identification Code> field remains there; new documents are appended to the end. If the system finds a duplicate file, only one copy of the file displays in the <Identification Code> field.
PCM Document Criteria:
• The document must exist in PCM Tabs for the date of service
• The document must be signed/completed by authorized personnel; i.e., Doctor, PA
• The document type must be set to ‘Y’ on the Utility--►Set Up--►PCM Documents Modify PCMDocuments screen (see details in Intellect Set Up below).
Intellect Set Up:
1. Go to Utility--►Set Up--►PCM Documents (effective version 14.07.11 – new option)

If you have PCM, the types of documents set up in PCM will display on this screen. Document types correlate to tabs, such as Billing, X-Ray, Progress Report, etc.
1.1 Enter ‘Y’ in the <Attach> column for any document type you would like to attach to electronic billing.
2. Go to Utility--►Set Up--►Parameter--►Modify
The following fields must be set up before the Charges--►Encounter <Identification Code> field will be auto-filled:
2.1 
Selecting ‘Y’ attaches the latest encounter to a charge.
Selecting ‘N’ does not attach an encounter to a charge.
Selecting ‘X’ causes Intellect to add an encounter to an imported charge (Effective version 14.07.11 – New option).
2.2 
Effective version 14.07.11 – New field.
This field enables Intellect to check for documents for a charge. Enter the number (i.e., 30) of days in which your office would like to look back at the charges based on the Date of Service going forward to any future dates of service. For example, if a doctor does not complete a document on the day of the patient’s July 1 visit, Intellect will check 30 days (June 1) back from the service date to all future dates of service for an encounter attached to the charge.
Note: Adding a number in this field activates the program (this is NOT retroactive). Removing the number immediately deactivates this function.
Sample Scenario, in Event Order:
Note: This scenario assumes PCM documents meet the established criteria and set up has been completed in Intellect.
1. A patient visits the doctor and there is a charge (either entered manually or imported).
2. An encounter is attached to the charge. This could happen two ways:
2.1 The encounter could be added manually.
2.2 The encounter could be added automatically for an imported charge, if the <Attach Encounter> field is set to ‘X’.
3. Intellect searches .pdf files saved in PCM Tab documents and whose type has been set to ‘Y’’ on the Utility--►Set Up--►PCM Documents Modify PCMDocuments screen.
3.1 Files of completed/signed documents with a type set to ‘Y’ are autofilled in the <Identification Code> field on the Charges--►Encounter screen.
Version 14.07.01
MODIFICATION Charges--►Encounter – HCFA Box 17
As of this update, when Intellect looks for a Referring Provider, Intellect first looks at the encounter screen for either <Ordering Provider> or <Supervising Provider> and, when either is blank, Intellect looks at the Utility--►Set Up--►Parameter <Referring> setting and pulls the referring provider based on the setting.
MODIFICATION Charges--►Encounter – <Identification Code> & <Appeal Documentation File> fields
With the focus in either the <Identification Code> field or <Appeal Documentation File> field, Intellect users who also have Patient Chart Manager (PCM) may now press the [F2] key twice to display a list of document files pulled from the Progress Notes in PCM. Note: To display only a certain type of file, enter the beginning letters of the file and then press [F2].

To make a selection, click on the file from the displayed list and press [Enter]. Multiple files may be selected by holding down the [Ctrl] and [Shift] keys and clicking on the desired files. Once selected, the Document Id of the selected file will display.
Version 14.04.15
MODIFICATION Charges--►CHDP
As of this update when printing CHDP forms, Intellect accepts the Utility--►Insurance--►Insurance <Form Type> options of:
|
Choice |
Description |
|
B |
1500 Claim Form (old red form) |
|
6 |
CHDP 6 |
|
7 |
CHDP 7 |
|
NEW HCFA RED |
HCFA 1500 (02-12) red form |
Version 14.02.04
FIX Charges--►Charge – Charge Posting Screen
In version13.10.29, the encounter screen froze when users had both the patient screen and charge posting screen open while adding an encounter. The problem has been fixed in this update as the acct_bal table is no longer updated when adding an encounter. Prior to this correction, users were given the work-around of closing the patient screen while adding an encounter.
FIX Charges--►Charge
In prior software versions, on the Charges--►Charge screen when users entered a check number but did not enter any payment and then pressed [Commit All], Intellect displayed the message shown below, and gave the user the option to post the payment or continue without posting a payment.
You did not enter any payment for the check number
Do you wish to continue?
This has been corrected.
NEW FIELD Charges--►Encounter--►Generic - <Project Identifier>
Effective this update, a <Project Identifier> field was added for use with clinical trials for medicines, procedures, etc.
![]()
Enter the 8-digit clinical trial registry number (CTN).
• For HCFA 1500 forms: When the <Project Identified> field is populated with the 8-digit CTN, Intellect prints it in Box 19, preceded by 'CT'. Do not enter 'CT' as part of the number when entering it in this field.
• For 837 Professional Claims: When the <Project Identified> field is populated with the 8-digit CTN, Intellect includes P4 in the Loop 2300, REF02, REF01. For example, REF*P4*12345678.
Version 14.08.25
MODIFICATION Payment--►Open Item
In version 5.14.14, when users tried back out a payment that was originally posted via auto post, they were unable to enter the entire 16-digit check number since there was a limitation of 15 digits for the <Check> field on the Open Item payment screen. As of this update, the <Check> field has been expanded to 25 characters.
Version 14.07.11
FIX Payment--►Autopayment
In prior software versions, after selecting ‘W’ from the <Carrier Type> drop down, Intellect would apply an adjustment to charges with a zero balance when using this feature. Now, when there are line item charges with credit balances, Intellect applies a negative adjustment to set the balance to zero on the line item charge.
Version 14.07.01
MODIFICATION Payment--►Auto Payment - <Provider Code>
Per this update, it is now possible to enter multiple provider codes in the <Provider Code> field. Provider codes must be separated by a comma.
Version 14.04.15
MODIFICATION Payment--►Open Item – Second Bill Review Form
Software version 13.06.24 made it possible to print a DWC Second Bill Review (SBR) form to appeal Worker’s Comp payments. A form was requested by entering SBR in the Message column. As of this version, the SBR form has been modified to print on two pages. The first page includes the charge information, and the statement ‘See attached’ in the section titled ‘Reason for Requesting Second Bill Review and Description of Additional Supporting Information/Documentation’. The top portion of the second page is identical to the first page; however, the section titled ‘Reason for Requesting Second Bill Review and Description of Additional Supporting Information/Documentation’ displays the description for the SBR code entered in the Message column on the Payment screen, as set up in Utility--►Messages--►Messages--►Add. Note: SBR codes set up in Utility--►Message--►Remark--►Add are for information only, and only display in the Comment column on the Payment screen; they do not display on the Second Bill Review form.
Only one code may be entered for the charge. If additional charges need different descriptions, a separate Second Bill Review form must be requested using a different SBR code. Note:
When requesting an SBR, note the following:
• The SBR form may not be customized.
• If a provider’s information is not completely filled-in, the SBR form will not print.
• If insurance information is not completely filled-in, the SBR form will not print.
Version 14.03.20
NEW FIELD Payment--►Autopayment
In this release, a <Credit Card Payment> field was added to the Auto Payment screen. This is a Y/N field and works the same as the Credit Card Payment option on the Payment screen.
The Autopayment feature posts all open balances for line item charges with payments in the ERA field when the Who is = ‘G’.
Intellect prints the payments on the days Journals, displays them in the patient ledger, and sends an email that includes a report and a receipt.
There is a location in Intellect where a report is kept showing which payments were not posted, and/or if Authorize.net is working. Currently, the report may only be accessed by PCS support. In the future, clinics will be able to view the report to see the status of the CC payments.
Version 14.02.04
NEW OPTION Payment--►Open Item
Effective this update, a ‘ Credit Card Payment’ option was added at the bottom of the Open Item screen. See Registration--►Credit Card in this release note and the online documentation for additional information.
Version 14.12.30
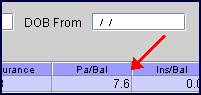
FIX Account
On the Account screen, the patient balance displayed with only one decimal place instead of two; i.e., 7.6 instead of 7.60, as shown below. This issue has been corrected in this release.
Version 14.08.25
MODIFICATION Ledger--►Accounting and Ledger--►Open Item
On this screen, pressing ‘Q’ displays the remarks and users can then press ‘A’ to add a new remark. In the past, when adding a new remark, users were able to enter or modify the date in the first column. Effective this update, users can not change the date and may only enter the remark in the second column.
Version 14.07.01
MODIFICATION Ledger--►Accounting--►Print and Ledger--►Open Item--►Print
Effective this version, the ledger reports display the category based on the <Category> field on the Registration--►Regular--►Patient screen instead of the <Category> field on the Ledger--►Accounting and Ledger--►Open Item screens.
Version 14.02.04
NEW OPTION Ledger--►Create Collection andLedger--►Review Collection
As of this update, a ‘Second Bill Review’ option was added to the right-click menu on both the "Create Collection" and "Review Collection" screens. This option can generate a DWC Second Bill Review form identical to the one requested through the ' Second Bill Review’ option at the bottom of the Payment--►Open Item screen.
To generate a DWC Second Bill Review form, tag charges on the multi-line display, right click to display the right-click menu, and select "Second Bill Review". Once “Second Bill Review” is selected, a window pops up with a text field for a Message code:
Enter the applicable message code beginning with ‘SBR’, as set up in Utility--►Messages--►Remark, and click [OK]. Intellect updates all the tagged charges with the entered message code and then prints a DWC Second Bill Review report for the qualified tagged charges.
Version 14.12.30
FIX Billing--►Worker - CLIA
This is a correction to a Known Issue in the 14.11.19 update.
In the 14.11.19 release there was a fix for a CLIA issue in software version 14.10.08 where users received a denial on their claim due to no CLIA having been submitted (see FIX Billing --►Worker in the 14.11.19 release note for details). Although a correction was made in the 14.11.19 version, the problem still remained. As a work around, clients with CLIAs using only the Utility --►Provider --►Provider Provider screen were asked to make sure the Utility --►Provider --►Provider Facility <Facility>, <Insurance>, <CLIA>, <Tax ID>, and <Group NPI> fields were filled.
The CLIA problem has been corrected in this update.
Version 14.11.19
ATTENTION: MODIFICATION Billing --►Insurance/Tele Com
In prior software versions for Medicare paper claims, if the <Ref Prv> field on the Charges screen was not populated, and the <Referring Name> field was not filled on the Registration--►Regular--►Patient screen, the rendering provider was used as the referring provider on the EB file, as well as printed on Box 17 of the HCFA claims.
As of this update, the referring provider only populates the EB file and the HCFA Box 17 if the Utility--►Insurance--►Insurance <Insurance Type> field is set to 'D', 'C', '1', '5' (WI Medicaid), or 'O' and a referring provider is added in the <Ref Prv> field on the Charges screen at the time of posting charges, or when the Registration--►Regular--►Patient <Referring Name> field is filled. Utility--►Set Up--►Parameter <Referring> determines if the Referring Provider will be pulled from the Charges <Ref Prv> field or the Registration--►Regular--►Patient <Referring> field.
FIX Billing --►Worker
In software version 14.10.08, users received a denial on their claim due to no CLIA having been submitted. In previous versions, the program was looking at the CLIA when one of these tables was populated, in this order:
1. Utility --►Provider --►Facility
2. Utility --►Provider --►Provider
3. Utility --►Provider
As of the 14.10.08 version, the program was not pulling the information because of an issue to Utility --►Provider --►Provider, where the system did not find the CLIA and did not populate in the necessary loop. As of this update, this problem has been corrected.
Version 14.11.10
FIX Electronic Billing--►Taxonomy, Blue Cross
In prior software, when doing UB institutional billing, users were sometimes rejected from BX due to missing the 2310A segment “Attending Provider” taxonomy code: PRV*AT*ZZ*##########. As a temporary fix, users were asked to submit paper claims since Intellect did not send the information electronically. As of this update, the problem has been corrected.
FIX Billing--►Worker--►Attorney - Charges & Payments
In prior software, when generating the Attorney Statement (i.e., the Attorney Credit in Report Designer), the program was missing the ADJ# and the Employer information. As of this update, the program has been corrected.
Version 14.09.29
FIX Billing
Requirements for the WC claims for Department of Labor indicate that the Providers Taxonomy Code be placed in the 2310C REF G2 and programming changes were made to accommodate. However, the program was also populating the REF G2 in the 2010AA REF G2 with the Taxonomy Code. As of this update, additional Program changes were made to populate the Taxonomy Code in ONLY the 23010C REG G2.
Version 14.09.16
FIX Billing--►Telecom--►Workers Comp Claims
In previous versions of Intellect, in the 2010BA for the REF segment related to the patients SSN, intellect sent REF 1W, followed by the Claim Number from Workers Insurance/ BOX 1A. This was causing rejections with Workers Comp EDI claims. Per Workers Comp EDI, they need 2010CA REF SY + the SSN of the patient. Programming changes have been made to send the 2010BA with the REF SY + SSN. When no SSN is available in the field, Intellect sends 9999999999.
FIX Billing--►Telecom--►Workers Comp Claims
In previous versions of Intellect, when an error occurred on a claim and the claim had attachments, Intellect sent the EB attachments without the 837 claim file.
Programming changes have been made so if a claim fails (i.e., it does not meet Intellect’s EB requirement) the EB attachments are not transmitted.
Version 14.08.25
FIX Billing--►insurance
In a prior software version, the 2320C was not present in the 837 when the Billing NPI in the 2010 AA was the same NPI number in the 2310C (Facility) for Intellect. As of this update, the 2310C (Facility) name and address is sent when the address of the Facility does not match the address of the billing provider.
MODIFICATION Billing--►Worker
As of this update for DME billing only, HCFA Box 17 prints the Charges--►Encounter <Ordering Provider> only if the <Status> field on Utility--►Procedure--►Procedure for one of the charges on the HCFA is set to O (DME – Oxygen Proc) or D (DME – other than Oxygen).
Version 14.07.24
MODIFICATION Billing --►Worker --►Letter – Second Bill Review Form
Beginning with version 14.04.15, the SBR form printed two pages. The first page was the SBR form and the second page included additional information. Since institutional requirement guidelines state that an SBR may only be one page, as of this update, when an SBR is requested and there are multiple procedures, Intellect now generates ‘one date of service’ in the area below ‘List of disputed goods, services’, along with the remarks attached to the date of service. Note: Only the first three lines of the remark print in the box ‘Reason for Requesting SBR’.
The maximum dates of service per page is two. For additional dates of service, Intellect generates a complete SBR form with the additional dates of service. Note: The procedure for generating SBR forms has not changed.
SBR forms may also be generated via Payment--►Open Item.
Version 14.07.01
FIX Billing--►Follow Up
In prior a software version, users would sometimes get a “record not found” message when trying to print a follow up letter. As of this update, this has been corrected.
MODIFICATION Billing--►Worker--►HCFA Form
Per this version, there have been three modifications:
• Intellect now prints 6 lines instead of 5 lines of service on the HCFA 1500 Form.
• When billing an insurance with the Utility--►Insurance--►Insurance <Insurance Type> field set to either D or 1 (Medi-Cal or Medi-Medi), HCFA Box 30 can now display the Balance Due based on the Utility--►Insurance--►Insurance <Include Payment> field setting. This modification affects NEW HCFA and NEW HCFA RED and Tracers. If you would like to use this option, please notify a PCS Support team member.
• Boxes 4, 7, and 9 now print blank (instead of ‘SAME’) when the insured is the same as the patient.
Version 14.05.14
NEW STATEMENT Billing--►Worker--►Attorney--►Batch of Patients
An Attorney Statement is now available from the <Form Code> drop down list. For this option, please note:
• Depending on the billing method, this statement is either by Provider or Clinic. If there is more than one provider/clinic, additional statement(s) are generated as needed.
• The figure shown in the Credit column reflects both adjustments and payments.
• The Total for the Balance Due column is based on the selected service dates and may or may not reflect the actual total balance for the patient.
Version 14.04.28
FIX Billing--►Insurance
In prior versions the group number was not printing on the Worker HCFA form (both red, and black and white) in BOX 11. As of this update, the Group Number on the Worker insurance screen prints in BOX 11.
Version 14.04.15
FIX Billing--►Company
In version 14.03.20 software, company statements did not print finance charges because all finance charges had a status of ‘C’. As of this update, the charge status is set to ‘O’ when posting finance charges for an account with category type = C (Company), allowing finance charges to print on company statements.
MODIFICATION Billing - New HCFA
In regard to the new HCFA 1500 (02-12) Form, as of this update:
• When a patient (or insured) does not have a middle name, Intellect removes the comma after the first name.
• When there is no insured’s name in Box 9, ", ," has been removed.
Version 14.03.20
FIX Billing--►Worker
In both versions 13.12.12 and 14.02.04. it was not possible to print Work Comp HCFA forms from the Billing--►Worker--►HCFA BOP or GOP options. Forms could be viewed but the claims were not able to be sent to a printer. As a work-around, clients were instructed to print the HCFA forms through Billing--►Insurance--►BOP or GOP until the issue is resolved. As of this update, the problem has been corrected and it is no longer necessary to use the work-around.
MODIFICATIONBilling--►Worker--►HCFA Form--►BOP/GOP
This update includes a change affecting the HCFA, BOX 9A for claims for Medi-Medi insurance patients. When the patient has MediCal as the secondary, Intellect will now pull the subscriber ID from the secondary MediCal insurance.
NEW FORM Billing--►Worker – Form
Periodically, Workers’ Comp releases new forms. As of 2/2014, there is a new form for the State of California Division of Workers' Compensation Request for Authorization - a.k.a. DWC Form RFA. To see a copy of the new RFA form, click here.
Version 14.02.04
NEW OPTION Billing - HCFA
Prime Clinical Systems has made the necessary requirements for the new HCFA 1500 Form (02/12), scheduled for mandate on 4/1/2014.
For your office to implement the new HCFA 1500 Form (02/12):
1. Intellect must be on version 13.12.12 or greater.
2. If your office has the HCFA 1500 forms set up as an Automated Task, you must contact our PCS Support Team at (support@primeclinical.com, or by phone at 626-449-1705, to make the necessary changes to the Tasks for the new form.
a. In the Subject Line of the email: New HCFA Task Changes
b. In the Body of the email: Client Id, Contact person and direct phone number.
3. If your office uses the Red and White HCFA Form, you may purchase them from Prime Clinical Systems. For more information on purchasing the New HCFA Form, please email support@primeclinical.com.
a. In the Subject Line of the email: Order New HCFA
b. In the Body of the email: Client Id, contact name and direct phone number.
NOTE: Before doing this, please be sure to test the NEW FORM by updating the Utility/Insurance/Form = NEW HCFA (For the Black and white form), NEW HCFA RED (for the Red and white form.
Version 14.12.30
NEW FIELD Management--►Analysis--►Analysis, Management--►Analysis--►Utilization, Management--►Analysis--►Detail and Management--►Analysis--►Misc - <Employer Code>
Effective this version, a new field has been added to the Print ANALYSIS, Print UTILIZATION, Print DETAIL, and Print MISC screens. This field may be used with all <Report Code> types.
![]()
The default for this field (blank) includes all employers/companies. To request the report for a specific employer/company, users may enter the Utility--►Business <Company Code>. This field accepts multiple values separated by commas with no space, or accepts the asterisk * to return all employers/companies starting with the portion of the <Company Code> entered prior to the *. For example, M* prints all employers/companies whose <Company Code> begins with M.
With this new field, Intellect can also pull data based on the employer attached to the Charges. For the employer to attach to any charges, the following information must be set up in Intellect:
Patient--►Registration <Employer Name>
Patient--►Worker--►Insurance--►Employer
NEW FIELD Management--► Detail - <Employer Code>
Effective this version, a new field has been added to the Print DETAIL_MAIN screen. This field may be used with all <Report Code> types.
![]()
The default for this field (blank) includes all employers/companies. To request the report for a specific employer/company, users may enter the Utility--►Business <Company Code>. This field accepts multiple values separated by commas with no space, or accepts the asterisk * to return all employers/companies starting with the portion of the <Company Code> entered prior to the *. For example, M* prints all employers/companies whose <Company Code> begins with M.
With this new field, Intellect can also pull data based on the employer attached to the Charges. For the employer to attach to any charges, the following information must be set up in Intellect:
Patient--►Registration <Employer Name>
Patient--►Worker--►Insurance--►Employer
NEW FIELD Management--► Anesthesiology - <Employer Code>
Effective this version, a new field has been added to the Print Anesthesiology screen. This field may be used with both <Report Type>s.
![]()
The default for this field (blank) includes all employers/companies. To request the report for a specific employer/company, users may enter the Utility--►Business <Company Code>. This field accepts multiple values separated by commas with no space, or accepts the asterisk * to return all employers/companies starting with the portion of the <Company Code> entered prior to the *. For example, M* prints all employers/companies whose <Company Code> begins with M.
With this new field, Intellect can also pull data based on the employer attached to the Charges. For the employer to attach to any charges, the following information must be set up in Intellect:
Patient--►Registration <Employer Name>
Patient--►Worker--►Insurance--►Employer
NEW FIELD Management--►Letters--►News Letters and Management--►Letters--►News Letter Reports - <Employer>
Effective this version, a new field has been added to the Print News Letter Report and Send News Letter screens:
![]()
The default for this field (blank) includes all employer/companies. To request a specific employer/company for an email address list or to send a voice message or newsletter, users may enter the Utility--►Business <Company Code>. This field accepts multiple values separated by commas with no space, or accepts the asterisk * to return all employers/companies starting with the portion of the <Company Code> entered prior to the *. For example, M* prints all employers/companies whose <Company Code> begins with M.
With this new field, Intellect can also pull data based on the employer attached to the Charges. For the employer to attach to any charges, the following information must be set up in Intellect:
Patient--►Registration <Employer Name>
Patient--►Worker--►Insurance--►Employer
Version 14.11.19
FIX Management --►Detail
When running a detail report in prior software and several billing providers are entered, the billing provider numbers were cut off after the 10th digit. As of this update, additional spaces were added to the <Billing Provider> field so that all billing providers now display in the body of the report. Please note, however, only a limited amount of provider information may be displayed in the header of the report because of the page width. If one enters multiple providers, some provider information may be truncated.
NEW REPORT Management --►Analysis --►Utilization Report
A new report is now included in the Intellect program which groups data based on the Facility/Category/Provider: The report may also be imported to Excel.
The output of the report includes Facility ID, Category/Financial Class at the time of posting, Provider, Occurrence, Patient Count, Visit #, Charge, Expected, Payment, Adjustment, and Average.
Version 14.11.14
NEW FIELDS Management --►Letters --►Newsletter
Effective in this update, three new fields have been added to the Send News Letter screen:
 This field may be used to select a specific age range of patients to receive the newsletter. Enter the beginning date of the desired age range. If this field is used, the <DOB To> field must also be filled in.
 This field is used in conjunction with the <DOB From> field to select a specific age range of patients to receive the newsletter. Enter the ending date of the desired age range.
 This field may be used to specify to whom the newsletter should be sent. Use the drop down list to select the appropriate party to receive the newsletter; i.e., patient, guarantor, or guardian.
Version 14.03.20
FIX OPTION Management--►Analysis--►Utilization
In prior software, when clients printed any of the Utilization Reports by Provider with the <Date Selection> field = Entry Date and <Cash/Accrual> field = CASH, when the report was sent to print, Intellect displayed the message ‘NO RECORD FOUND’. This problem has been corrected in this update.
Version 14.12.30
MODIFICATION Utility--►Set Up--►Clinic
In prior software, if a user changed the system date to an incorrect date and needed to enter a new date, the user could do so regardless of his/her security level. As of this update, a security level check has been added on the Utility--►Set Up--►Clinic <Current Entry Date> field. With this change, only users with qualified security levels can change the <Current Entry Date> on the Modify CLINIC screen. Security is set via the <Security Level Group> fields on the Utility--►Set Up--►Security--►Login Users--►Modify screen. Permitted users must have a <Security Level Group> 1 greater than that shown in the Utility--►Set Up--►Menus--►Programs <Security Group> field.
If a user with a low security level tries to change the date, he/she will get this pop up message:
"Your security level does not allow you to modify the Current Entry Date."
NEW FIELD Utility--►Set Up--►Appointment--►Appointment Type
For PCM users only.As of this update, a new field has been added to this screen for Meaningful Use and EMR. This field is used to indicate whether or not this appointment type is for a consultation.
![]()
· Select ‘Yes’ if the appointment type requires a summary of care document; i.e., the patient is a new patient, the patient was referred to your office, etc.
· Select ‘No’ if the appointment type does not require a summary of care document; i.e., the appointment is for an established patient.
Note: Also effective in this release, the <Other Dependencies> field was removed from this screen.
NEW FIELD Utility--►Facility
For PCM users only. Effective this release, a new field has been added to this screen to accommodate required data for validation of e-Prescription files:

For example, if a facility had the street address of 3675 E. Huntington Drive, Suite A, PCM users could enter 3675 E. Huntington Drive in the original <Address> field and Suite A in the new <Address1> field.
Version 14.11.19
MODIFICATION Utility--►Set Up--►Parameter
New options have been added to the <Attach Encounter> field. In past versions, the options were ‘N’ and ‘Y’. ‘N’ did not include an encounter; ‘Y’ included the last encounter number entered not older than 30 days. As of this update, the drop down includes additional time increments to be searched for the last encounter. For example, selecting 180 initiates a search back 180 days for the last patient encounter.
ATTENTION: MODIFICATION Utility--►Insurance--►Insurance - <Insurance Type>
When the <Insurance Type> field is set to ‘B’ on this screen, paper billing for Workers Comp patients now prints the Utility--►Provider--►Provider <Taxonomy> in Box 24J above the <NPI>. Note: When printing the HCFA from Billing--►Insurance, the <Category> field must be set to a Worker Category.
Note: This change affects all clinics who do billing for Workers Comp.
Version 14.11.10
NEW FIELD Utility--►Set Up--►Parameter - <HL7 Path>
As of this update, an <HL7 Path> field has been added to the Parameter screen:
![]()
Users can now specify the path where they want HL7 information sent. If this field is left blank (the default), HL7 information will be sent to the location it has been sent in the past; i.e., home/staff/hl7.
FIELD REMOVED Utility--►Set Up--►Parameter - <Date Selection>
Effective this version, the <Date Selection> field has been removed from the Parameter screen.
![]()
FIXUtility--►Provider--►Provider Facility
In version 14.09.29 there was a Known Issue that users got rejections for not transmitting a CLIA when the Utility--►Provider--►Provider Facility screen did not have the <CLIA> field filled, even though the Utility--►Provider--►Provider <CLIA> field was filled. As a work-around, the <CLIA> field on the Utility--►Provider--►Provider Facility screen must always be filled. This issue has been corrected in this update.
NEW FIELD Utility--►Insurance--►Tele Com - <PCM Import>
For PCM users only. As of this update, a <PCM Import> field has been added to the Tele Com screen:
![]()
As of version 13.12.12, Intellect began including a K3 packet with the Workers Compensation claims to WC EDI as part of the attachments. The packet files are sent in .pdf format, as indicated in the <POS Type> field on the Utility --►Category screen. These are the same files that are included via the WC Encounter Screen in the <Identification Code> field. To receive the packet back from the clearing house, the <PCM Import> field must be set to the value of ‘Y’. See below for detailed information:
· If ‘Y’ is selected, WC EDI is notified to import the .pdf files to PCM.
· If ‘N’ is selected, the .pdf files will not be imported to PCM.
Note: To use this option, the <Special Requirement> field on the Utility --►Insurance --►Telecom screen must be equal to ‘W’.
Version 14.10.08
NEW FIELD Utility--►Insurance--►Tele Com
As of this update, an <Error on Attachment> field has been added to the Telecom screen for claims with attachments that are transmitted electronically via a Worker’s Comp clearinghouse:
![]()
This field asks the question, “If there is a problem with the attachment, or the attachment is missing, should the claim NOT be sent?”
· Y = If the EB_ATTACHMENT File is missing, Intellect will NOT send the claim and prints the comment, ‘Error: Missing attachment’; followed by the attachment number missing.
· N = Sends the claim WITHOUT THE EB_ATTACHMENT. Intellect prints a comment on the report, ‘WARNING’: Attachment X.YYY.ZZZ.PDF not found. Note: The EB_ Attachments will need to be manually uploaded to WCEDI via their Portal.
MODIFICATION Utility--►Provider--►Provider Facility
As of this update, Intellect now checks the CLIA column on the Utility--►Provider--►Provider Facility screen for a CLIA to print in HCFA Box 23. If Intellect does not find any records on the Provider Facility screen, it prints the CLIA from the <CLIA> field on the Utility--►Provider--►Provider screen, as in prior versions.
FIX Utility--►Set Up--►Security--►Login Users
Previously, when a new user was added, he/she was unable to login to Intellect as an erroneous message displayed indicating the password exceeded 50 characters. The password length is 10 characters, and the pop up message has now been changed accordingly.
Version 14.09.29
FIX Utility--►Provider--►Provider Facility
Prior to version 14.09.16, the CLIA number was not populating the 2400 REF X4 when entered in the Utility--►Provider--►Provider Facility file. As of version 14.09.16 and greater, when the CLIA number is populated in the Utility--►Provider--►Provider Facility, the program populates the information in the 2400 REF X4 of the 837 for electronic claims.
Version 14.09.16
NEW COLUMN Utility--►Provider--►Provider Provider and Utility--►Provider--►Provider Facility
An SSN/EIN column was added to the Utility--►Provider--►Provider Provider and Utility--►Provider--►Provider Facility screens. This field is used to determine whether to complete Box 25 on the CMS 1500 (HCFA) with a social security number (SSN) or TAX ID (EIN).

· When the SSN/EIN field is left blank (the default) or EIN is typed-in, HCFA Box 25 is filled with the Tax ID, as entered in the <I.R.S. Id> field on the Utility--►Provider--►Provider screen.
· When SSN is typed into the SSN/EIN field, HCFA Box 25 is filled with the provider’s social security number, as entered in the <Social Security No.> field on the Utility--►Provider--►Provider screen.
The settings in this field override any other settings in regard to how Box 25 is filled. This feature applies to both paper and electronic billing.
FIX Utility--►Set Up--►Parameter
In version 14.08.25 there was a known issue that when clients tried to modify the idle time, the <Idle Time in Minutes> field was missing from the screen. This has been fixed in this release.
Additionally, a limit of 4 characters has been set for this field.
Version 14.07.24
NEW FIELD Utility--►Set Up--►Parameter
A new <Idle Time in Minutes> field has been added to the Modify Parameter screen. This field allows users to enter the number of minutes Intellect may be allowed to remain active once keyboard or mouse activity end. For example, enter 2 in this field to request re-entry of the password once Intellect has been idle for 2 minutes. See the Miscellaneous section in this release note for additional information on using this field.
Version 14.07.11
NEW FIELD Utility--►Set Up--►Parameter--►Modify - <PCM Doc Lookup Days>
For PCM users only. A new <PCM Doc Lookup Days> field has been added to the Modify Parameter screen. See Charges--►Encounter in this release note for additional information.
NEW OPTION Utility--►Set Up--►Parameter--►Modify - <Attach Encounter>
For PCM users only. A new ‘X’ option has been added to the drop down list on the <Attach Encounter> field. See Charges--►Encounter in this release note for additional information.
NEW OPTION Utility--►Set Up--►PCM Documents
For PCM users only. A new option has been added to have the <Identification Code> field on the Charges--►Encounter screen automatically filled with appropriate PCM documents. See Charges--►Encounter in this release note for additional information.
Version 14.07.01
NEW FIELD Utility--►Category - <Administrator Fee>
A new <Administrator Fee> field has been added to the Modify CATEGORY screen:
![]()
This field allows users to enter the dollar amount for an administrator fee to be charged to patient accounts on a yearly basis, via the Automated Task.
Before using the <Administrator Fee> field, please note the following:
1. The amount that is entered in this field is applied to the Provider who displays in the Registration--►Regular--►Patient <Treating Provider Name> field.
2. Your office must choose a Facility code to apply to these charges. If none is mentioned when the set up is completed, Intellect pulls the Facility from the <Default Facility> field as set up in Utility--►Set Up --►Parameter.
3. When your system is updated to this version (14.xx.xx), Intellect includes a Panel Code of ‘ADMINFEE’. If your office prefers to use a different Panel Code for the Administrator Fee, please add it to Utility--►Procedure--►Procedure and let your Support Team Rep know which code your office will use. Please see the required settings in the online documentation under <Panel Code>, section 2.6.
4. In Utility--►Task Manager, the Yearly Task is set up by a PCS Support Team Representative. This task must be run by your office either at the beginning of each year or at the end of each year and always around the same time. If your office is using a different Panel Code for the Administrator Fee, please let your Support Team Representative know the Panel Code you would like attached to the Yearly Task.
4.1 Run the Yearly Task:
To run the Yearly Task, go to Management--►Run Tasks--►Run Yearly Tasks.
4.2 Review Accounts to Which the Administrator Fee was Applied:
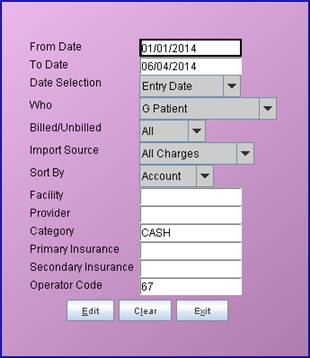
Users may review the patient accounts to which the administrator fee was applied by running the Charges--►Charge Review report. Enter the information in the Charges--►Charge Review option as shown below, verifying the <From Date> indicates the correct year, changing <To Date> to your Clinic Date for when YOUR office ran the Task, and entering the appropriate operator code. Note: For additional information on running this task and reviewing the report, please see our online documentation.
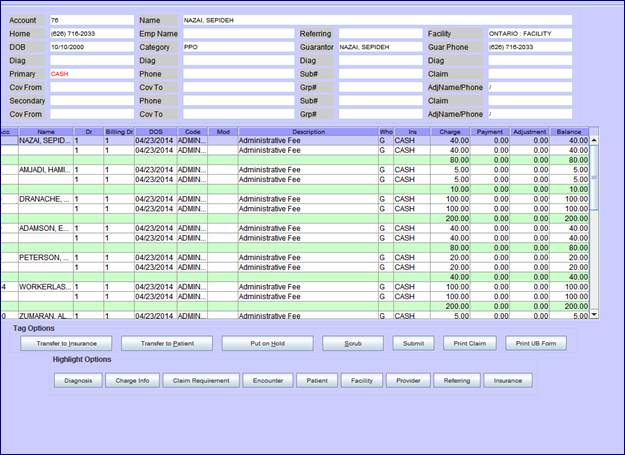
5. The administrator fee charge appears on the patient ledger as ADMINFEE with the amount of the charge being the amount entered in the new <Administrator Fee> field in Utility--►Category. Intellect automatically assigns ‘CASH’ as the insurance company and ‘Who’ is always ‘G’ for the ADMINFEE panel code (or the panel code your office assigned for the administrator fee).
For an example, please see the Ledger--►Accounting--►Display below:
Version 14.05.14
FIX Utility--►Insurance <Claim Filing Indicator> & Electronic Billing Claim Type
In a prior version, the Intellect program was not linking the Utility--►Insurance <Claim Filing Indicator> to the Billing--►Telecom <Claim Type>. This caused errors on the Electronic Billing report in Intellect.
As of this update, a correction was made to look at the <Claim Type> and pull the correct Utility--►Insurance <Claim Filing Indicator>.
Version 14.04.28
NEW OPTION Utility--►Set Up--►Maintenance--►Purge--►Group of Patients
As of this update, there is a change to this portion of the program designed for Billing Services only. Billing Service clients may contact Support for further details.
Version 14.04.15
FIX Utility--►Task Manager - Autopayment
In version 14.03.20 there was an issue in the Autopayment Task that caused an error. This has been corrected in this release.
MODIFICATION Utility--►Messages--►Messages--►Add
The Second Bill Review (SBR) form has been changed as described in the Payment--►Open Item entry in this release note. To accommodate this change, SBR codes must be set up in Utility--►Messages--►Messages--►Add.
Codes must start with SBR to display a description on the SBR form. They may be numbered from 1 – 999; i.e., SBR1, SBR2, SBR3 … SBR999.
The description of the SBR code should include details of why the appeal should be made. The length of the description is limited only by the space allotted on the SBR form.
Version 14.03.20
FIX Utility--►Diagnosis--►Crosswalk
In a prior software version, there was an issue with duplicates in the crosswalk. This issue was related to a NO KEY record in the crosswalk. As of this update, the problem has been corrected.
Version 14.02.04
NEW FIELDS Utility--►Set Up--►Appointment--►Appointment Type
As of this update, Intellect has the option of sending a pre-written email when any of the following new fields are populated:
1. ![]()
This option may be used to notify a referring provider when a Worker’s Comp patient fails to keep his/her appointment.
1.1 Selecting ‘WC No Show’ allows Intellect to send a pre-written notification email with an encrypted report to the referring provider when the appointment in the schedule is tagged as ‘No Show’ via the right-click menu option. The password to open the encrypted report is then sent in a separate email.
1.2 The pre-written email, as set up in Utility--►Messages, cannot be modified.
1.3 Before using this feature:
1.3.1 The email option must be set up in your system.
1.3.2 The referring provider must have a completed email address on file in Intellect.
2. ![]()
This option may be used to notify a referring provider when an appointment is canceled for a Worker’s Comp patient.
2.1 Selecting ‘WC Canceled’ allows Intellect to send a pre-written notification email with an encrypted report to the referring provider when the appointment in the schedule is tagged as ‘Canceled’ via the right-click menu option. The password to open the encrypted report is then sent in a separate email.
2.2 The pre-written email, as set up in Utility--►Messages, cannot be modified.
2.3 Before using this feature:
2.3.1 The email option must be set up in your system.
2.3.2 The referring provider must have a completed email address on file in Intellect.
3.![]()
This option may be used to notify a patient when he/she has not kept his/her appointment.
3.1 Selecting ‘Patient No Show’ allows Intellect to send a pre-written notification email with an encrypted report to the patient when his/her appointment in the schedule is tagged as ‘No Show’ via the right-click menu option. The password to open the encrypted report is then sent in a separate email.
3.2 The pre-written email, as set up in Utility--►Messages, cannot be modified.
3.3 Before using this feature:
3.3.1 The email option must be set up in your system.
3.3.2 The patient must have a completed email address on file in Intellect.
4. ![]()
This option may be used to notify a patient when an appointment is canceled for him/her.
4.1 Selecting ‘Patient Canceled’ allows Intellect to send a pre-written notification email with an encrypted report to the patient when his/her appointment in the schedule is tagged as ‘Canceled’ via the right-click menu option. The password to open the encrypted report is then sent in a separate email.
4.2 The pre-written email, as set up in Utility--►Messages, cannot be modified.
4.3 Before using this feature:
4.3.1 The email option must be set up in your system.
4.3.2 The patient must have a completed email address on file in Intellect.
FIX Utility--►Facility - <Encounter Screen>
In prior software, after selecting an encounter type in the <Encounter Screen> field, pressing [Enter] to display the selection screen, and clicking the appropriate options, the selection screen would not close. This problem has been corrected in this version.
Version 14.11.14
FIX Schedule – Appointment Reminders (Twilio)
In software version 14.10.08, multiple email reminders were sent for each appointment. Per this release, the problem has been corrected so that only one reminder is sent per appointment.
Version 14.10.08
FIX Schedule--►Appointment--►Full Day
In a prior software version, if a user added a patient through the Appointment Schedule, but before pressing [Add], the user pressed [Exit] without saving the patient information, Intellect would not allow another new patient to be added through the Appointment Schedule. This problem has been corrected.
Version 14.09.29
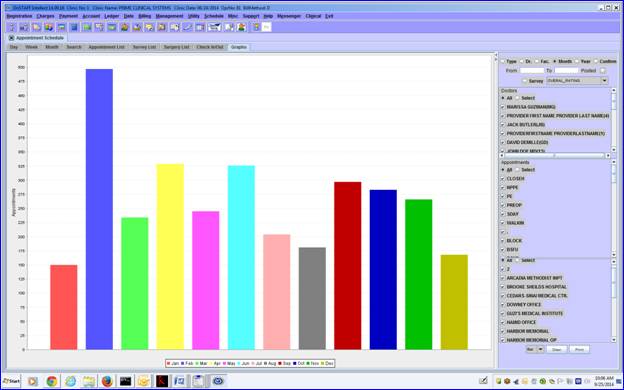
FIX Schedule--►Appointment--►Full Day--►Graphs
In a prior software version, when a user ran the Schedule--►Appointment--►Full Day--►Graphs--►Month, the months were not appearing in order. This problem has been corrected.
Version 14.09.16
FIX Schedule--►Appointment--►Full Day
In a prior software version, when users on the hosted server entered an ‘A’ to add an appointment in the Full Day appointment screen, the letter ‘A’ was carried over to the <Name> field on the Add Appointment pop-up screen.
FIX Schedule--►Appointment--►Full Day - Superbill
When posting a charge from the appointment schedule, if the appointment did not have a super bill attached to it, Intellect set the date of service (DOS) equal to the clinic date instead of the appointment date. This has been corrected so that Intellect now always sets the DOS equal to the appointment date.
Version 14.08.25
FIX Schedule--►Appointment--►Receipt--►Print Report Receipt
In software version 14.04.15, when trying to run the Schedule/Appt/Receipt/Report for Current Receipts, the report merged the two facility codes. This problem has been corrected.
Version 14.07.24
MODIFICATION Schedule--►Appointment--►Self Check In
Several changes have been made to this option:
1. The opening screen now includes a border where individual clinics may place ads and/or information for their practice. For additional information, please contact PCS support.
2. In prior versions, patients were only able to update their demographic information. Effective this update, patients may also update their insurance information and/or make a co-payment on the following screen:

• If changes need to be made to a patient's demographics and/or insurance, he/she can enter the changes and then click on [OK].
• If a patient would like to make a co-payment, he/she may enter the amount in the <Co Payment> field and then click on [OK].
• If no changes need to be made, the patient can just click on either [OK] or [Cancel].
Version 14.07.11
NEW FUNCTION Schedule--►Appointment--►Full Day -- Add non-chargeable Diagnosis codes to the RFA
As of this update on the RFA, it is possible to display diagnosis codes for which there is no charge. To add the code:
• In the Daily Appointment Schedule, highlight the applicable patient in the schedule and right-click.
• On the Modify Appointment screen, click on the Surgery tab.
• In the Diagnosis section, enter the applicable Diagnosis code and click on the [Add] button to the right.
• Once all of the needed Diagnosis codes are entered, click on [Save], followed by clicking on the [Modify] button at the bottom of the Modify Appointment screen to save your entries.
Version 14.07.01
NEW FUNCTION Schedule--►Appointment--►Full Day
The RFA now prints the date of the patients’ appointment instead of the Clinic Date.
NEW COLUMNS Schedule--►Appointment--►Full Day--►Surgery List Tab
Effective this update, new columns have been added to the Surgery List tab screen, including Sex, DOB (date of birth), Length, C-Phone (patient’s cell phone), and Note.

Additionally, the following changes were made to previously existing columns:
• ‘Provider’ was shortened to ‘Dr’.
• ‘Patient Phone’ was shortened to ‘H-Phone’, indicating the patient’s home phone number.
• Procedure codes shown in the ‘Procedure’ column now include a modifier code. For example, a procedure code of 99214 with a modifier code of 26 now displays in the Procedure column as 9921426, followed by a brief description.
For additional information on the new columns on the Surgery List tab screen, please see the online documentation.
Version 14.04.15
FIX Schedule--►Appointment--►Print – Customized Report 2
In prior software, a bug caused the “Customized Report 2” option to fail when printing from the server side. This has been corrected in this update.
Version 14.03.20
NEW DISPLAY Schedule--►Appointment--►Print – Single Provider report
In prior software versions, the patient’s cell phone number could display on the Single Provider report. As of this update, it is now possible to display either the patients’ cell phone number or the guarantor’s cell phone number on the Single Provider report. The patient’s cell phone number displays by default. If you would like the guarantor’s cell phone number to display, please contact PCS support.
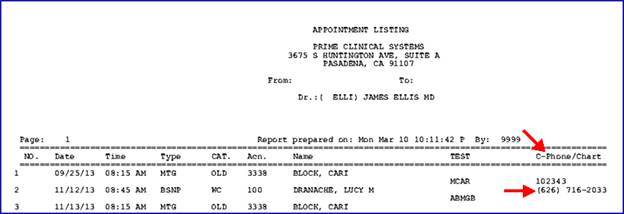
NEW FEATURE Schedule--►Appointment--►Full Day--►Survey List/Graphs
This update includes a Survey feature designed to send email surveys to your patients asking several questions regarding the services they received. Surveys are sent to all patients the day after their appointment.
The questions in the survey are standard, with options of Excellent, Good, Fair, and Poor. For each question, the percentage of each type of response may be viewed on the Graphs tab using the new · Survey button:
![]()
Response percentages are displayed based on the type of graph selected; i.e., pie, bar, or line. The display may also be filtered by type of appointment, doctor, facility, from/to date, etc. Survey comments may be viewed using the new Survey List tab.
If your office chooses to have the standard questions modified or changed, this can be done via customization. For set up information, contact PCS support.
Version 14.02.04
MODIFICATION Schedule--►Appointment--►Full Day – Cancel/Delete
In previous software versions, appointments had to be deleted or canceled one at a time. As of this release, selected groups of appointments may be deleted or canceled all at once.
On the Appointment Schedule:
1. Right-click on the patient for whom you wish to delete/cancel appointments.
2. Select ‘Search’ from the right-click menu.
3. Enter the search criteria for the patient and press [Enter].
4. Click on the first appointment you wish to delete/cancel. Hold down the [Shift] key on your keyboard and use the up/down arrows to select the remaining appointments that need to be deleted/canceled.
5. Once the appointments are selected, click on the [Cancel App] or [Delete] button, as appropriate. Intellect displays:
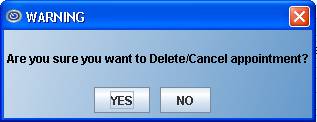
• Clicking [Yes] deletes/cancels the selected appointments.
Note: The status does not change until you press the [Exit] button at the bottom of the screen and then re-enter the Appointment History screen.
• Clicking [No] returns the user to the Appointment History screen. The selected appointments will remain highlighted. To un-highlight the appointments, click anywhere on the list of appointments.
Note: This modification does not apply to the ReSchedule option.
NEW FEATURE Schedule--►Appointment--►Full Day – Cancel/No Show
As of this update, when ‘Canceled’ or ‘No Show’ is selected via the right-click menu option, a notification email can be sent to the referring provider and/or patient. To use this feature, the referring provider and/or patient must have an email address on file in Intellect, and the appropriate fields need to be set up on the Utility--►Set Up--►Appointment--►Appointment Type screen. See Utility--►Set Up--►Appointment--►Appointment Type in this release note for additional information.
Note: This modification does not apply to the ReSchedule option.
Version 14.08.25
NEW FEATURE Export Intellect Reports to PCM
For PCM users only. As of this update, any Intellect report may now be exported to PCM for storage. The reports can be stored in PCM indefinitely. Reports are exported in .pdf format. Before reports may be exported, set up is required.
Intellect:
1. Go to Registration--►Regular--►Patient and set up a new patient with Intellect_Reports in the <Last Name> field. A first name and DOB is also required. Any value can be used for the <First name> and <DOB> fields, such as “Reports” or “Intellect” for the first name and today’s date for the DOB. Note: When entering Intellect_Reports, case does not matter; i.e., it may be all upper case, all lower case, or lower case with beginning capitals.
2. Go to PCM and create a chart for the “Intellect_Reports’ account. After the PCM chart is created, select 'PCM Chart' as the printer when exporting reports in Intellect.
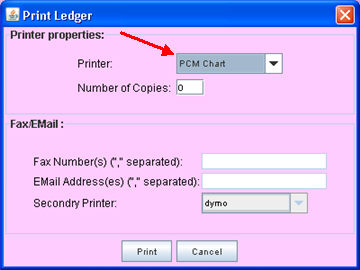
PCM:
PCM Ver. 5.5.1225 or higher is required.
1. After creating the above patient account in Intellect, log in to the appropriate clinic in PCM and do a Patient Search using the name “Intellect” and proceed with creating a chart for the “Intellect_Reports” account just as you would normally do for any other chart. Once the chart in PCM is created, you may begin printing reports from Intellect as described in step 2 above.
2. The printed reports are sent to the Intellect_Reports chart in PCM. The reports are filed under chart tab “int_rpt”, which is automatically created. The reports are filed based on the Intellect report name. The document date is the date the report was printed. Note: The PDF documents are NOSIG and can be deleted on the same day they were created. These reports can also be edited in PCM using the PDF editing tools, such as highlighting, text, and ink.
MODIFICATION HL7 ADT/SIU Message Specifications
Per this update, the email address has been added to the HL7 file for the PID13-Element 4.
Version 14.07.24
NEW HIPAA-COMPLIANT SECURITY
As of this release, when neither the keyboard nor mouse have been used for the number of minutes indicated in the <Idle Time in Minutes> field (see NEW FIELD Utility--►Set Up--►Parameter below for <Idle Time in Minutes> field set up information), the following pop-up displays.
The user has three opportunities to enter the password that was originally entered to open the current Intellect session. If an invalid password is entered, this pop-up displays:
The user has three opportunities to enter the password that was originally entered to open the current Intellect session. If an invalid password is entered, this pop-up displays:
The user may click on [OK] to return to the first screen. Should a user fail to enter the correct password by the third try, after clicking [OK], this pop-up displays:
Upon clicking [OK], Intellect shuts down. Background functions still running on the server continue; however, any local jobs that were not completed before Intellect shut down are lost.
Version 14.03.20
Fix HCFA Forms
In prior software versions that include the NEW HCFA 1500 RED AND WHITE form, there were issues with the alignment of the form in Report Designer. These issues have been corrected in this update.
FIX Loading Fonts and Forms
Loading fonts and forms into a printer caused the printer to print pages and pages of gibberish. This has been fixed in this update.
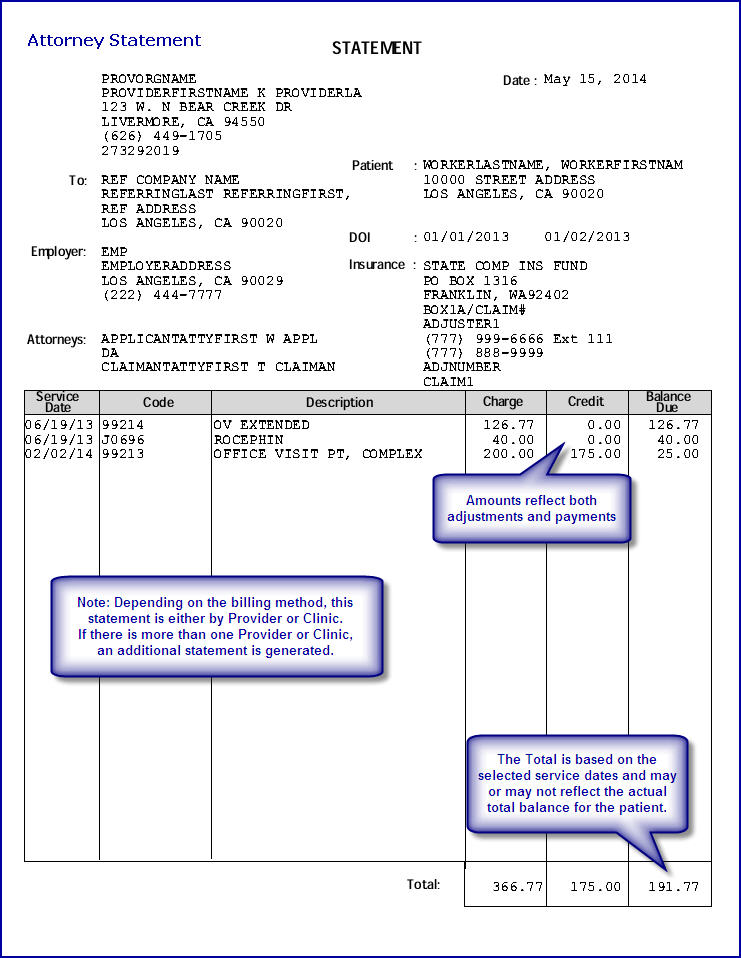