
Intellect™
BILLING MENU OPTIONS

Worker
Statement
Group of Patients
This menu option is used to print statements and claim forms for a group of workers. Very often, Workers Compensation Insurance billing, statements, and Proof of Service for patients' accounts are set up for automation; hence this screen would be most useful for printing specific claims.
For billing and rebilling, these conditions must exist:
• A charge/date of service exists within the requested date range.
• The requested insurance(s) is listed as one of the patients' insurance screen(s).
• The date(s) of service must fall within the patients' insurance screens' <Coverage From> and <Coverage To> date range.
Note: When a patient changes insurance, the old insurance information should be left in the patient's demographic screens until all charges/payments have been completed for the old carrier. If the old insurance is removed prior to completion of charges/payments, Intellect does not generate the information for the old insurance on the statements.
Effective Version 9.12.15
Clients can now print the Adjuster Name on the top right corner of the Worker Compensation paper claim. However, there are three requirements which must be met for the name to print:
a - For each insurance being used, the <Print Name on Claim> field must be set to X - Print the Adjuster name. See Utility --►Insurance --►Insurance.
b - The <Adjuster Name> field must be completed on the patient’s insurance screen. See either Registration --►Regular --►Insurance or Registration --►Worker --►Insurance.
c - The patient's category <Type> must be either W or F. See Utility --►Category.
The 'Adjuster Name' data element has been added to the programming file but has not been added to the form. Therefore, offices wanting to have the Adjuster Name printed on the paper WC Claims, should call PCS Support and request it be added.
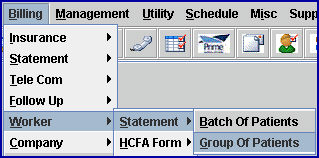
1. To open the Print GOP Worker screen in Intellect, go to Billing --►Worker --►Statement --►Group of Patients
The Print GOP Worker screen opens:
Effective Version 9.12.10 Field Modification. The one- and two-character code choices on the drop-down lists have been replaced with explanatory choices, making the code selection more user-friendly and comprehensive.
Note: The drop-down list descriptions for the code choices have remained the same, allowing correlation between the old and new code choices.
2. From Date 
2.1 Enter the beginning date of the date range for charges to be billed/rebilled based on the <Date Selection (E/S/P/B)> field criteria.
3. To Date 
3.1 Enter the latest date of the date range for charges to be billed/rebilled based on the <Date Selection (E/S/P/B)> field criteria.
4. Selection Criteria 
4.1 Allows the accounts to be defined to bill, based on alphabetical criteria.
4.2 Leave blank to select all patients that meet any other criteria entered below, OR define the parameter using a hyphenated alphabetical range such as A-L to return patient accounts, where the last name begins with any letters in the range of A-L.
4.3 Note: Medi-Cal, Medicare, and Medi-Medi claims only print when Billing --►Insurance <Form Type> = 'B.'
5. Account Number From 
5.1 This is the beginning number for billing by a specific range of patient account numbers.
5.2 Press [Enter] to bypass this field to request ALL accounts, OR use this field as the beginning account number to be billed.
6. Account Number To 
6.1 This is the ending number for billing by a specific range of patient account numbers.
6.2 Press [Enter] to bypass this field to request ALL accounts greater than any value entered in <Account Number From > (open ended), OR use this field as the ending account number to be billed.
NOTE: When pressing [Enter] without entering an account number in either the <Account Number From> or <Account Number To> fields, this message displays, urging a value to be entered:
7. Category 
7.1 This field limits the billing results by specific patient category.
7.2 Press [Enter] to bypass this field to request ALL categories, OR use a specific category by typing its Utility --►Category <Category Code>. It is required that it is a Workers Compensation Utility --►Category <Category Code> where <Type (C/P/W/O/F/G)> = 'W' or 'F.'
7.3 This field accepts multiple values:
• category codes separated by commas with no spaces:

• a range of codes entered with a hyphen and no spaces:

• an asterisk * to return all Categories starting with the portion of the code entered prior to the *. For example, M* prints all Categories whose code begins with M.

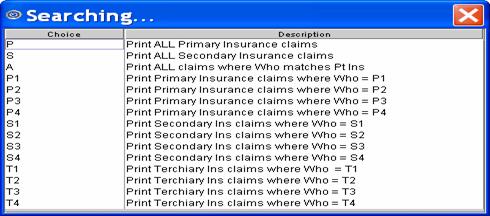
8. Primary/Sec/All (P/S/A) 
8.1 This field is used to select which insurance bill to print.
8.2 Accept the default 'P All Primary Insurances' (formerly 'P') for this group of patients, OR use the drop-down list to make an alternate selection.
8.3 Click on the field, OR press the [F2] key to display the valid choices.
To view the list of only the codes, click on the arrow. To select, click on the correct code, OR use the ↑ (up) and ↓ (down) arrows to highlight the correct code and then press the [Enter] key to select.
Effective version 9.12.10
All versions prior to 9.12.10
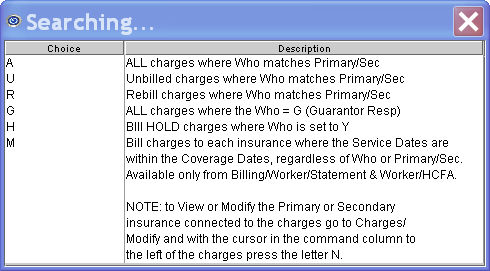
9.1 This field is used to select which status of claims to print.
9.2 Accept the default 'Unbilled Charges' (formerly 'U'), OR use the drop-down list to make an alternate selection.
9.3 Click on the field, OR press the [F2] key to display the valid choices.
To view the list of only the codes, click on the arrow. To select, click on the correct code, OR use the ↑ (up) and ↓ (down) arrows to highlight the correct code and then press the [Enter] key to select.
Effective version 9.12.10
All versions prior to 9.12.10
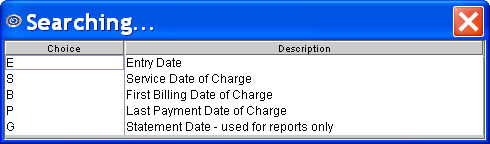
10.1 Accept the Entry Date default, OR use the drop-down to make an alternate selection.
10.2 Click on the field, OR press the [F2] key to display the valid choices. To view the list of only the codes, click on the arrow. To select, click on the correct code, OR use the ↑ (up) and ↓ (down) arrows to highlight the correct code and then press the [Enter] key to select.
Effective version 9.12.10
All versions prior to 9.12.10
11.1 This field is used to attach a message to the billing statement.
11.2 Type a Utility --►Messages --►Message <Message Code> to add the message to the area below the STATEMENT TOTAL BALANCE on the printed Worker Statement.
![]()
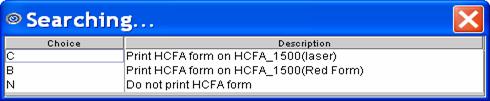
12. Print HCFA Form(B/C/N) 
12.1 This field allows the selection of the type of CMS 1500 (HCFA) to print or none.
12.2 Accept the default 'HCFA' (formerly 'C'), OR use the drop-down to make an alternate selection.
12.3 Click on the field, OR press the [F2] key to display the valid choices.
To view the list of only the codes, click on the arrow. To select, click on the correct code, OR use the ↑ (up) and ↓ (down) arrows to highlight the correct code and then press the [Enter] key to select.
Effective version 9.12.10
All versions prior to 9.12.10
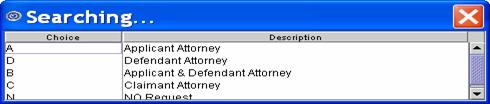
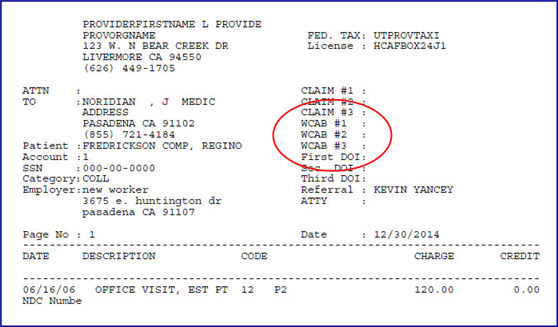
13.1 This field determines whose name appears in the ATTY field in the upper right hand portion of the statement. Information must be completed during Registration --►Worker --► Workers Insurance screen.
13.2 Accept the default 'Applicant Attorney' (formerly 'A'), OR use the drop-down list to make an alternate selection.
13.3 Click on the field, OR press the [F2] key to display the valid choices.
To view the list of only the codes, click on the arrow. To select, click on the correct code, OR use the ↑ (up) and ↓ (down) arrows to highlight the correct code and then press the [Enter] key to select.
Effective version 9.12.10
All versions prior to 9.12.10
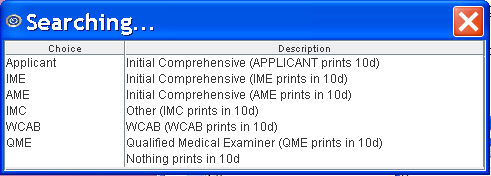
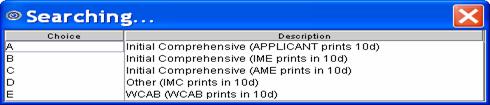
14.1 Intellect completes Box 10D of the CMS 1500 (HCFA) indicating the type of report.
![]()
14.2 Accept the default 'Applicant' (formerly 'A'), OR use the drop-down list to make an alternate selection.
14.3 Click on the field, OR press the [F2] key to display the valid choices.
To view the list of only the codes, click on the arrow. To select, click on the correct code, OR use the ↑ (up) and ↓ (down) arrows to highlight the correct code and then press the [Enter] key to select.
Effective version 9.12.28 - New options
Effective version 9.12.10
All versions prior to 9.12.10
15. Cover Letter 
15.1 Not available at this time.
16.1 Determines if a Proof of Service letter should print, and, if so, what type of letter.
16.2 Accept the default 'blank' (standard) to not generate a letter, OR use the drop-down to make an alternate selection.
16.3 Both POSMLM and POSMLRM print a Proof of Service letter.
Note: POSMLRM requires a signature.
17.1 This field is used to determine if credits (payments) and adjustments are printed in Box 29 on the CMS 1500 form.
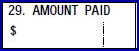
17.2 For this option to work, Utility --►Insurance --►Insurance <Include Payment> should NOT = 'N'.
17.3 Accept the default 'Y' (include credits), OR use the drop-down list to make an alternate selection.
18.1 This field determines if the Diagnosis code and description are included on the statement in the area above the posted procedure for Statement Type 1.

or in the Diagnosis field in Statement Type 2.
This does not affect Statement Type 3.
18.2 Accept the default 'Y' (yes), OR use the drop-down list to select 'N' (no).
19.1 Accept the default '1' (standard), OR use the drop-down to make an alternate selection.
19.2 As there are several differences between the statement types, see Sample Billing Worker Statements for samples, or contact PCS for additional information.
19.3 In software prior to version 13.08.20, the <Statement Type> field offered three types of reports (1, 2, and 3) which printed the information on a plain sheet of paper. Effective version 13.08.20, four additional statement types have been added: WC Form1, WC Form2, PI Form1, and PI Form2. Each of the new statements types have the more finished look of an actual form. For an additional fee, office letterhead may also be added at the top of the form.
19.3.1 Note: The print order of the WC Form 1, WC Form 2, PI Form 1, and PI Form 2 statements is controlled by the <Itemization> field on the Utility --►Set Up --►Parameter screen. .
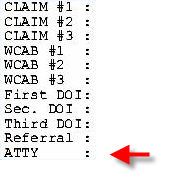
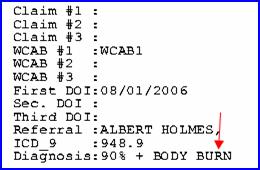
19.4 In software prior to version 15.01.09, the worker’s <Statement Type> options 1, 2, and 3 included the labels WCAB #1, WCAB #2, and WCAB #3, as shown below:
In keeping with the 2010 change from WCAB case numbers to ADJ case numbers, effective version 15.01.09, the labels on the Worker’s Comp statements have been changed in this update to ADJ #1, ADJ #2, and ADJ #3:
20. When the information is completely entered, select one of these options:

20.1 Select the [Print] button OR press [Enter] to display the printer dialog box:
20.1.1 Printer Properties:
20.1.1.1 Printer: The default printer for the logged-in clinic and password is selected. To select a different printer, either click on the arrow, OR press the → (right arrow) on the keyboard to view the list of printer codes. In our example, the defaulted Printer is HP. This is just an example of a printer name and may or may not be set up on the system.
To select the printer type, click on the code, OR use the ↑ (up) and ↓ (down) arrows to highlight the correct code; then press the [Enter] key to select.
20.1.1.2 Number of Copies: This field defaults to either 0 (zero) or 1. Both print 1 copy. To print more than one copy, enter the number of copies.
20.1.2 Fax/Email:
In addition to printing reports, Intellect provides the capability to export reports to Email, Fax, Disk, or Archive. A secondary printer may also be selected, if one is set up, by clicking on the arrow to display the drop-down list.
20.1.3 Select the [Print] button to send the request to the printer (or as a Fax or email).
20.1.4 Select the [Cancel] button to clear the screen and return to the <From Date> field without saving or printing.
20.2 Click [Clear] to clear all information and return the focus to <From Date> field without saving.
20.3 Click [Exit] to clear the screen and return the focus to the main Intellect screen without saving.


